DeviceBook
Follow the below steps to configure DeviceBook as your SMS Service Provider (SSP).

Click to enlarge
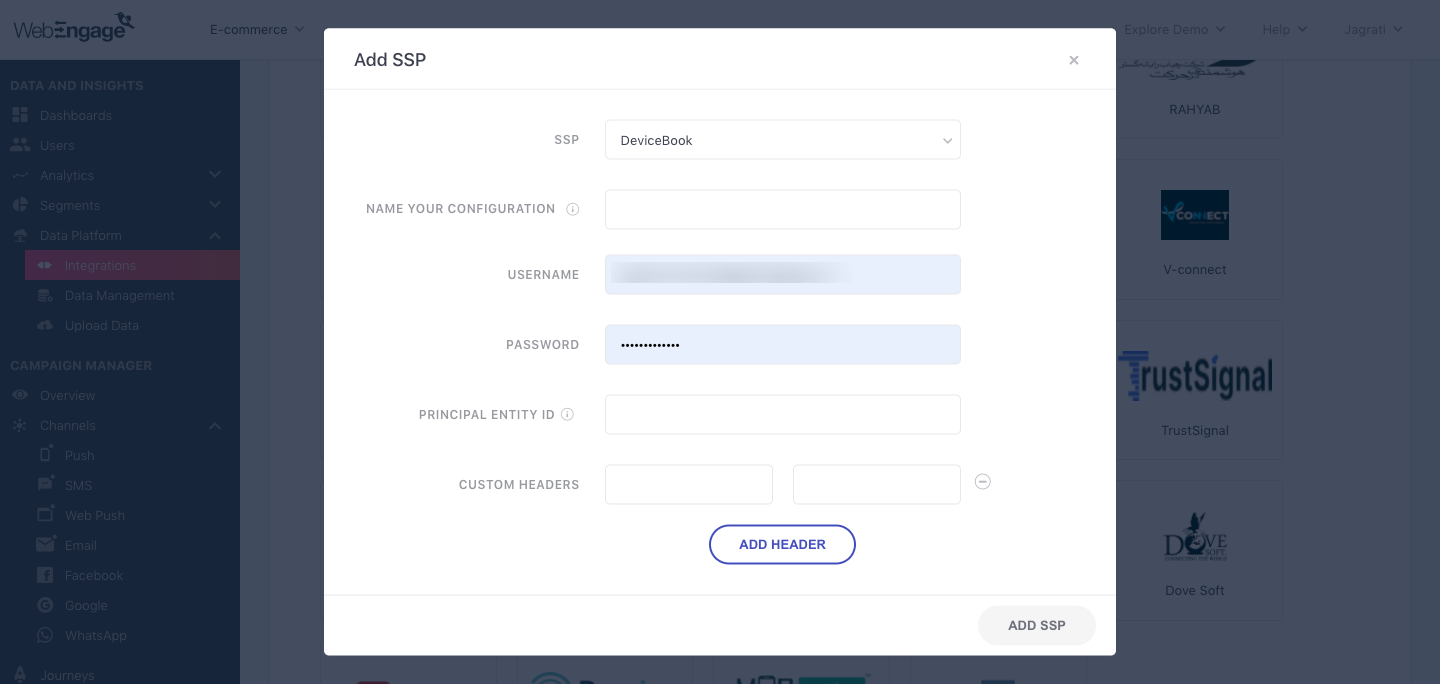
As shown above:
Step 1: Select SSP
Select DeviceBook from the List of Available SSPs. In doing so, you will be prompted by a configuration modal.
Step 2: Name your Configuration
Please add a user-friendly name that enables you to identify the right SSP for a campaign while creating it. This comes in handy especially, when you have multiple accounts with the same SSP for sending different types of campaigns.
For example, if you have chosen to use DeviceBook for sending Promotional campaigns, then we recommend that you indicate the same by naming the configuration something like:
- DeviceBook Promo
- DeviceBook Mobile Promo Pipeline
Step 3: Add Username and Password
Navigate to your DeviceBook to find and copy your account details. Paste them in the configuration modal.
Step 4: Add Principal Entity ID
(Applicable only if you are sending messages to users located in India via domestic messaging pipeline. International messaging routes remain unaffected.)
-
As per TRAI's latest SMS Marketing regulations for India, you must be registered on a DLT portal as a business entity. Once registered, a unique Principle Entity ID (PE ID) will be assigned to you.
-
W.e.f from Nov 19, 2020, it is mandatory for all SSPs to pass a PE ID in the payload of each SMS message being sent to Indian phone numbers. We have partnered with DeviceBook to make this a seamless process for you.
-
Add your PE ID during configuration - we will ensure that it is relayed to the SSP for each SMS sent to your users.
Step 5: Add Header
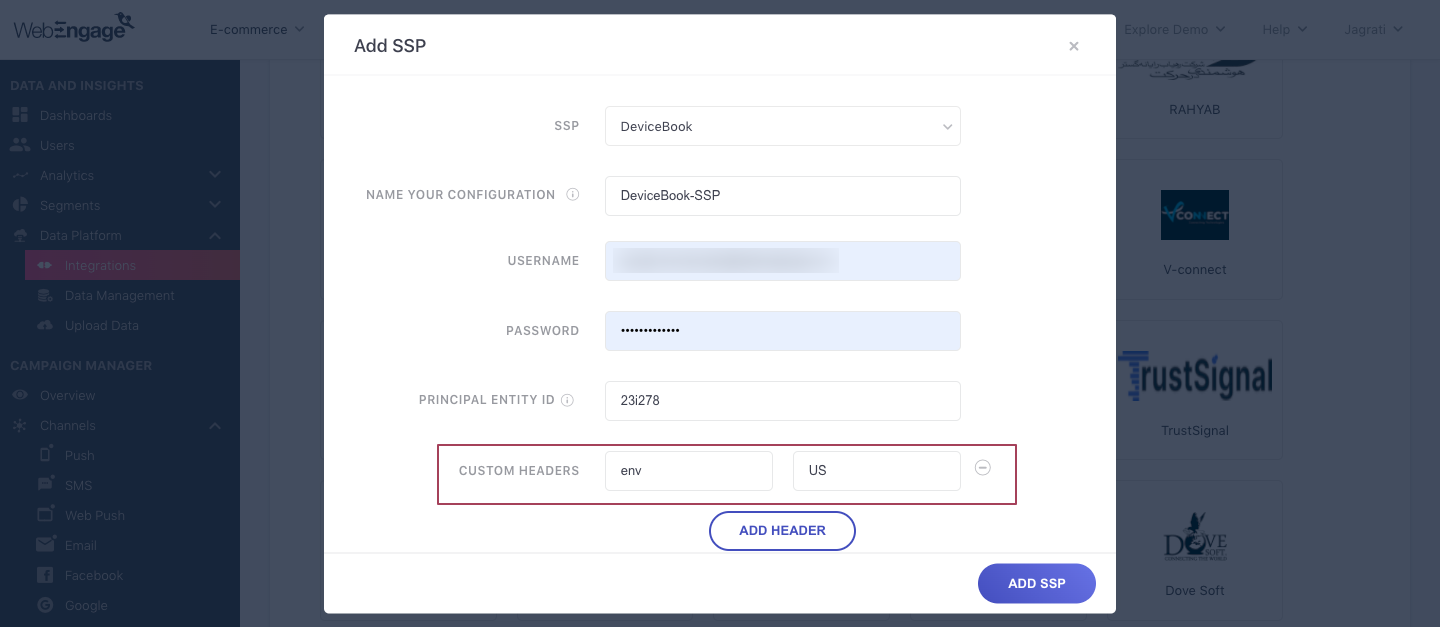
To configure DeviceBook you will have to add the location where your account is located as shown below:

Click to enlarge
Kindly add env as US if your WebEngage dashboard is located in the US server and IN if it is located in the India server.
Find your account server locationIf you are not sure which server your account is on, kindly check the URL of your dashboard:
For the US server, the URL is
https://dashboard.webengage.comFor the Indian server, the URL is
https://dashboard.in.webengage.com
Step 6: Add SSP
Click Add SSP, and you're good to go!
Step 7: Add WebEngage Webhook URL in DeviceBook Dashboard (Highly Recommended)
Adding the WebEngage Webhook in DeviceBook will enable us to receive delivery status notifications for each user. This includes campaign performance indicators like the message delivered, failed, and queued.
Here's how you can go about it:

Click to enlarge
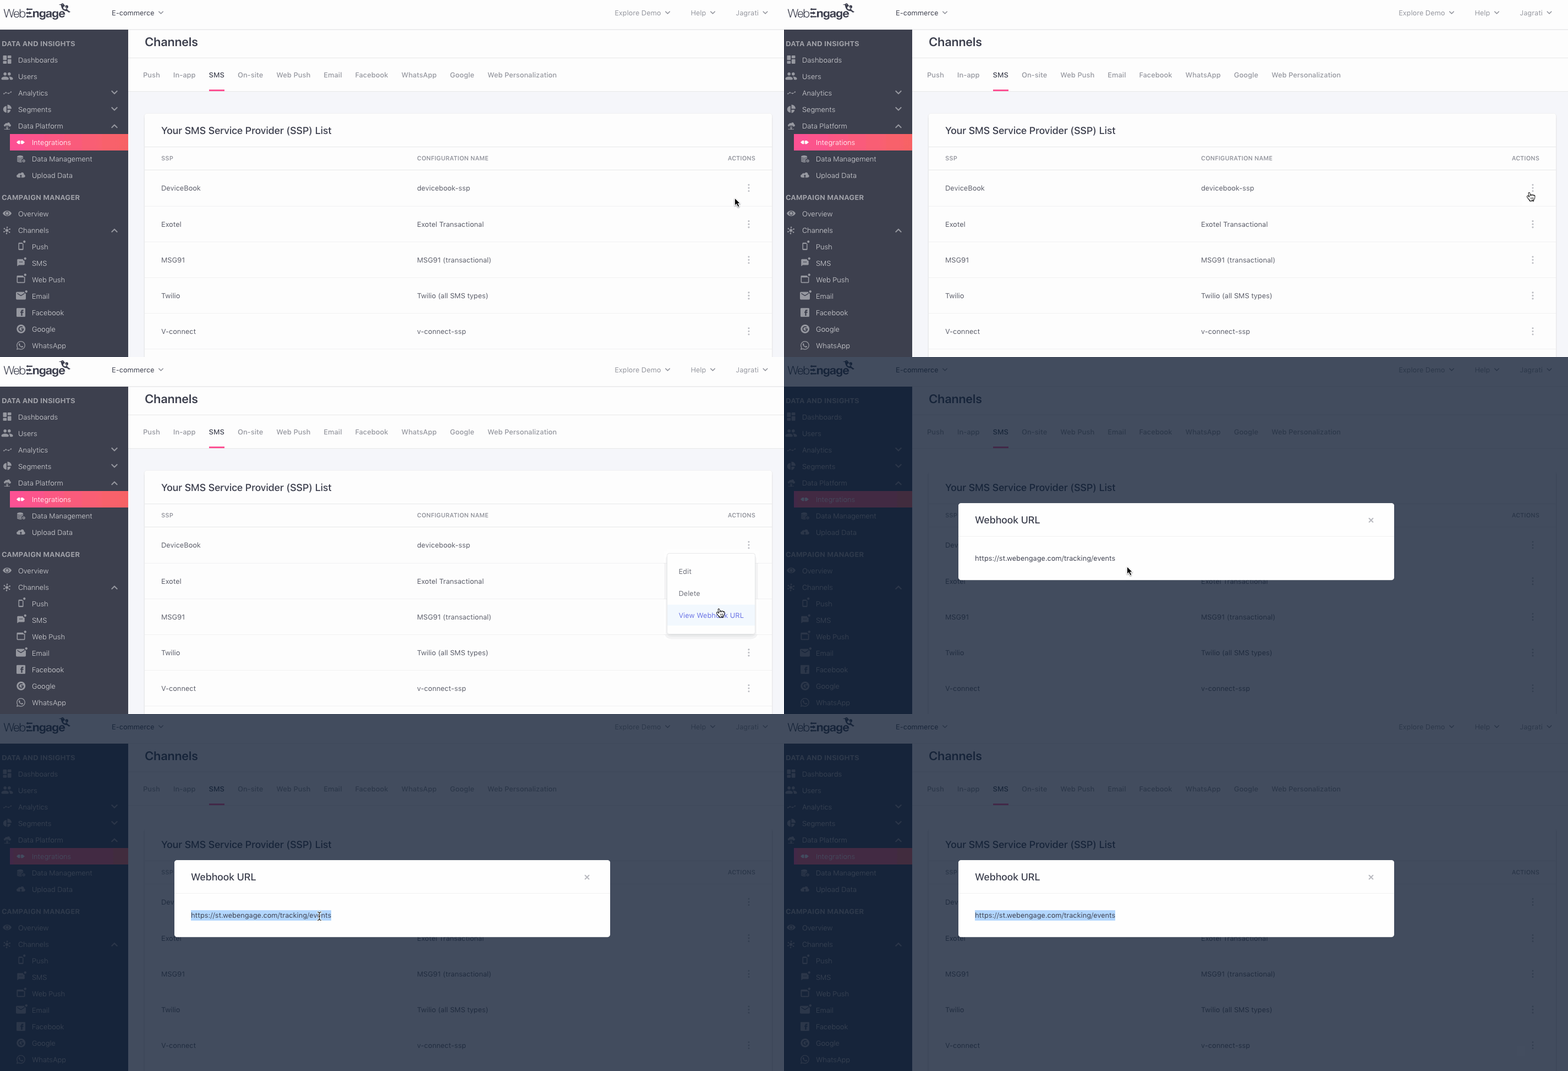
Step 7.1.: As shown below, you will find your DeviceBook integration under the section, Your SMS Service Provider List.
Step 7.2.: Click the overflow menu placed on the extreme right, click View Webhook URL, and copy the link.
Step 7.3.: Paste the WebEngage Webhook URL under the relevant field in your DeviceBook dashboard and click Save. Please connect with your DeviceBook Account Manager for further assistance.
Congratulations!You've now successfully integrated DeviceBook with your WebEngage dashboard.
You can test the integration by creating a test SMS campaign and sending it to a group of internal users (aka your teammates).
Please feel free to drop in a few lines at [email protected] in you have any further queries. We're always just an email away!
Updated 3 months ago