Web Push
Configuring Web Push user opt-in & messaging in your dashboard
Please Ensure That Your Website is Integrated with WebEngage Before Proceeding
Integration via Segment.com or Google Tag Manager (GTM)
Web Push Notifications are clickable media messages that are sent to a user's desktop, mobile, or tablet through a website or web app, even when they're inactive your the site. This makes Browser Push Notifications highly visible and easy to respond to for a user.
Web Push is supported by all major browsers like Chrome, Firefox, Microsoft Edge, Opera, UC Browser. However, notifications containing images are currently supported only by Chrome.
Related Read
We recommend that you leverage the channel to communicate time-bound messages, reactivate dormant users, and re-engage users who dropped off from your site mid-way in their lifecycle.
However, users need to explicitly opt-in to receive messages from your domain. Once you've set up Web Push opt-in, you can start engaging subscribers with contextually personalized notifications!
Here's how you can go about it:
1. Enable Web Push

Click to enlarge
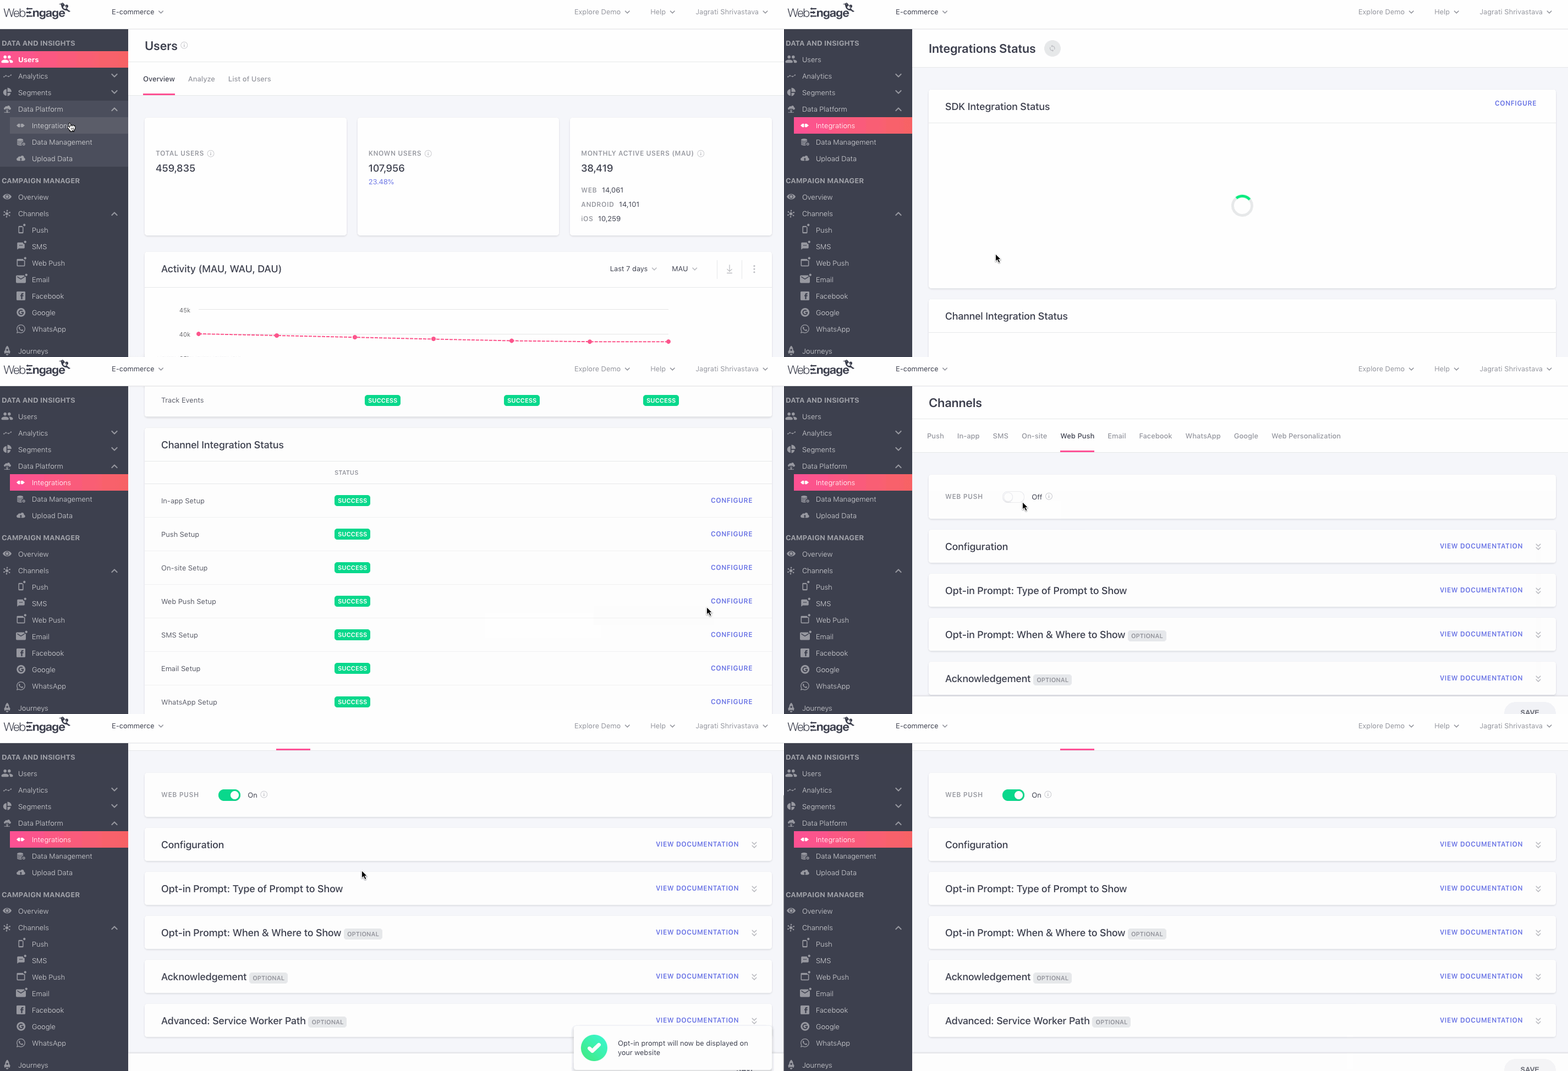
As shown above, head over to Data Platform > Integrations > Web Push Setup > Web Push in your dashboard and click the toggle button to enable Web Push Notifications for your domain.
Looking to Set Up Web Push for AMP Pages?
2. Select Opt-in Type
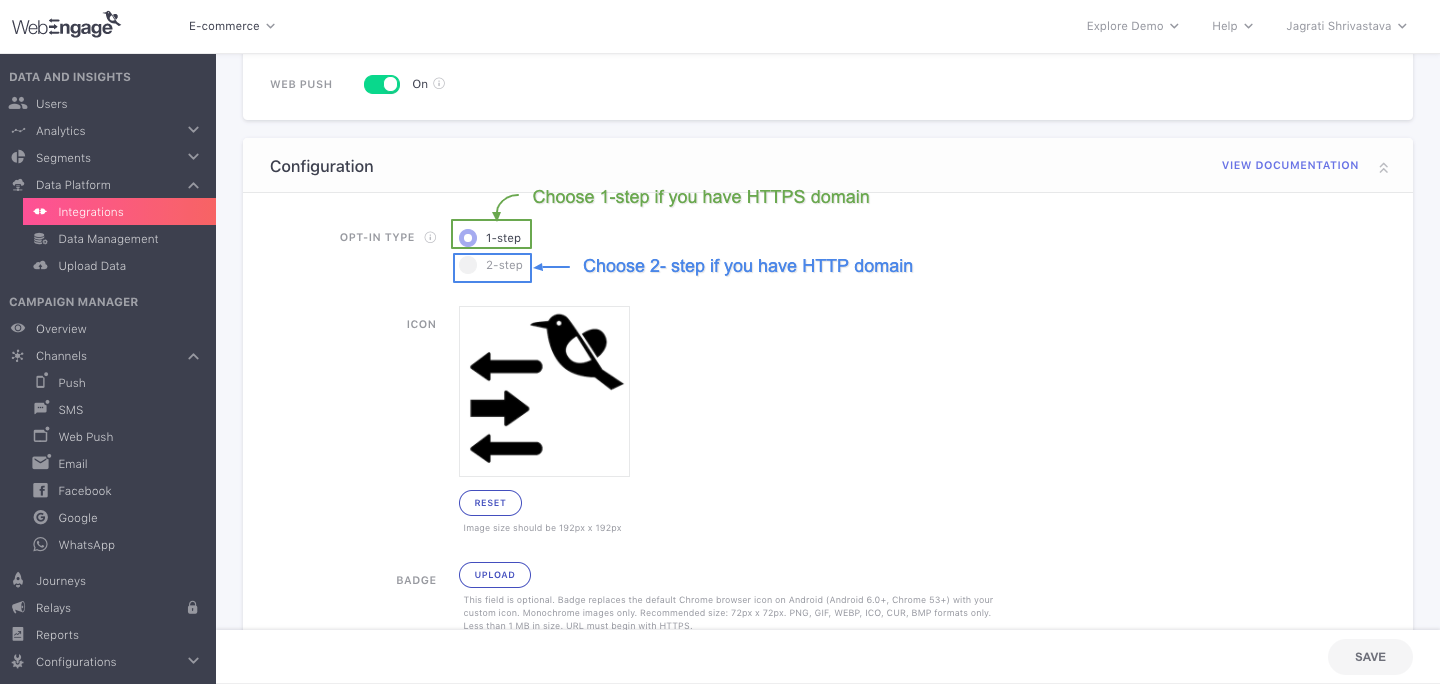
Depending on whether or not you have an HTTPS domain, Web Push opt-ins can be collected in two ways:
- Directly through Browser-based opt-in prompts. (1-Step Opt-in)
- In-directly through an On-site Notification (shown by WebEngage) that initiates the opt-in process. Users are then led to the Native Browser opt-in prompt to complete the subscription. (2-Step Opt-in)

Click to enlarge
Let's quickly walk you through how these opt-in models work:
How 1-Step Opt-in Works
(works for only HTTPS websites/ sites that have SSL Certificate)

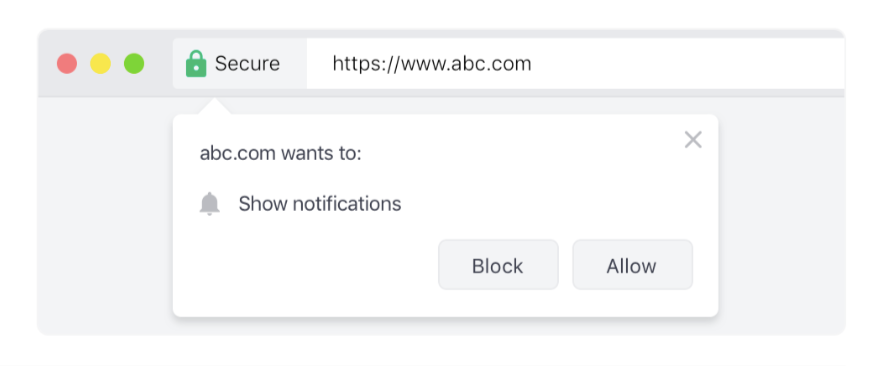
Here's what a 1-step opt-in native browser prompt looks like
The opt-in model enables users to subscribe by simply clicking the Allow button on the native prompt shown by their browser.
Highly recommended if you have an HTTPS domain as users can receive notifications from your custom sub-domain! Opt-in prompts can be customized too.
How 2-Step Opt-in Works
(works for both HTTP & HTTPS domains)
Since Web Push Notifications are not supported for HTTP sites, we created the 2-step opt-in model to enable messaging for such domains. For the same reason, users will be subscribed to a WebEngage domain like mywebsite.webengagepush.com, and not your domain.

Here's what the on-site notification and native browser prompts look like for 2-step opt-in
This model requires users to subscribe to your channel in 2 steps:
Step 1: User is prompted by an intermediary On-site Notification (triggered by WebEngage) that conveys why they should subscribe to your Web Push Notifications.
- Once they click the Allow button on the On-site Notification, the browser-based native prompt intimates the User.
Step 2: The User will need to click the Allow button on the second prompt to confirm their subscription.
Highly recommended if you have an HTTP domain.(HTTPS websites can choose to set it up too if you prefer that users subscribe to a WebEngage domain instead of your own.)
Please NoteWeb Push does not work in Incognito Mode, Private Browsing Mode, and Guest Browser Mode. However, while browsing your website in incognito mode, you might see the Notification Prompt appear because of technical constraints imposed by browsers that don't allow the detection of incognito mode. Kindly make sure you are not in incognito mode while testing any Web Push Campaign.
3. Configure Selected Opt-in Type
Web Push Opt-in configuration varies as per the option selected at Step 2.
Please Navigate to the Respective Guide to Complete Your Setup
Changing Web Push Opt-in Model
You can always choose to change the way users opt-in to your Web Push Notifications from 2-Step Opt-in to 1-Step Opt-in and vice-versa. However, do keep in mind that doing so causes the loss of your existing subscriber database. Subscribers will be prompted to resubscribe to your channel if the opt-in model is changed. Hence, we recommend that you do so only when deemed necessary.
Here's how you can go about it:

Click to enlarge
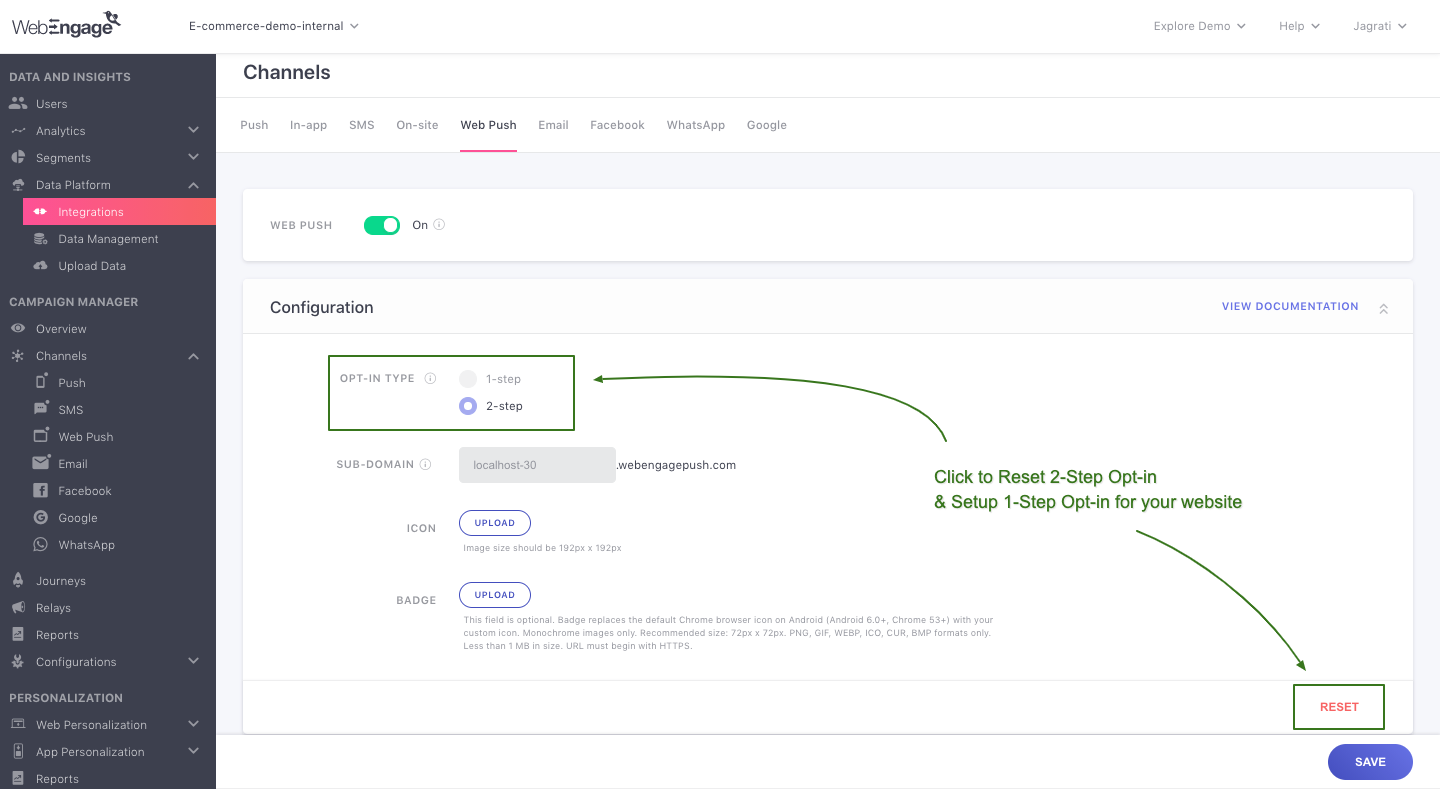
As shown above:
Step 1: Click the Reset button placed on the bottom right of the Configuration section.
- In doing so, you will be prompted to confirm your decision.
Step 2: Click Reset on the pop-up to change the existing opt-in model.
Step 3: Select your preferred Opt-in Type and configure it.
Please feel free to drop in a few lines at [email protected] in case you have any queries or feedback. We're always just an email away!
Updated 3 months ago
Continue Web Push Opt-in set up...