TrustSignal
Follow the below steps to configure TrustSignal as your RCS Service Provider (RSP).

Click to enlarge
As shown above:
Step 1: Select RSP
Select TrustSignal from the List of Available RSPs. In doing so, you will be prompted by a configuration modal.
Step 2: Name your Configuration
Please add a user-friendly name that enables you to identify the right RSP for a campaign while creating it. This comes in handy especially, when you have multiple accounts with the same RSP for sending different types of campaigns.
Step 3: Add API Key
Navigate to your TrustSignal to find and copy your API Key. Paste it in the configuration modal to connect your account with WebEngage.
Step 4: Add Custom headers (IMP NOTE : Add only for US AND KSA environments)
For accounts on the Indian dashboards, there's no need to click Add Header- this step is only applicable for accounts in the US and KSA environments.
Example: If the account is on the US environment, click Add Header and specify: env: US
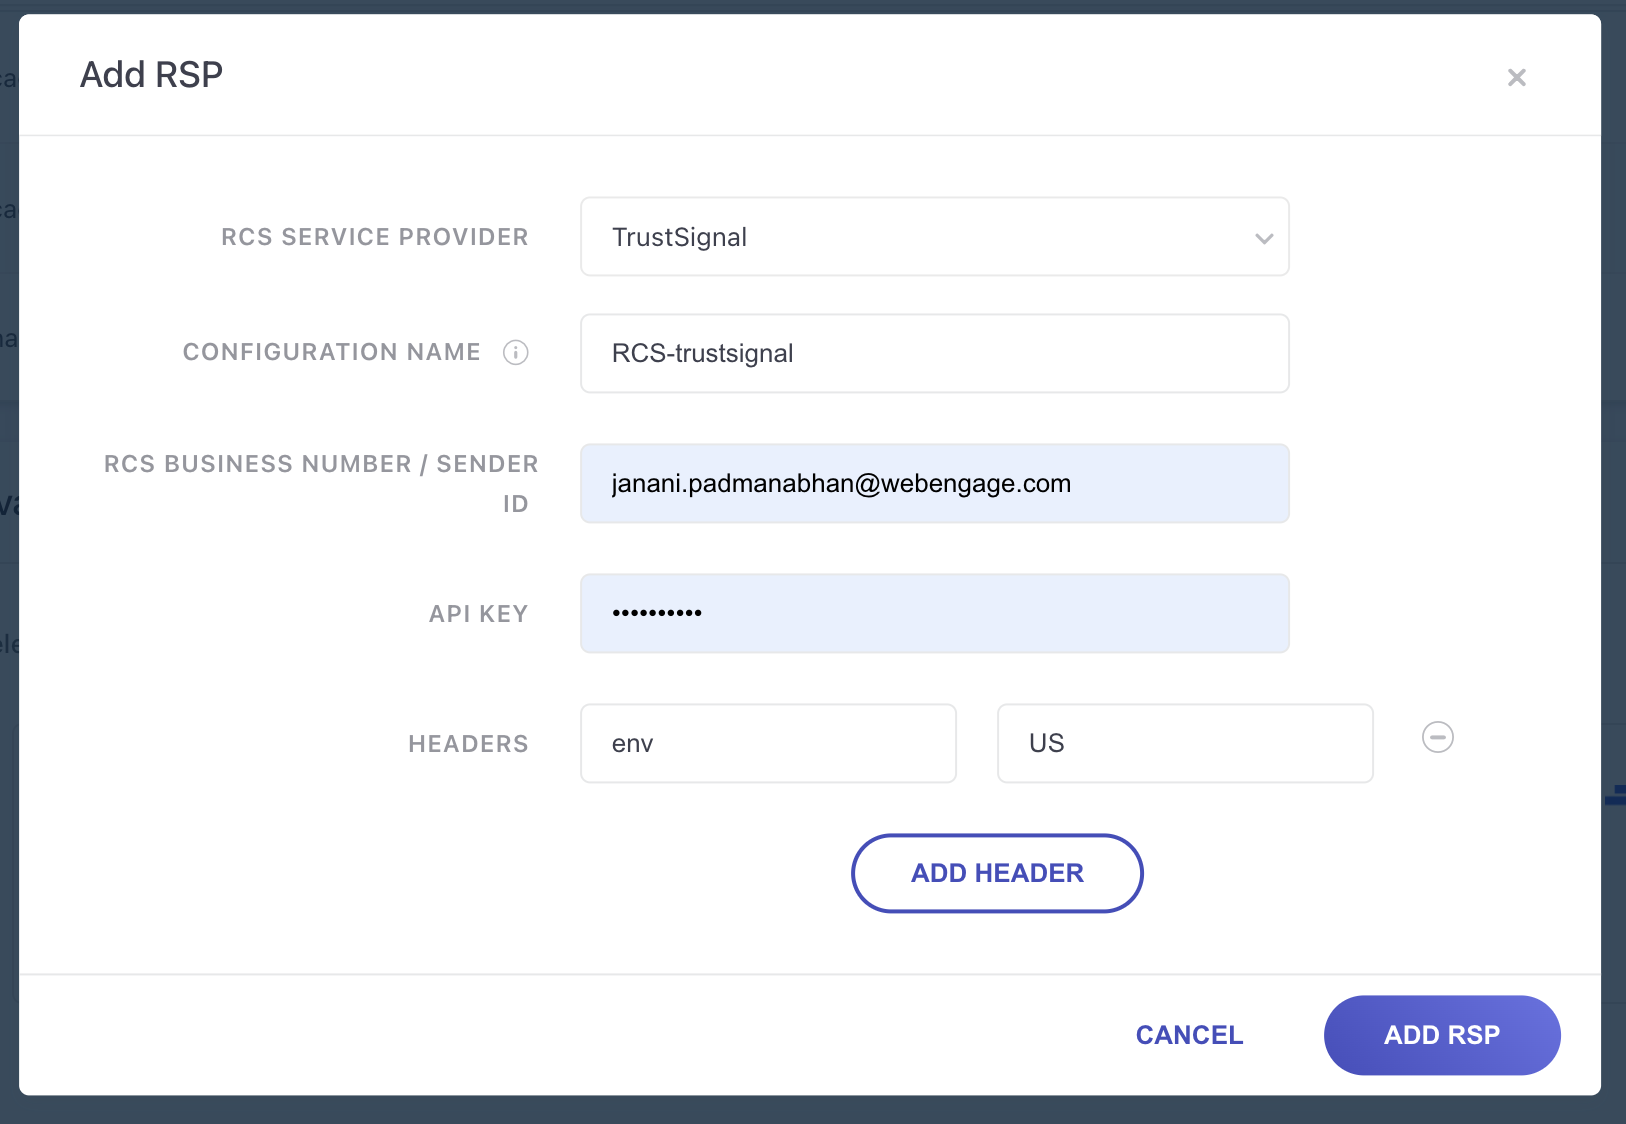
Step 5: Add RSP
Click Add RSP, and you're good to go!*
Congratulations!You've now successfully integrated TrustSignal with your WebEngage dashboard.
You can test the integration by creating a test RCS campaign and sending it to a group of internal users (aka your teammates).
Please feel free to drop in a few lines at [email protected] in case you have any further queries or feedback. We're always just an email away!
Updated 8 months ago