Xamarin.Android
Xamarin.Android exposes the complete Android SDK for .NET developers. It enables you to build fully native Android apps using C# or F#.
Here's how you can integrate the WebEngage SDK with your Xamarin.Android app:
1. Installation
Step 1: Download WebEngage Xamarin.Android Library.
Step 2: To consume this downloaded .DLL in your Xamarin.Android app, you must add a reference to the Bindings Library. To do this, right-click on the References node of your project and select Add Reference.
2. Initialization
Initialize WebEngage SDK with your license code from onCreate callback of your Application class as shown below.
using Com.Webengage.Sdk.Android;
...

	[Application]
    public class YourApplication : Application
    {
    	...

    	public override void OnCreate()
        {
            base.OnCreate();

            WebEngageConfig config = new WebEngageConfig.Builder()
                                                        .SetWebEngageKey(YOUR_WEBENGAGE_LICENSE_CODE)
                                                        .SetDebugMode(true)
                                                        .Build();
            RegisterActivityLifecycleCallbacks(new WebEngageActivityLifeCycleCallbacks(this, config));

            ...
        }
    }
Make sure you replaceYOUR_WEBENGAGE_LICENSE_CODE with your WebEngage license code

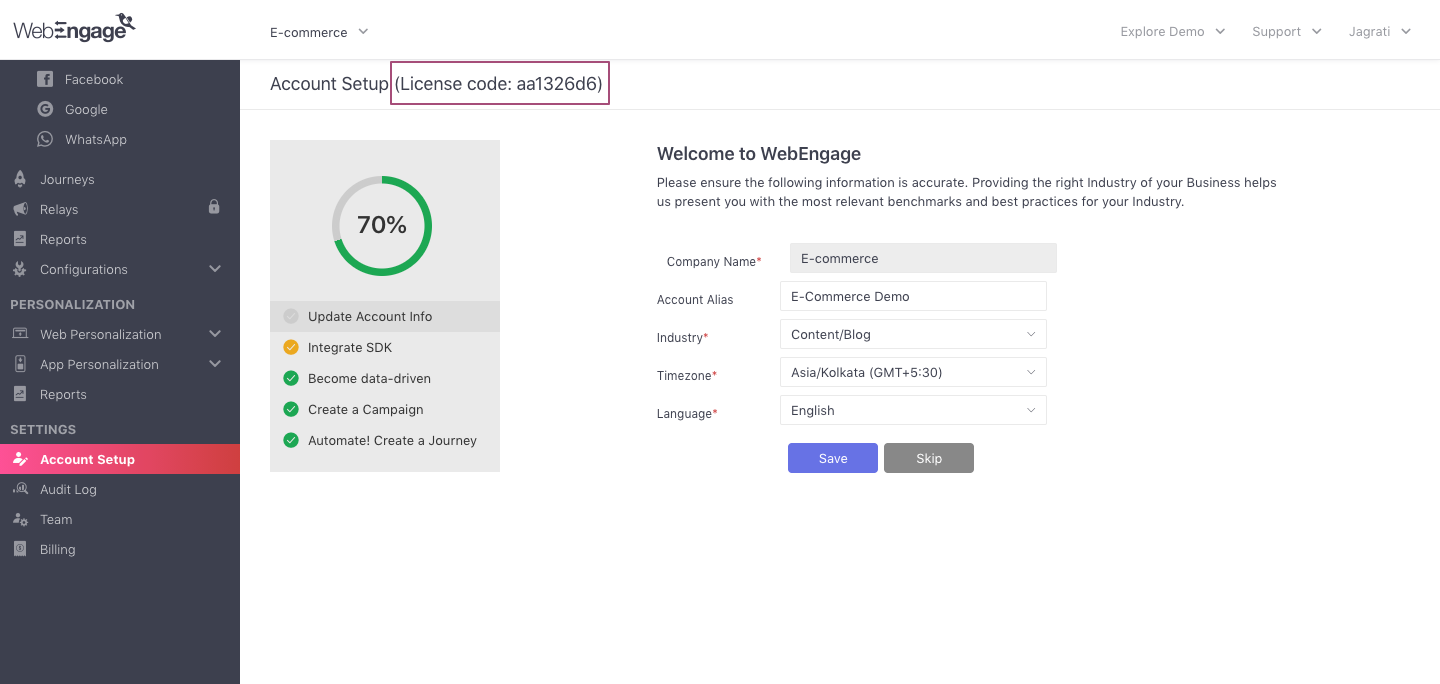
Finding your WebEngage License Code
As shown above, naviagte to the Account Setup section to find your license code. Your License Code might start with tilde (~).
3. Attribution Tracking
Step 1: Make sure that you are using WebEngage Xamarin Android Library version 0.4.0.0 or above.
Step 2: Download the latest version of Android Install Referrer library.
Step 3: Add the aar file to your Xamarin.Android project, for example at location YourProject/lib/installreferrer-1.1.1.aar.
Step 4: Set Build Action for the installreferrer aar to AndroidAarLibrary.
Please note
App Installedevent andFirst Acquisition Detailsdata in user profile will not be tracked on your Android app unless you follow the above step.
4. Additional Steps (Optional)
For other integrations such as location tracking, please refer to the Advanced section.
Congratulations!You have successfully integrated WebEngage with your Hybrid app and are sending user session data to WebEngage. Please note that it may take a few minutes for data to reflect in your dashboard.
Please feel free to drop in a few lines at [email protected] in case you have any further queries. We're always just an email away!
Updated 3 months ago
We recommend that you implement the following integrations with your app before releasing it with WebEngage for the first time: