Push Messaging
ImportantPlease ensure that you have completed all the platform integration steps listed under Getting started before proceeding.
Push Notifications are messages that pop up on mobile devices. App publishers can send them at any time; even if the recipients aren’t currently engaging with the app or using their devices.
You can start sending Push Notifications to your Android users via WebEngage by configuring Firebase Cloud Messaging (FCM).
Here's how you can go about it:
1. Add Firebase to Your Project
Please follow these instructions for adding Firebase to Your Android Project.
2. Add Firebase Cloud Messaging Dependency
Add the dependency for Firebase Cloud Messaging in your module’s build.gradle.
dependencies {
  implementation 'com.google.firebase:firebase-messaging:22.0.0'
}
3. Pass Firebase Token to WebEngage
Firebase tokens can be passed to WebEngage using FirebaseMessagingService
import com.google.firebase.messaging.FirebaseMessagingService;
import com.webengage.sdk.android.WebEngage;

public class MyFirebaseMessagingService extends FirebaseMessagingService {
    @Override
    public void onNewToken(String s) {
        super.onNewToken(s);
        WebEngage.get().setRegistrationID(s);
    }
}
import com.google.firebase.messaging.FirebaseMessagingService;
import com.webengage.sdk.android.WebEngage;
class MyFirebaseMessagingService : FirebaseMessagingService() {
override fun onNewToken(s: String) {
super.onNewToken(s)
WebEngage.get().setRegistrationID(s)
}
}
Mandatory StepIt is also mandatory that you pass Firebase token to WebEngage from
onCreateof yourApplicationclass as shown below. This will ensure that changes in user’s Firebase token are communicated to WebEngage.
import com.webengage.sdk.android.WebEngage;
import com.google.android.gms.tasks.OnCompleteListener;
import com.google.android.gms.tasks.Task;
import com.google.firebase.messaging.FirebaseMessaging;

public class MyApplication extends Application {
    @Override
    public void onCreate() {
        super.onCreate();

       FirebaseMessaging.getInstance().getToken().addOnCompleteListener(new OnCompleteListener<String>() {
                @Override
                public void onComplete(@NonNull Task<String> task) {
                    try {
                        String token = task.getResult();
                        WebEngage.get().setRegistrationID(token);
                    } catch (Exception e) {
                        e.printStackTrace();
                    }
                }
            });
    }
}
import com.webengage.sdk.android.WebEngage;
import com.google.android.gms.tasks.OnCompleteListener;
import com.google.android.gms.tasks.Task;
import com.google.firebase.messaging.FirebaseMessaging;
class MyApplication : Application() {
override fun onCreate() {
super.onCreate()
FirebaseMessaging.getInstance().token.addOnCompleteListener { task ->
try {
val token: String? = task.result
WebEngage.get().setRegistrationID(token)
} catch (e: Exception) {
e.printStackTrace()
}
}
}
}4. Pass Messages to WebEngage
Create a class that extends FirebaseMessagingService and pass messages to WebEngage.
All incoming messages from WebEngage will contain key source with the value as webengage.
package your.application.package;

import com.google.firebase.messaging.FirebaseMessagingService;
import com.google.firebase.messaging.RemoteMessage;
import com.webengage.sdk.android.WebEngage;

public class MyFirebaseMessagingService extends FirebaseMessagingService {
  @Override
  public void onMessageReceived(RemoteMessage remoteMessage) {
    Map<String, String> data = remoteMessage.getData();
    if(data != null) {
      if(data.containsKey("source") && "webengage".equals(data.get("source"))) {
        WebEngage.get().receive(data);
      }
    }
  }
}
package your.application.package;
import com.google.firebase.messaging.FirebaseMessagingService;
import com.google.firebase.messaging.RemoteMessage;
import com.webengage.sdk.android.WebEngage;
public class MyFirebaseMessagingService extends FirebaseMessagingService {
@Override
public void onMessageReceived(RemoteMessage remoteMessage) {
Map<String, String> data = remoteMessage.getData();
if (data != null) {
if (data.containsKey("source") && "webengage".equals(data.get("source"))) {
WebEngage.get().receive(data);
}
}
}
}
NoteIf you want to do customization on push, kindly follow the doc.
Next, register the service to the application element of your AndroidManifest.xml as follows.
<service android:exported="false"
         android:name=".MyFirebaseMessagingService">
    <intent-filter>
        <action android:name="com.google.firebase.MESSAGING_EVENT"/>
    </intent-filter>
</service>
5. Add Your Firebase Credentials to WebEngage
Step 1: Log in to the Firebase Developers Console.
Step 2: Select your Firebase project.
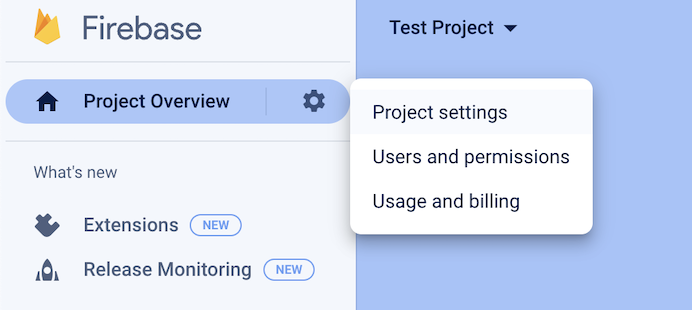
Step 3: Navigate to Project Settings, select Cloud Messaging and ensure that Firebase Cloud Messaging API (V1) is enabled.
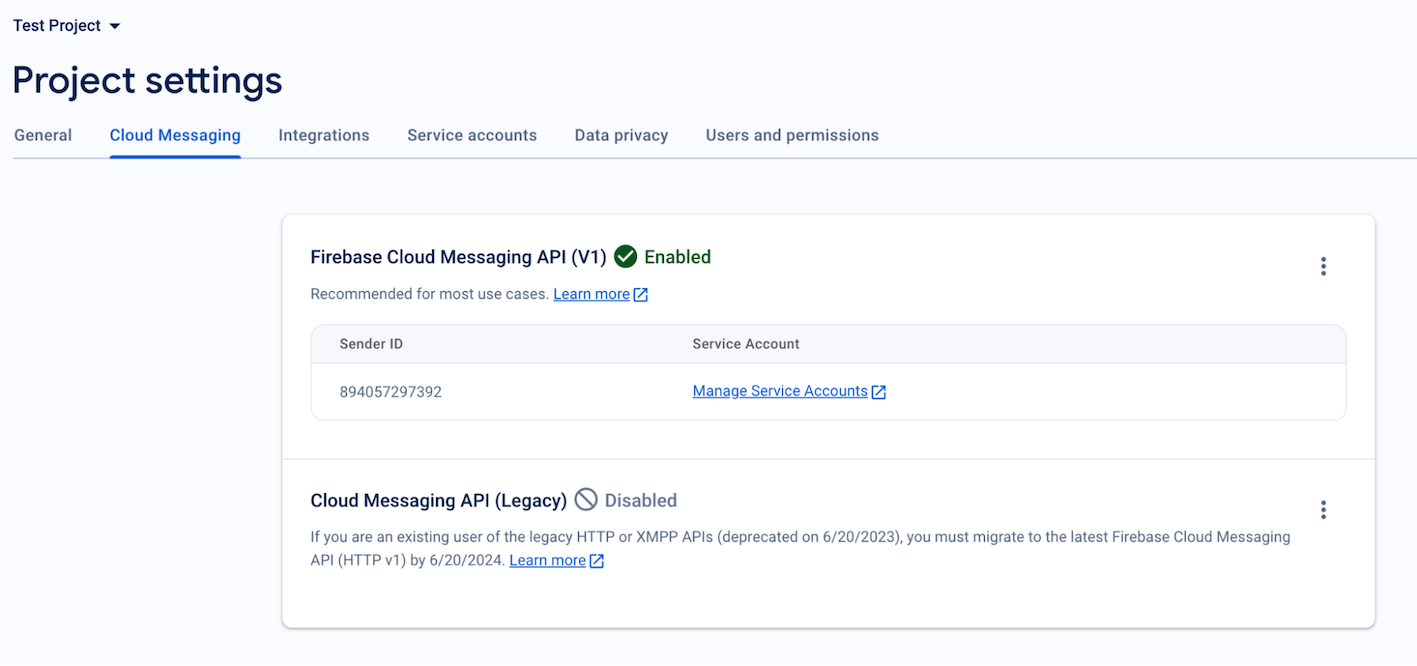
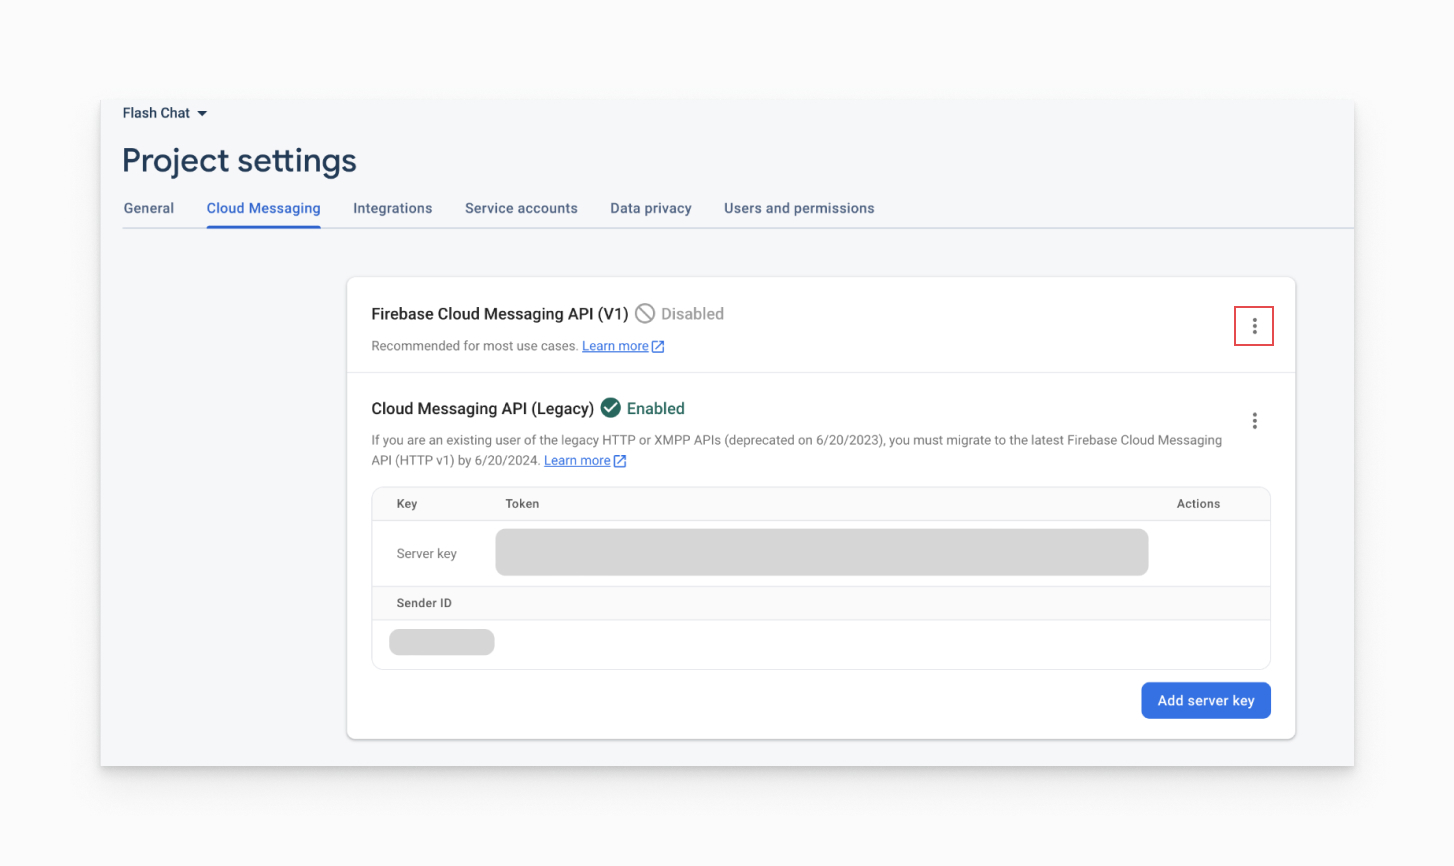
For existing projects, cloud messaging API is enabled by default. If Firebase Cloud Messaging API (V1) is disabled, then click the kebab menu icon on the top right corner and open the link.
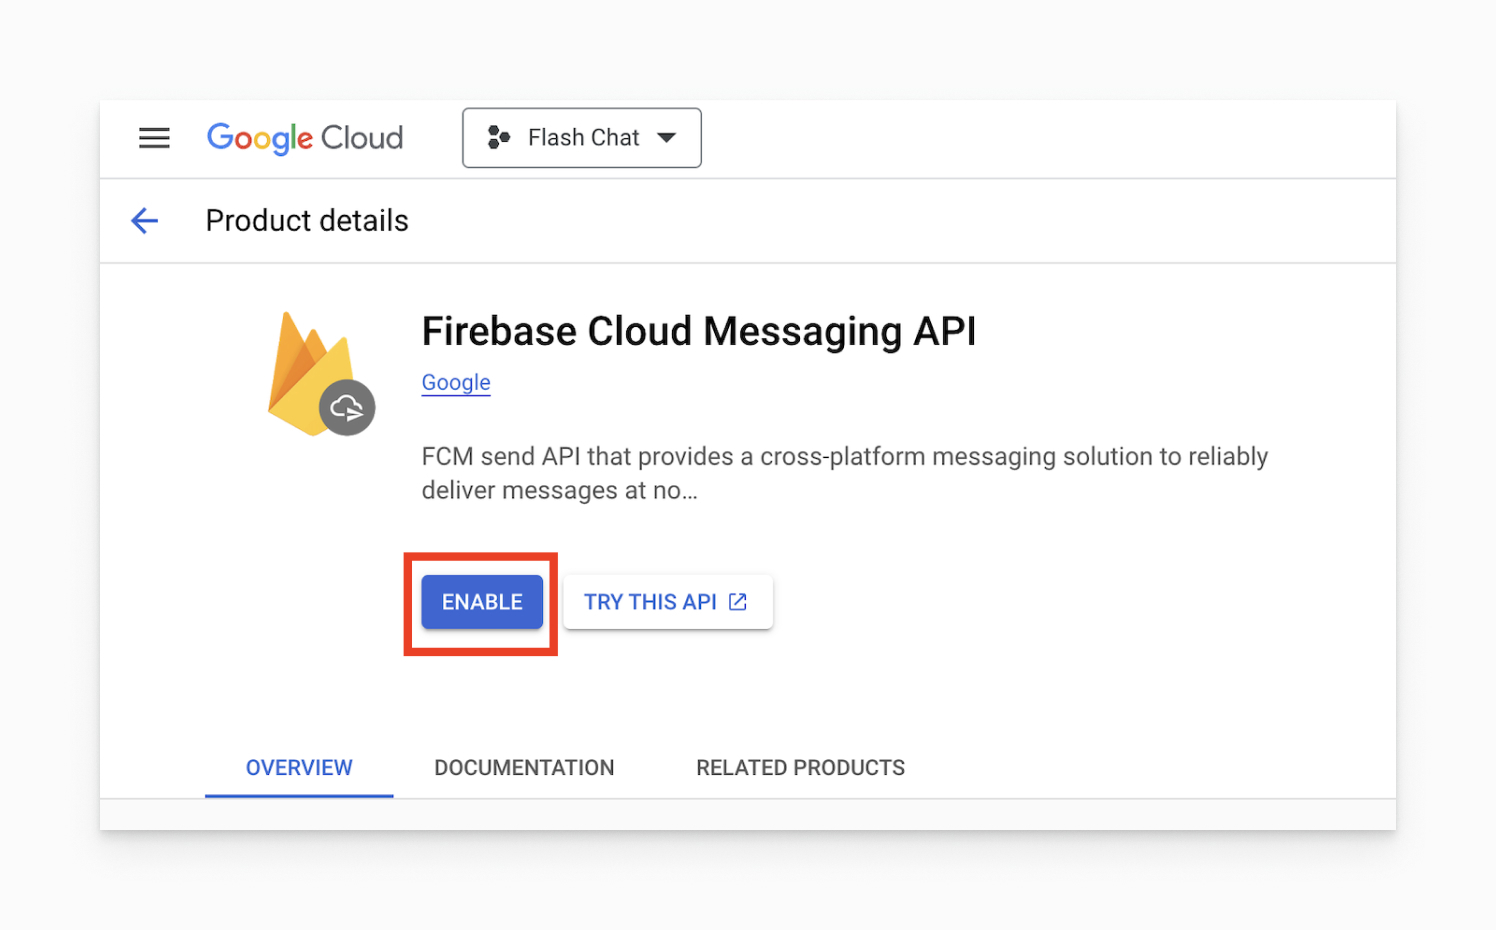
On the subsequent page, click Enable. You may need to wait a few minutes for the action to propagate to Firebase systems.
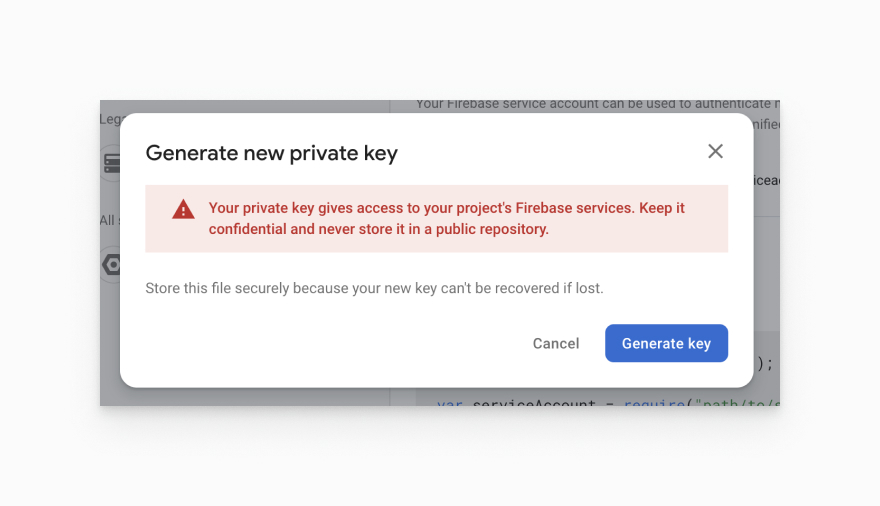
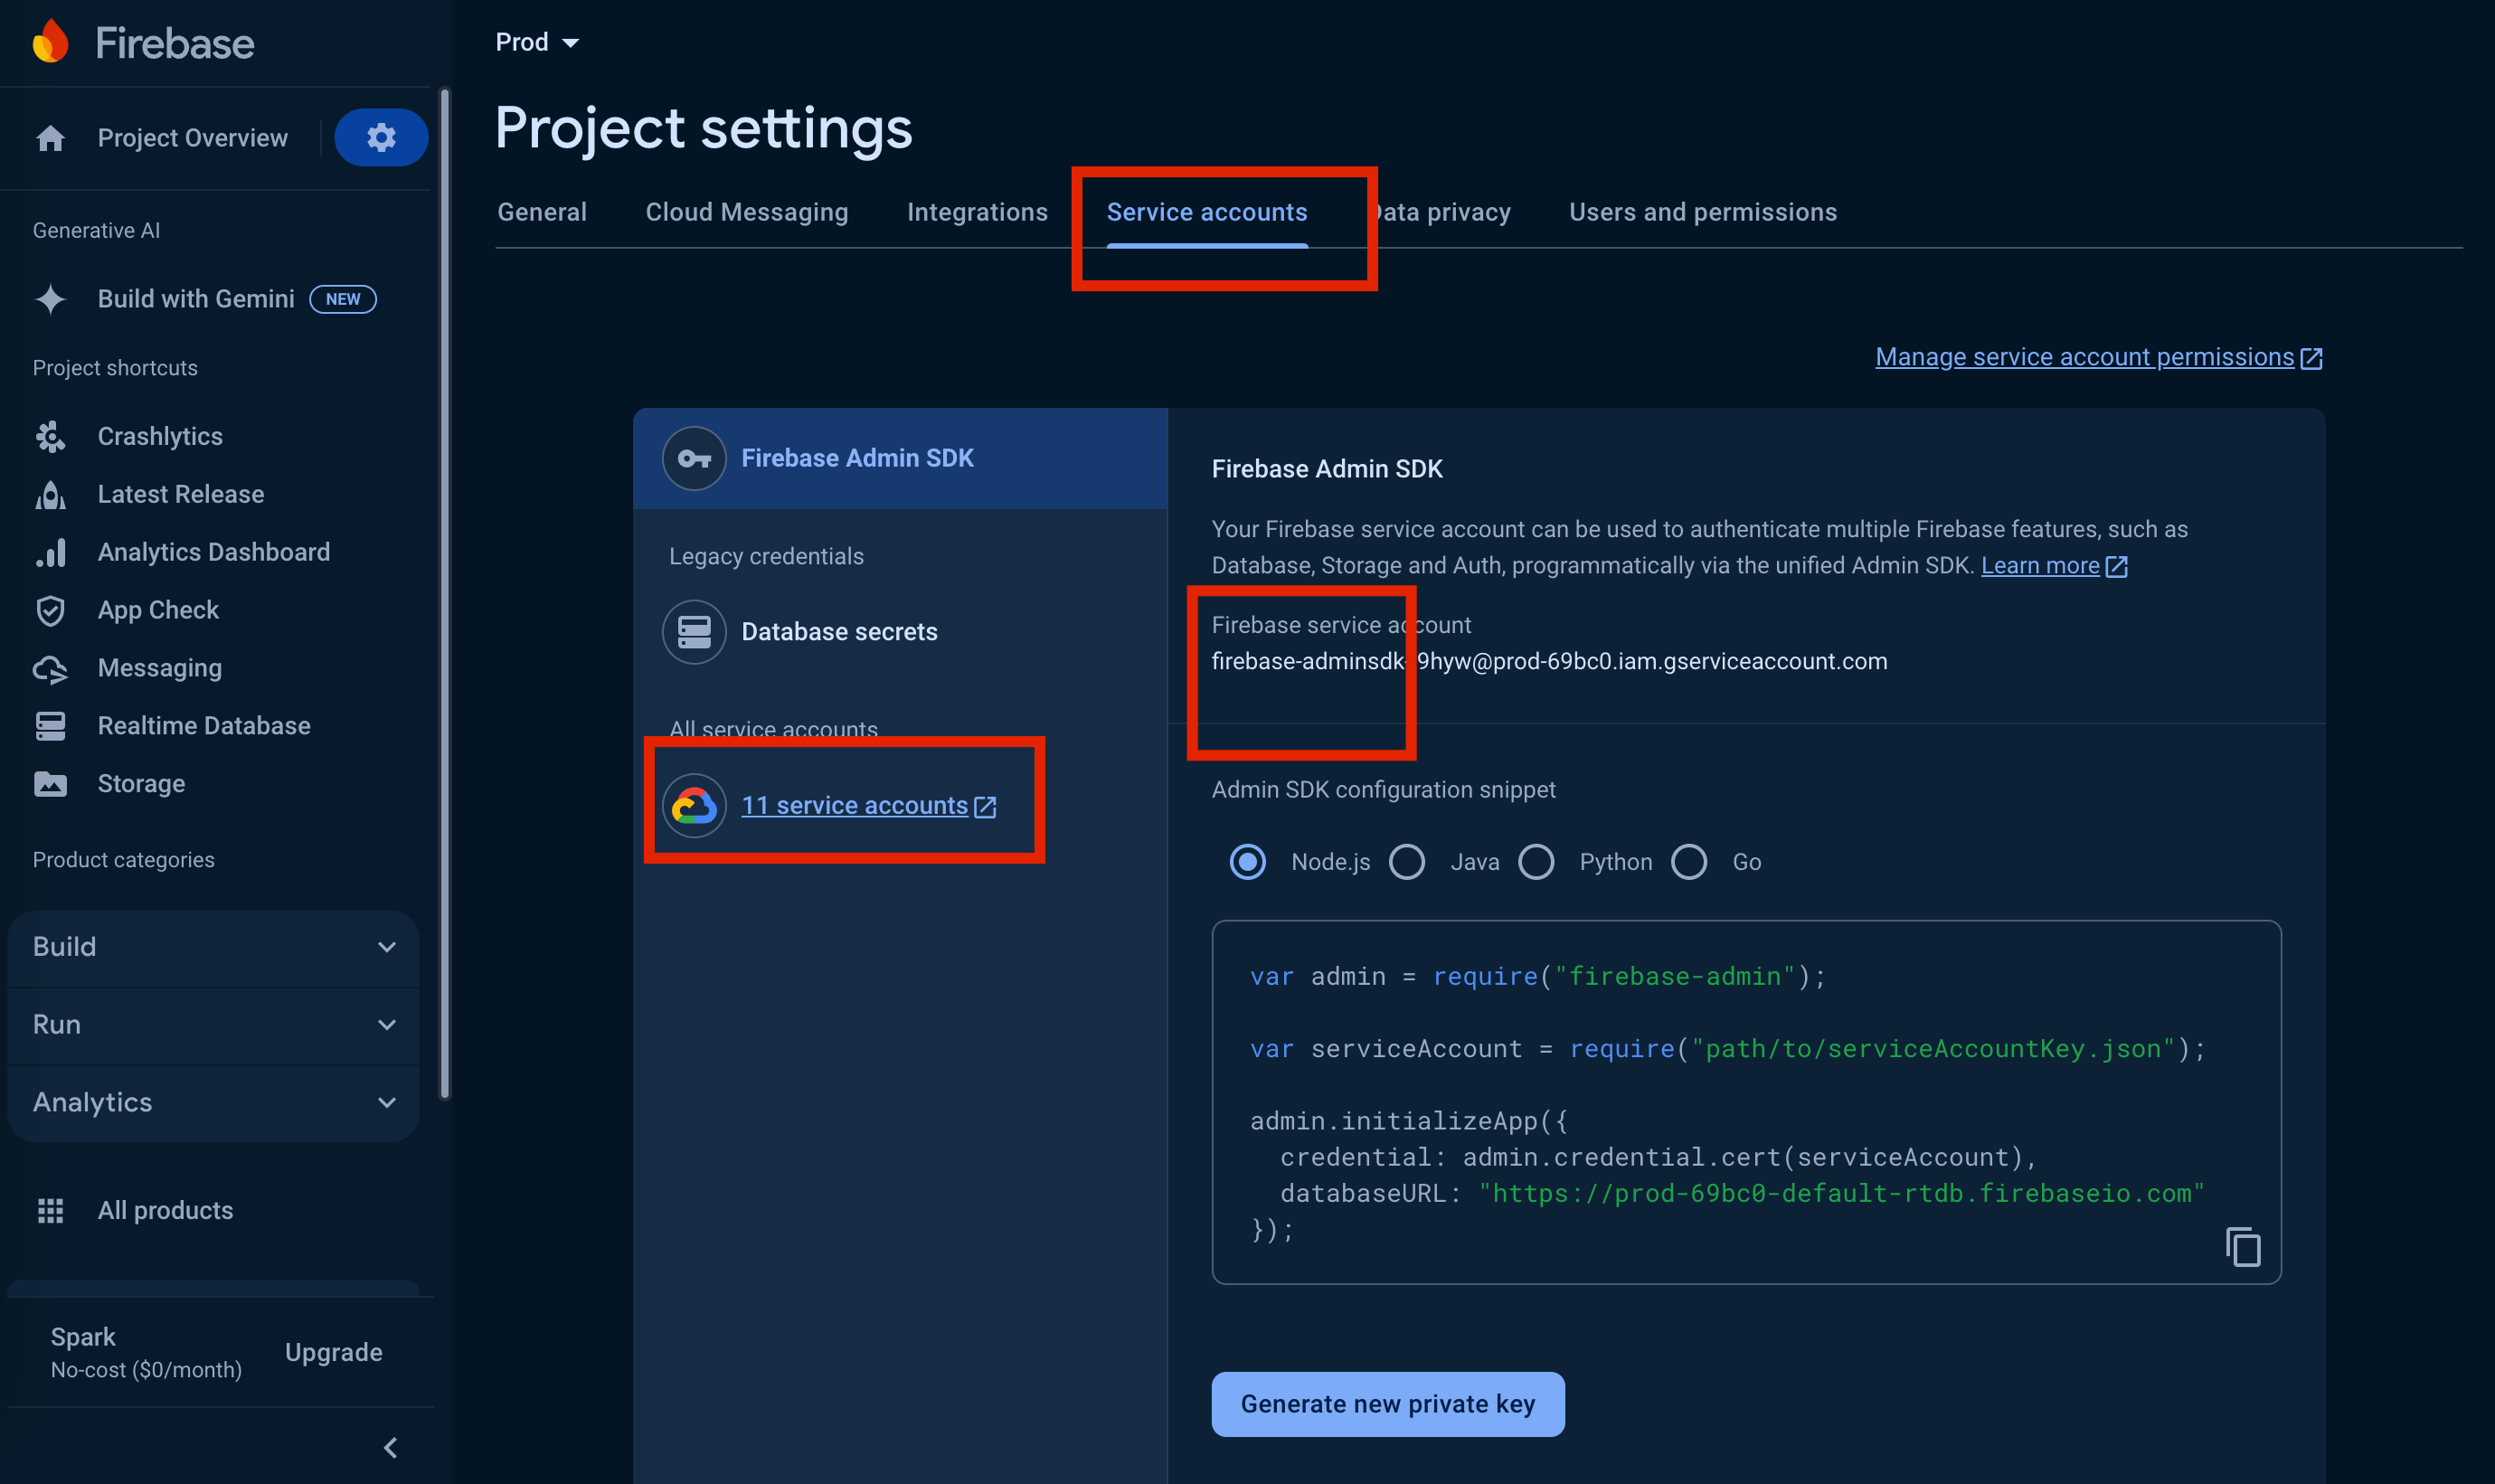
- Step 4 : On the Project Settings page, navigate to the Service Accounts tab. Under Firebase Admin SDK, ensure that Node.js is selected, then click Generate New Private Key.
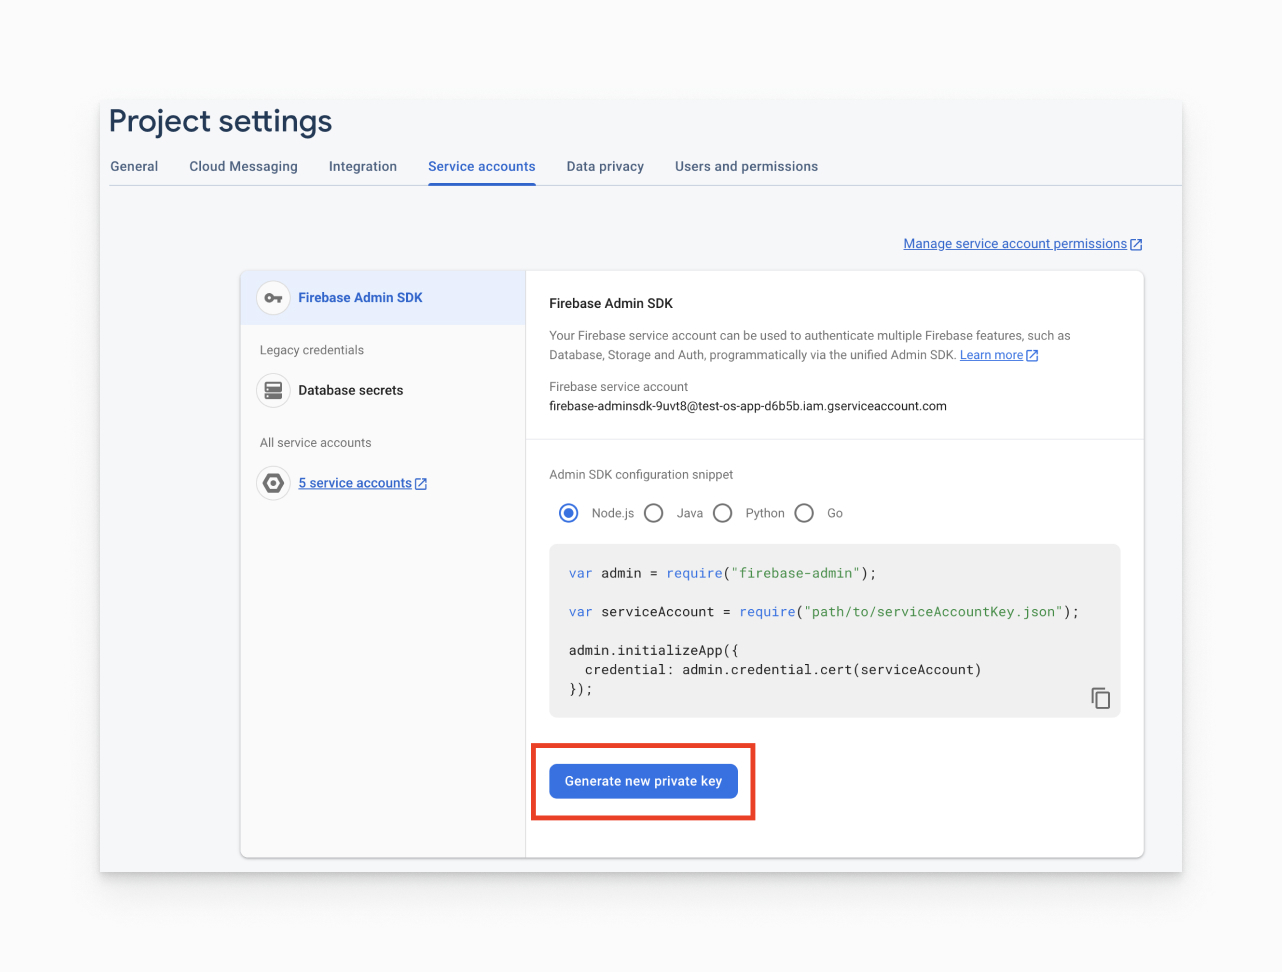
On doing so, you will be presented with a warning message, proceed to clicking on Generate Key, to download your private key JSON file.
Step 5: Login to your WebEngage Dashboard and navigate to the Data Platform > Integrations > Push Setup (Create Android Credentials).
- Enter application package name in the field labeled Package Name.
- Upload the private key which you have downloaded from firebase cloud messaging (FCM) and click on Save.
Clients having existing credentials with ‘App Secret’ i.e, FCM’s "Server Key" for authorization purposes:
- If you are using App Secret then we strongly recommend to upload Private Key, as FCM HTTPS legacy APIs are deprecated and will be removed in June 2024’.
- To update the existing Server Key configuration on clicking the Edit, you would see the following Modal. Upload the Private Key and Save.
Service Account Generation
If your privacy policy requires safeguarding your admin credentials shared in the JSON file, follow below steps.
Step 1: Open Firebase Project and go to Service accounts tab.
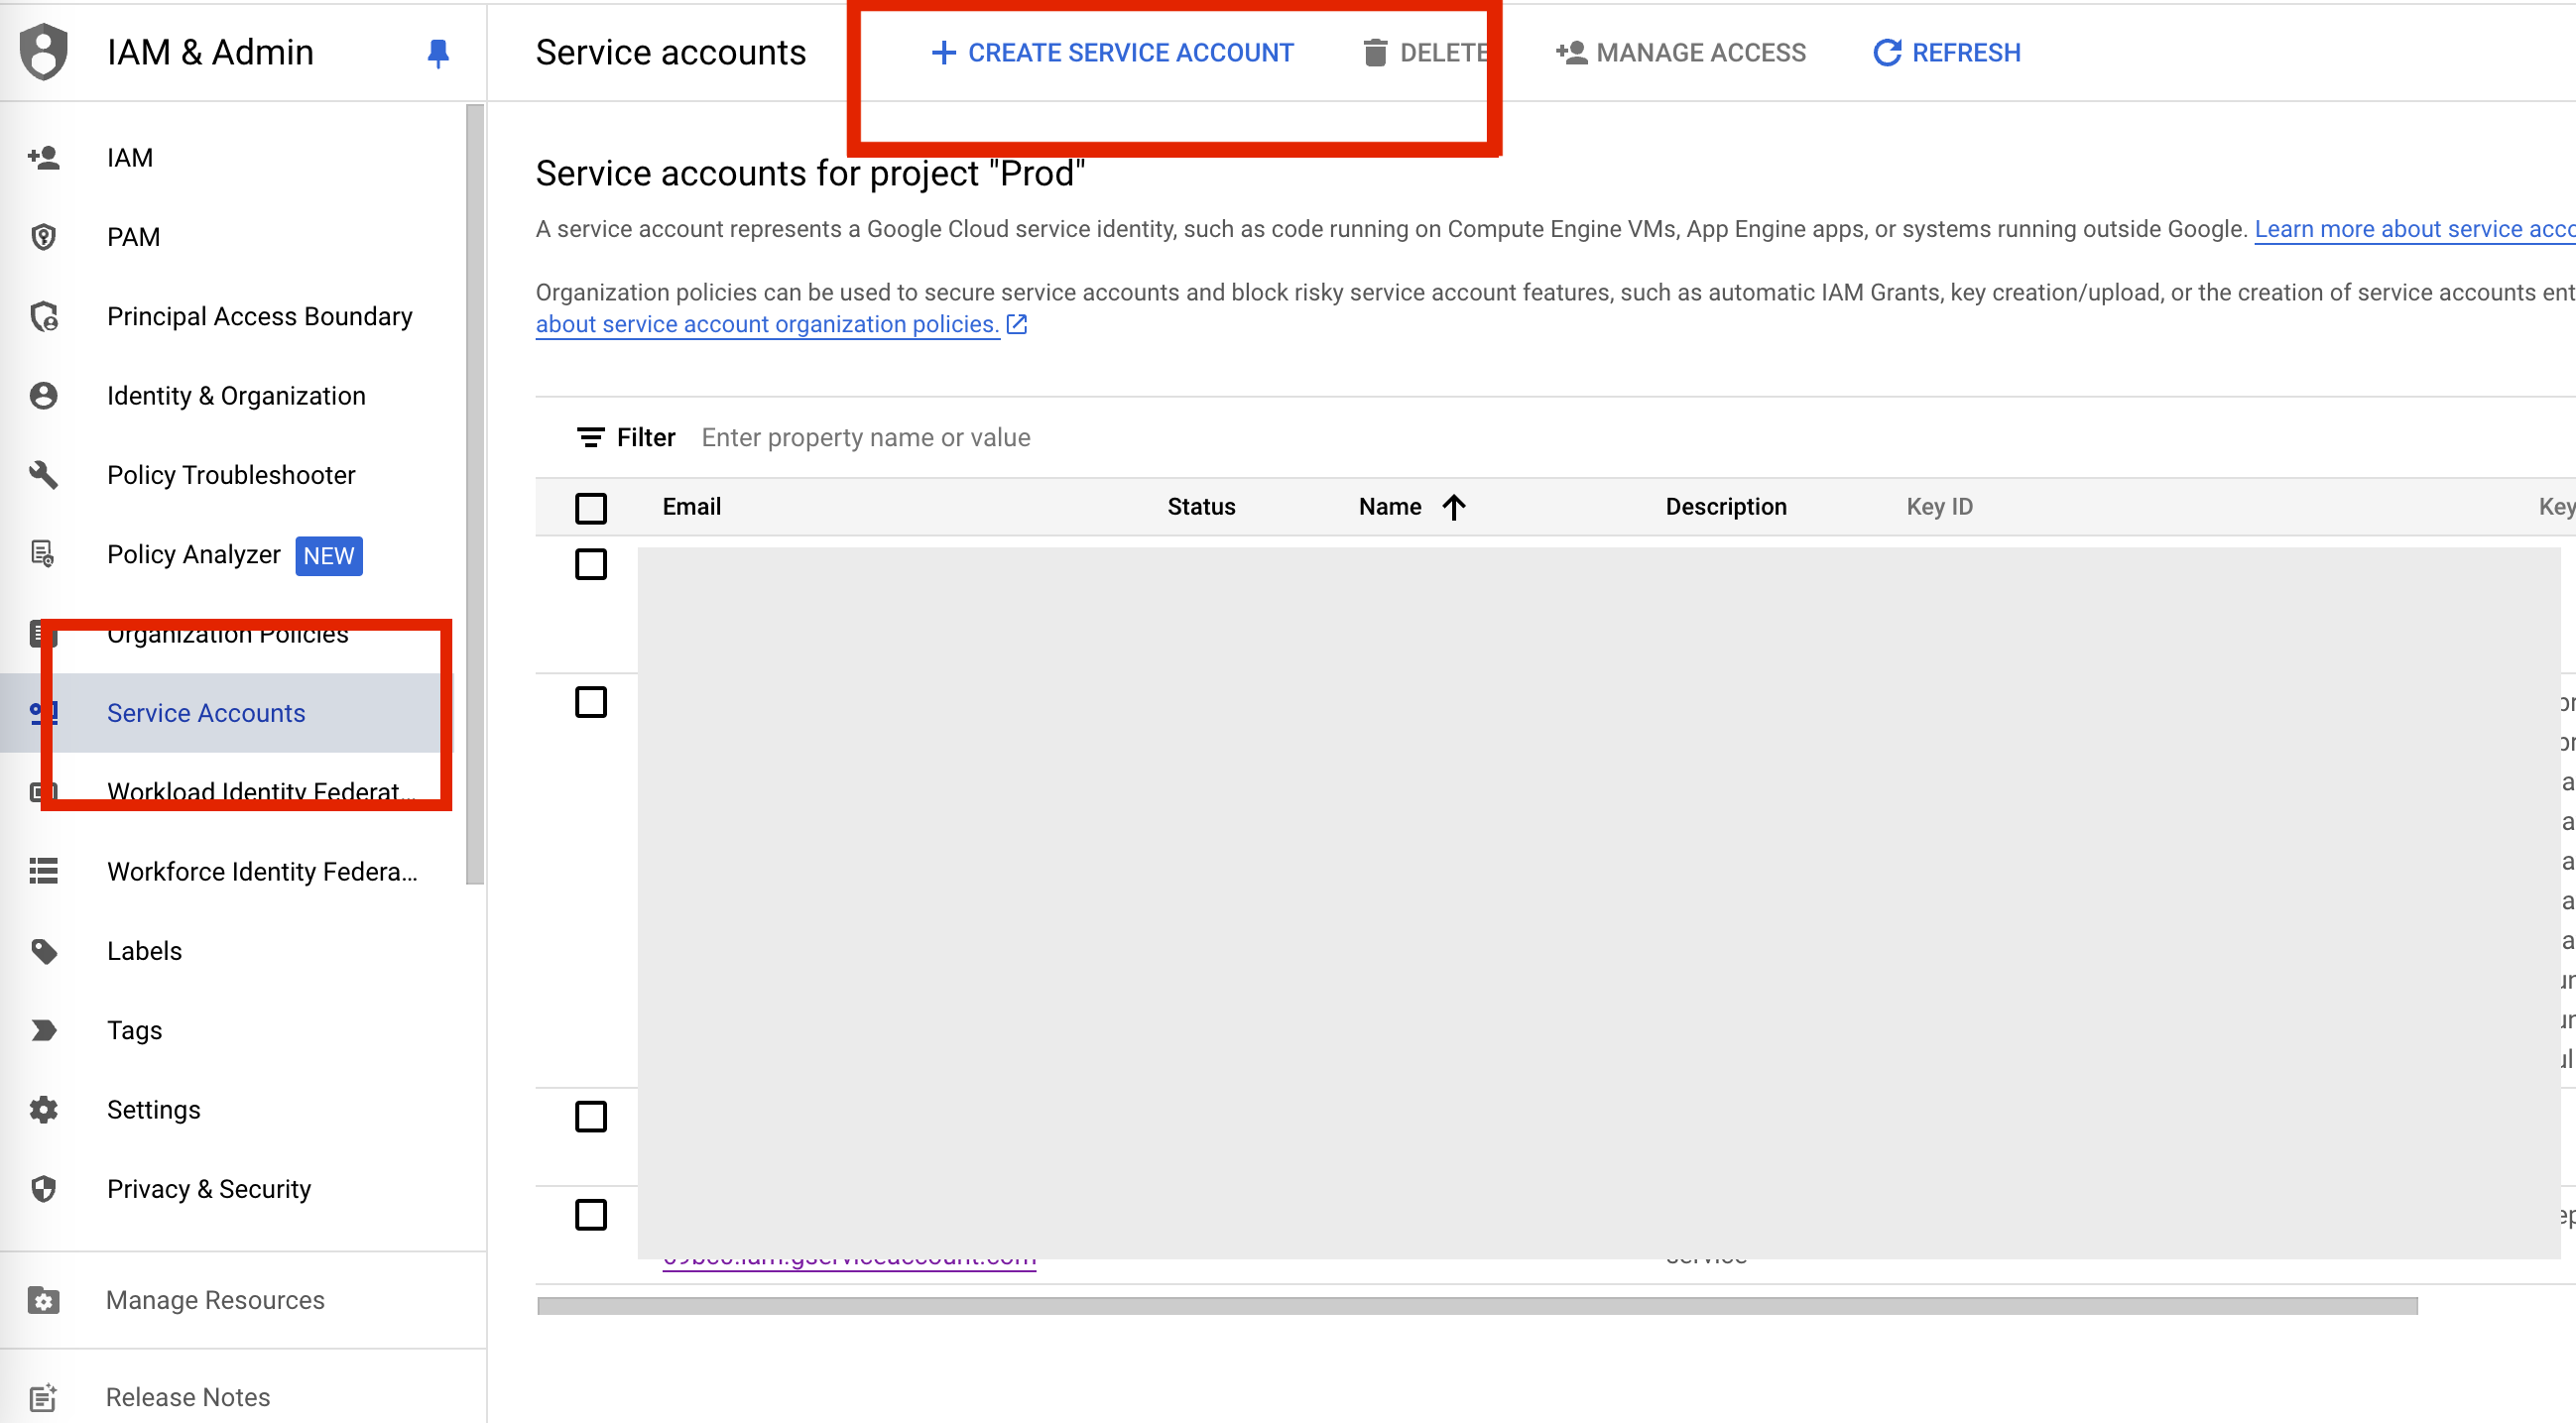
Step 2: Click on Service Accounts list to redirect to the Google Cloud Console for your project.
Step 3: Click on the Service Accounts tab
Step 4: Click on CREATE SERVICE ACCOUNT
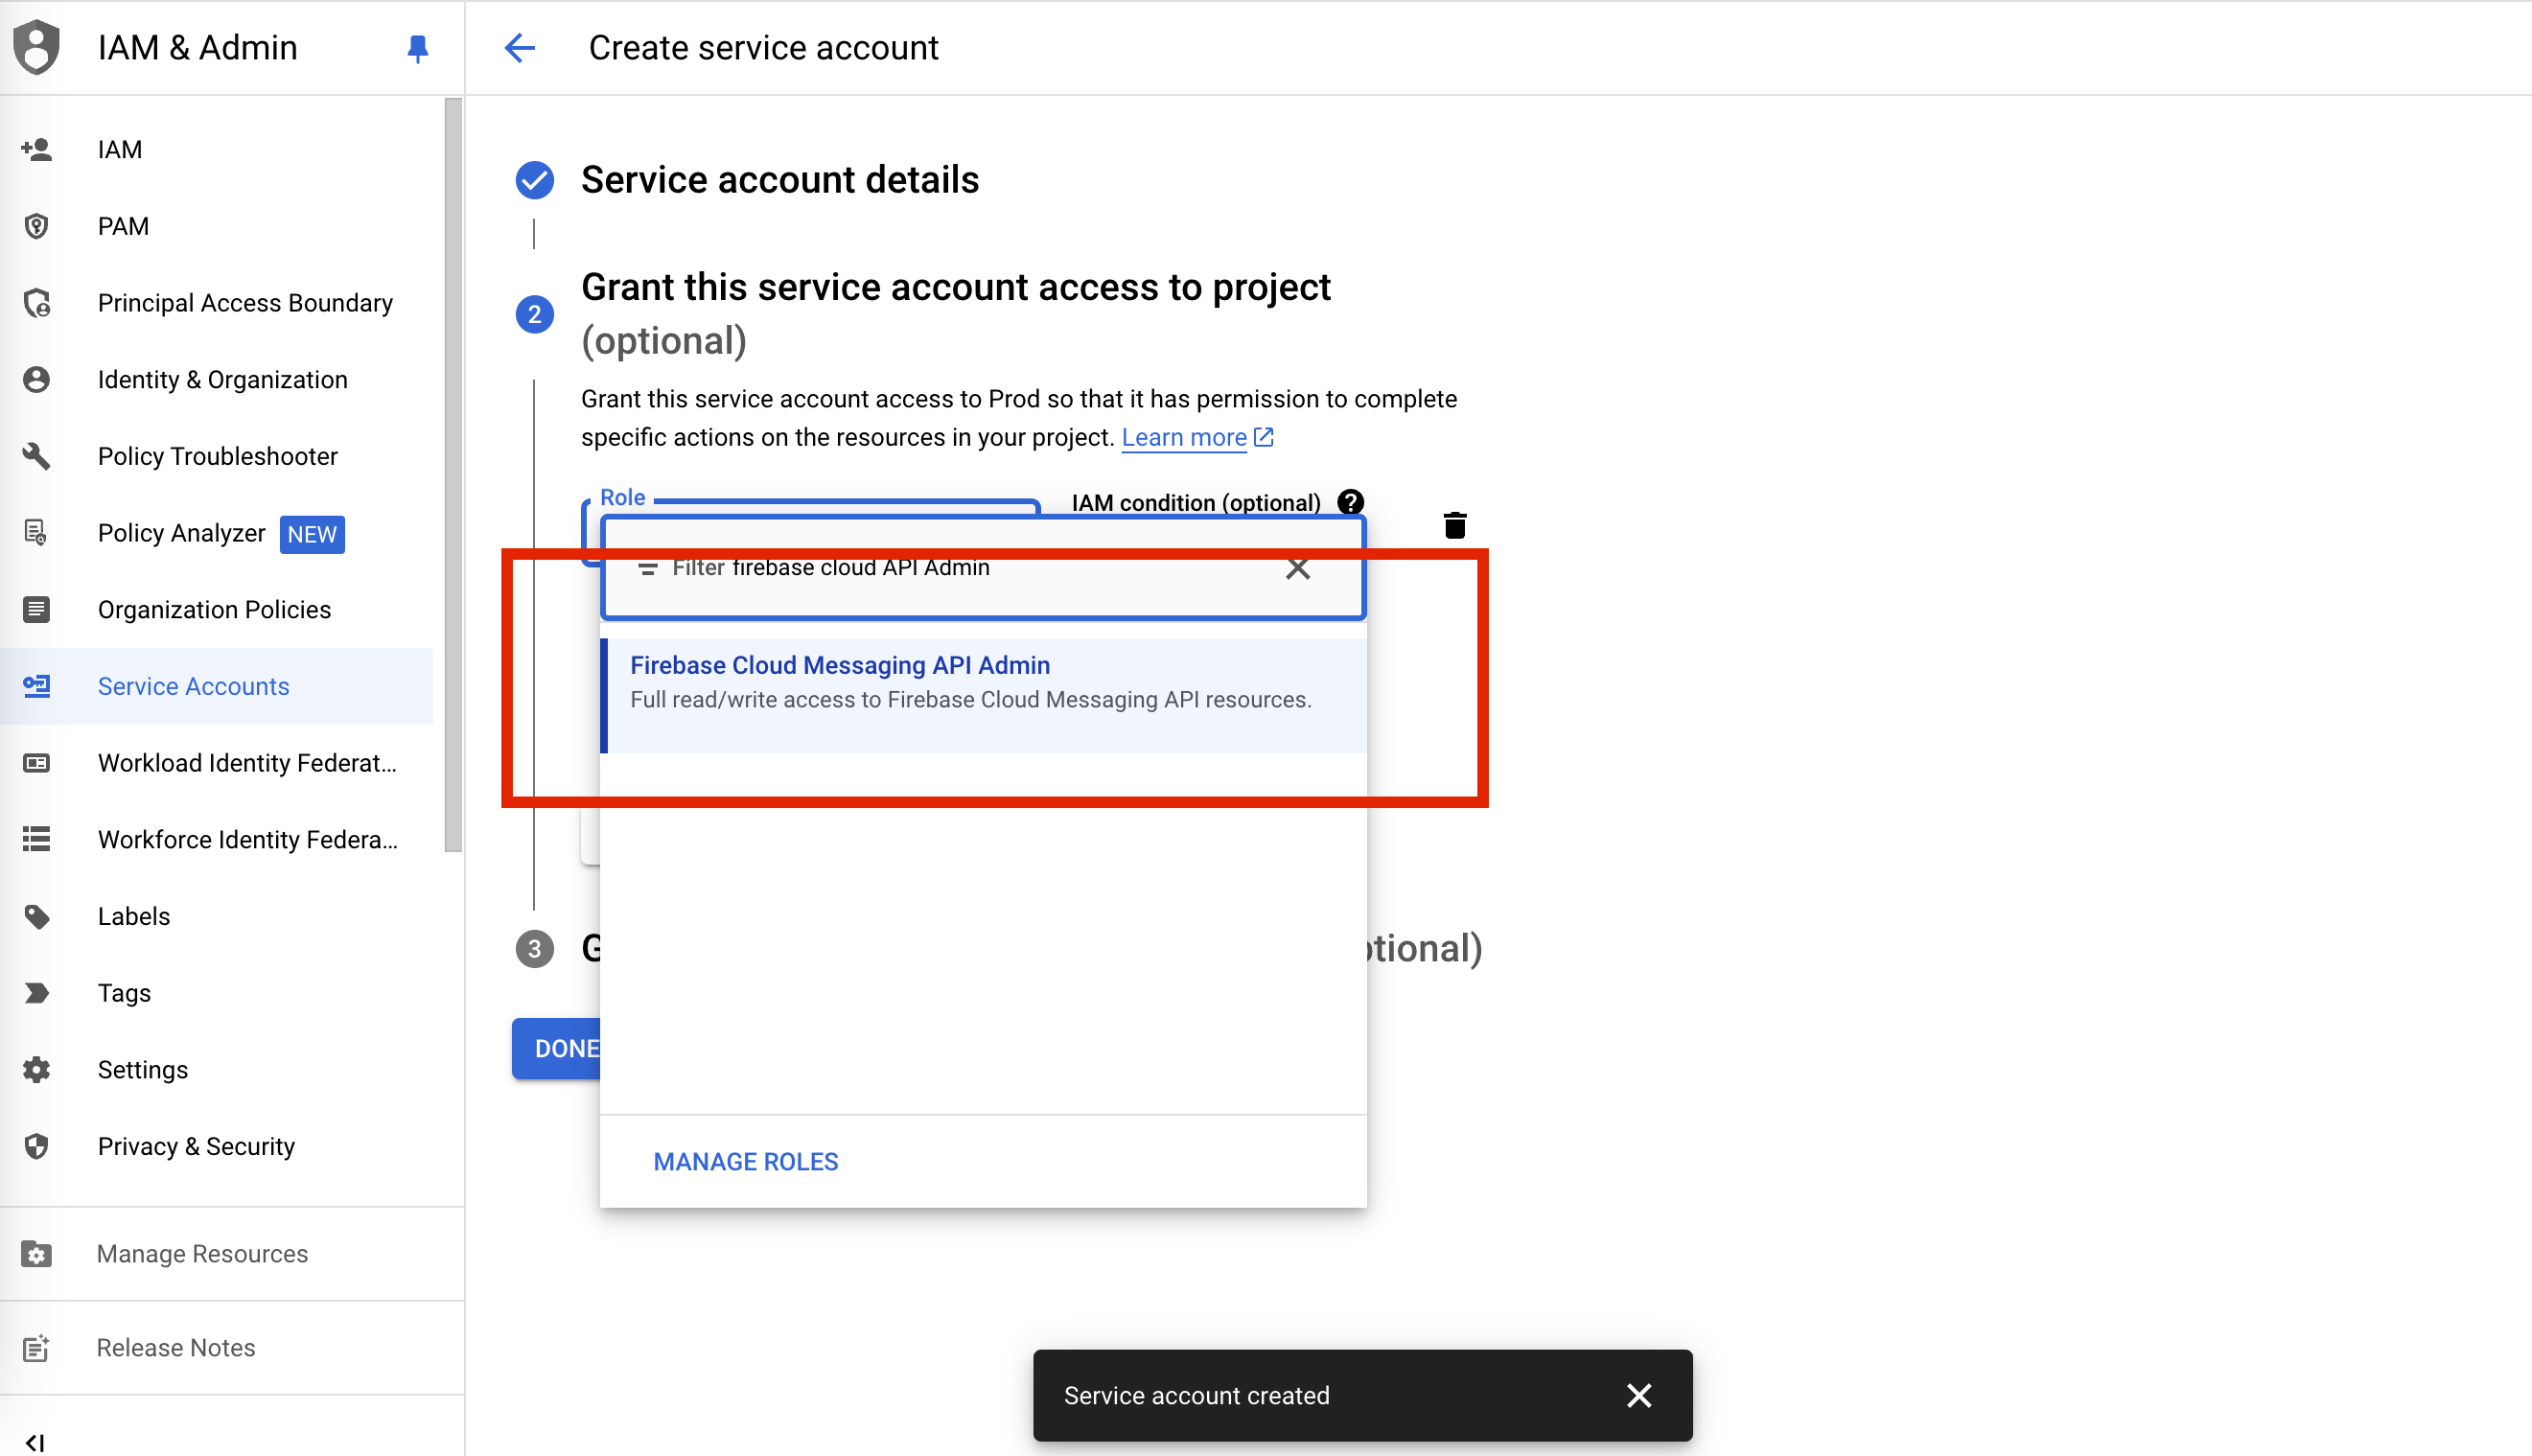
Step 5: Enter the details for the Service Account and Provide below Access to the Service Account
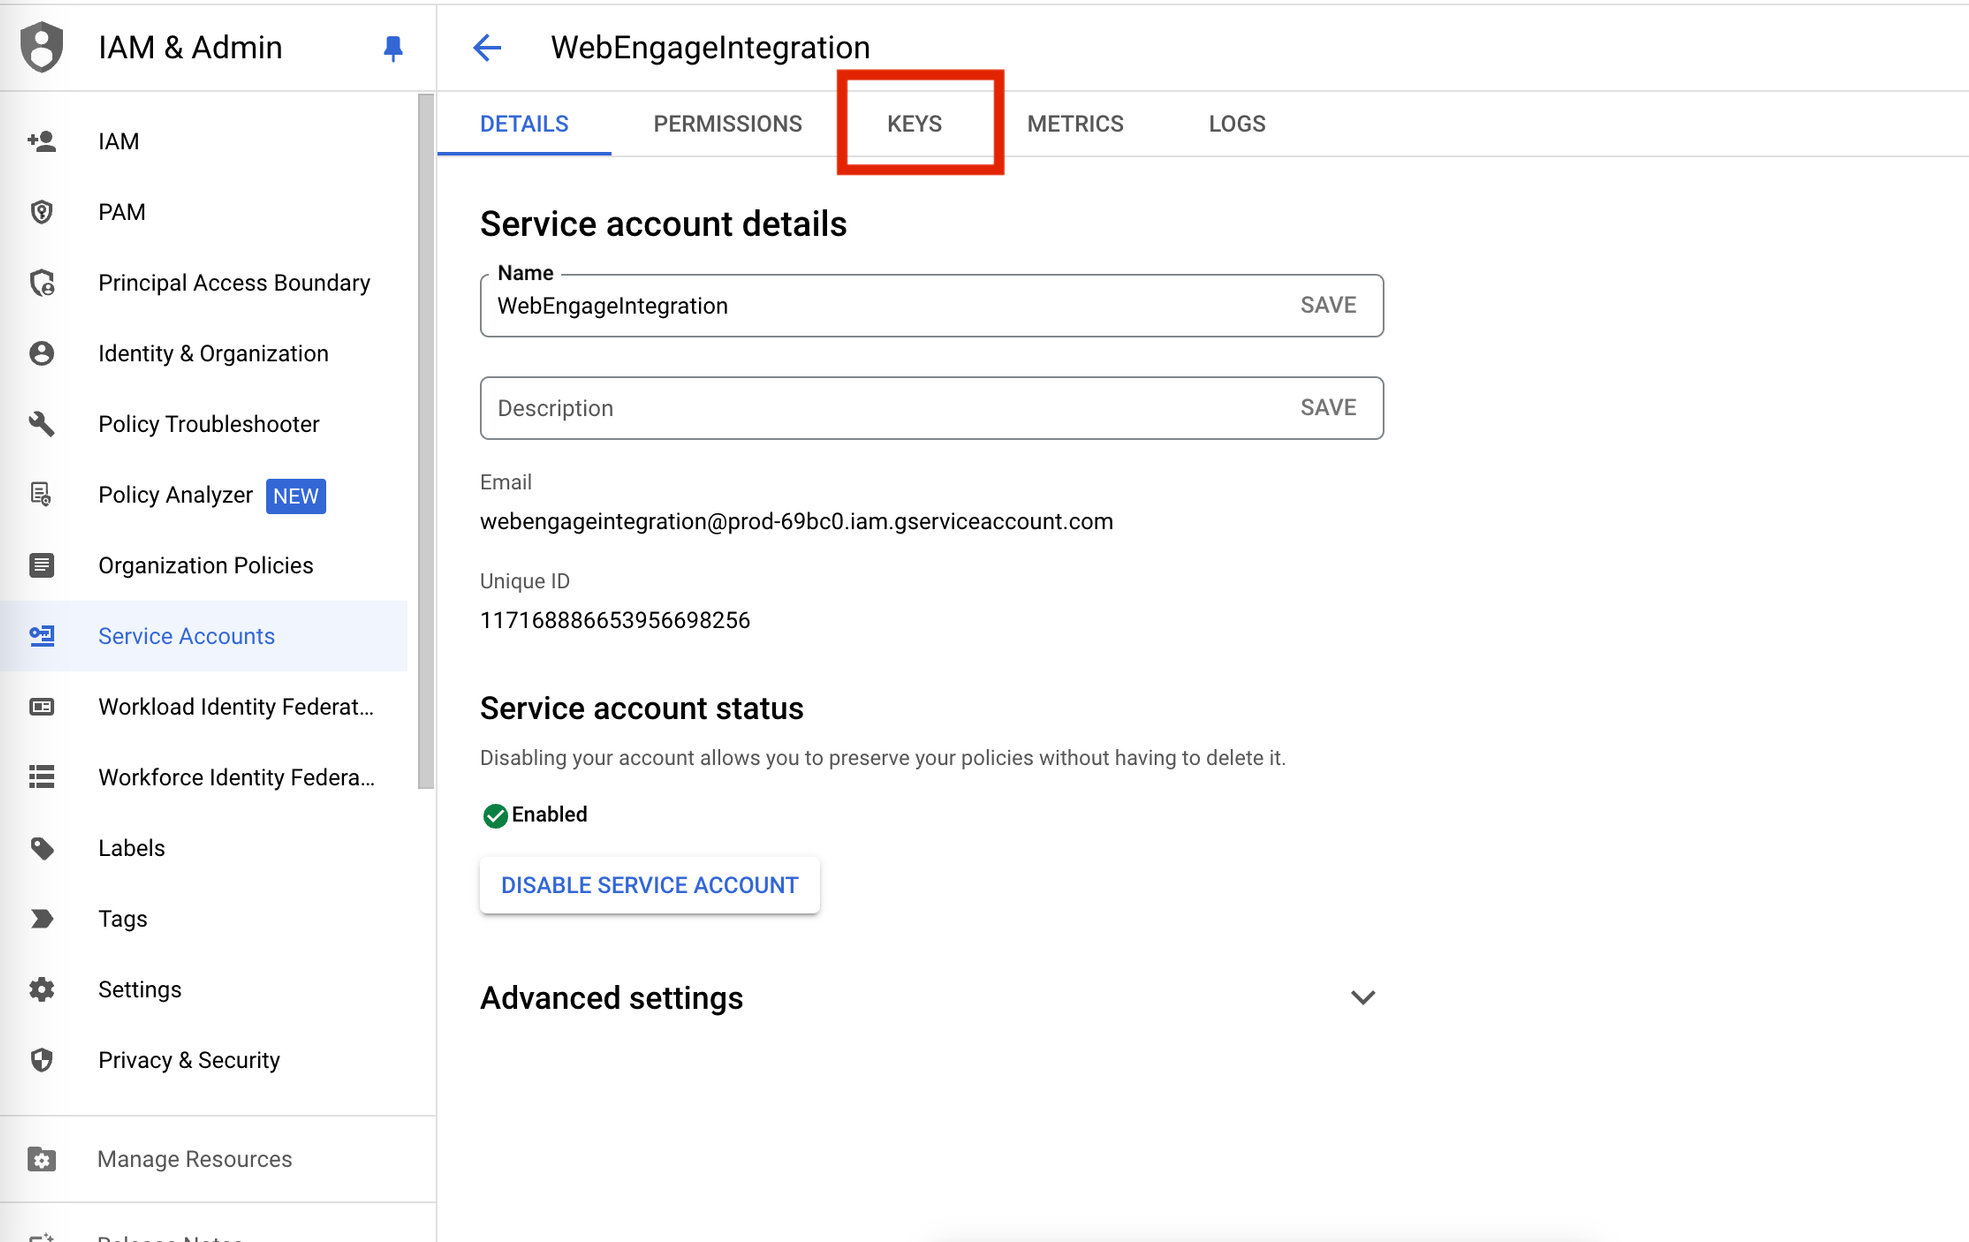
Step 6: Click on the generated Service Account in the list. You will be redirected to the Service Account’s page
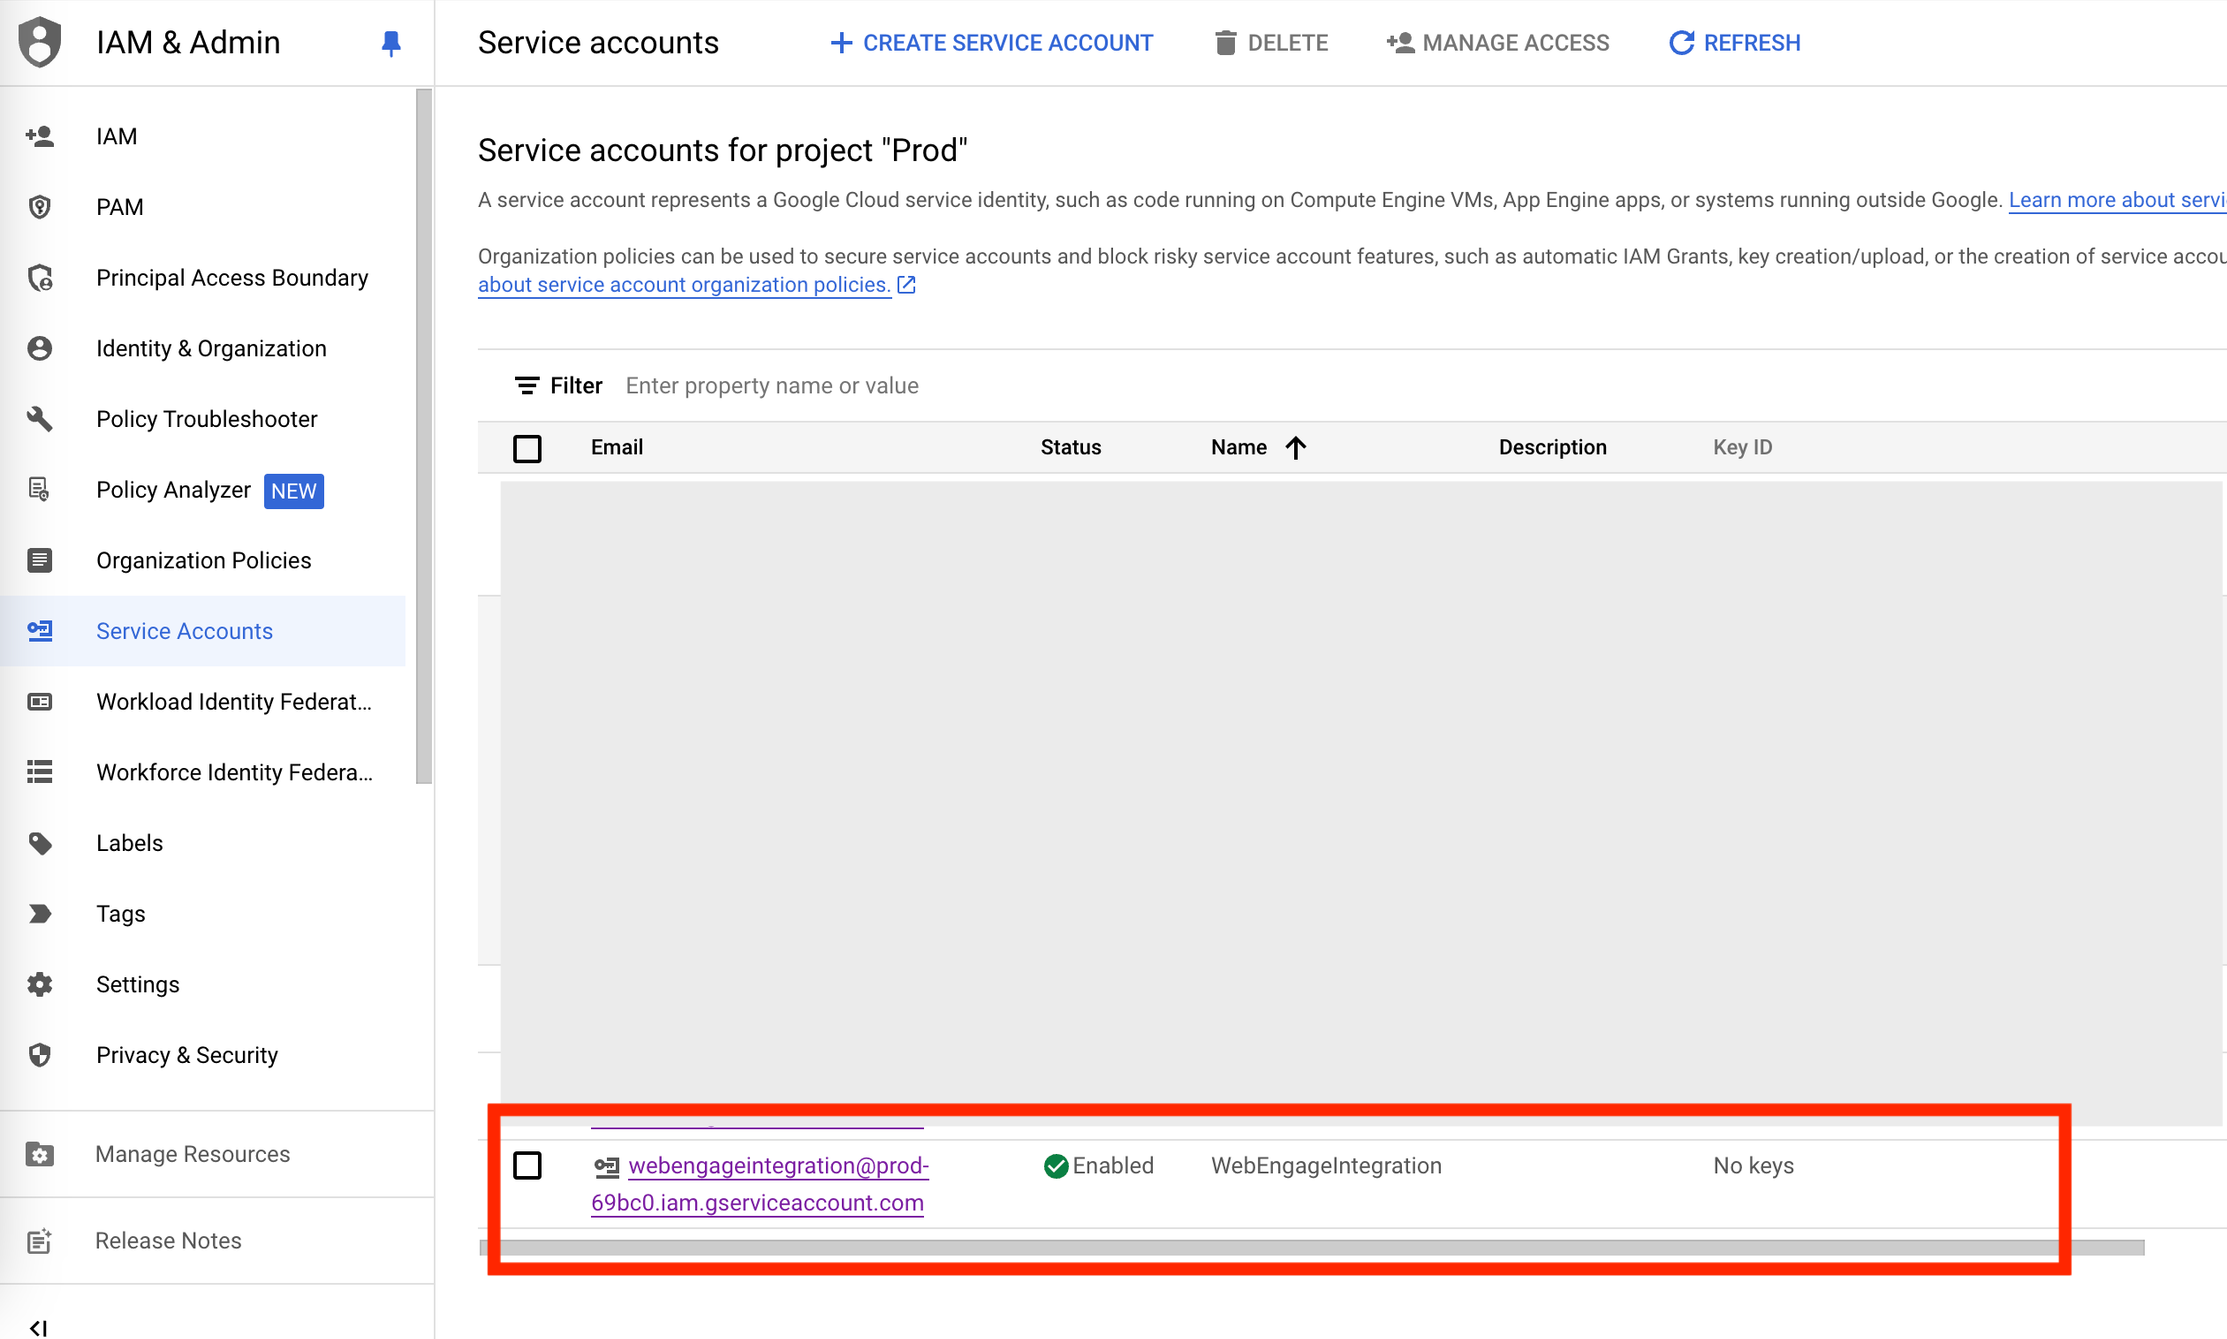
Step 7: Click on the KEYS tab. And then on the ADD KEY to create a new key
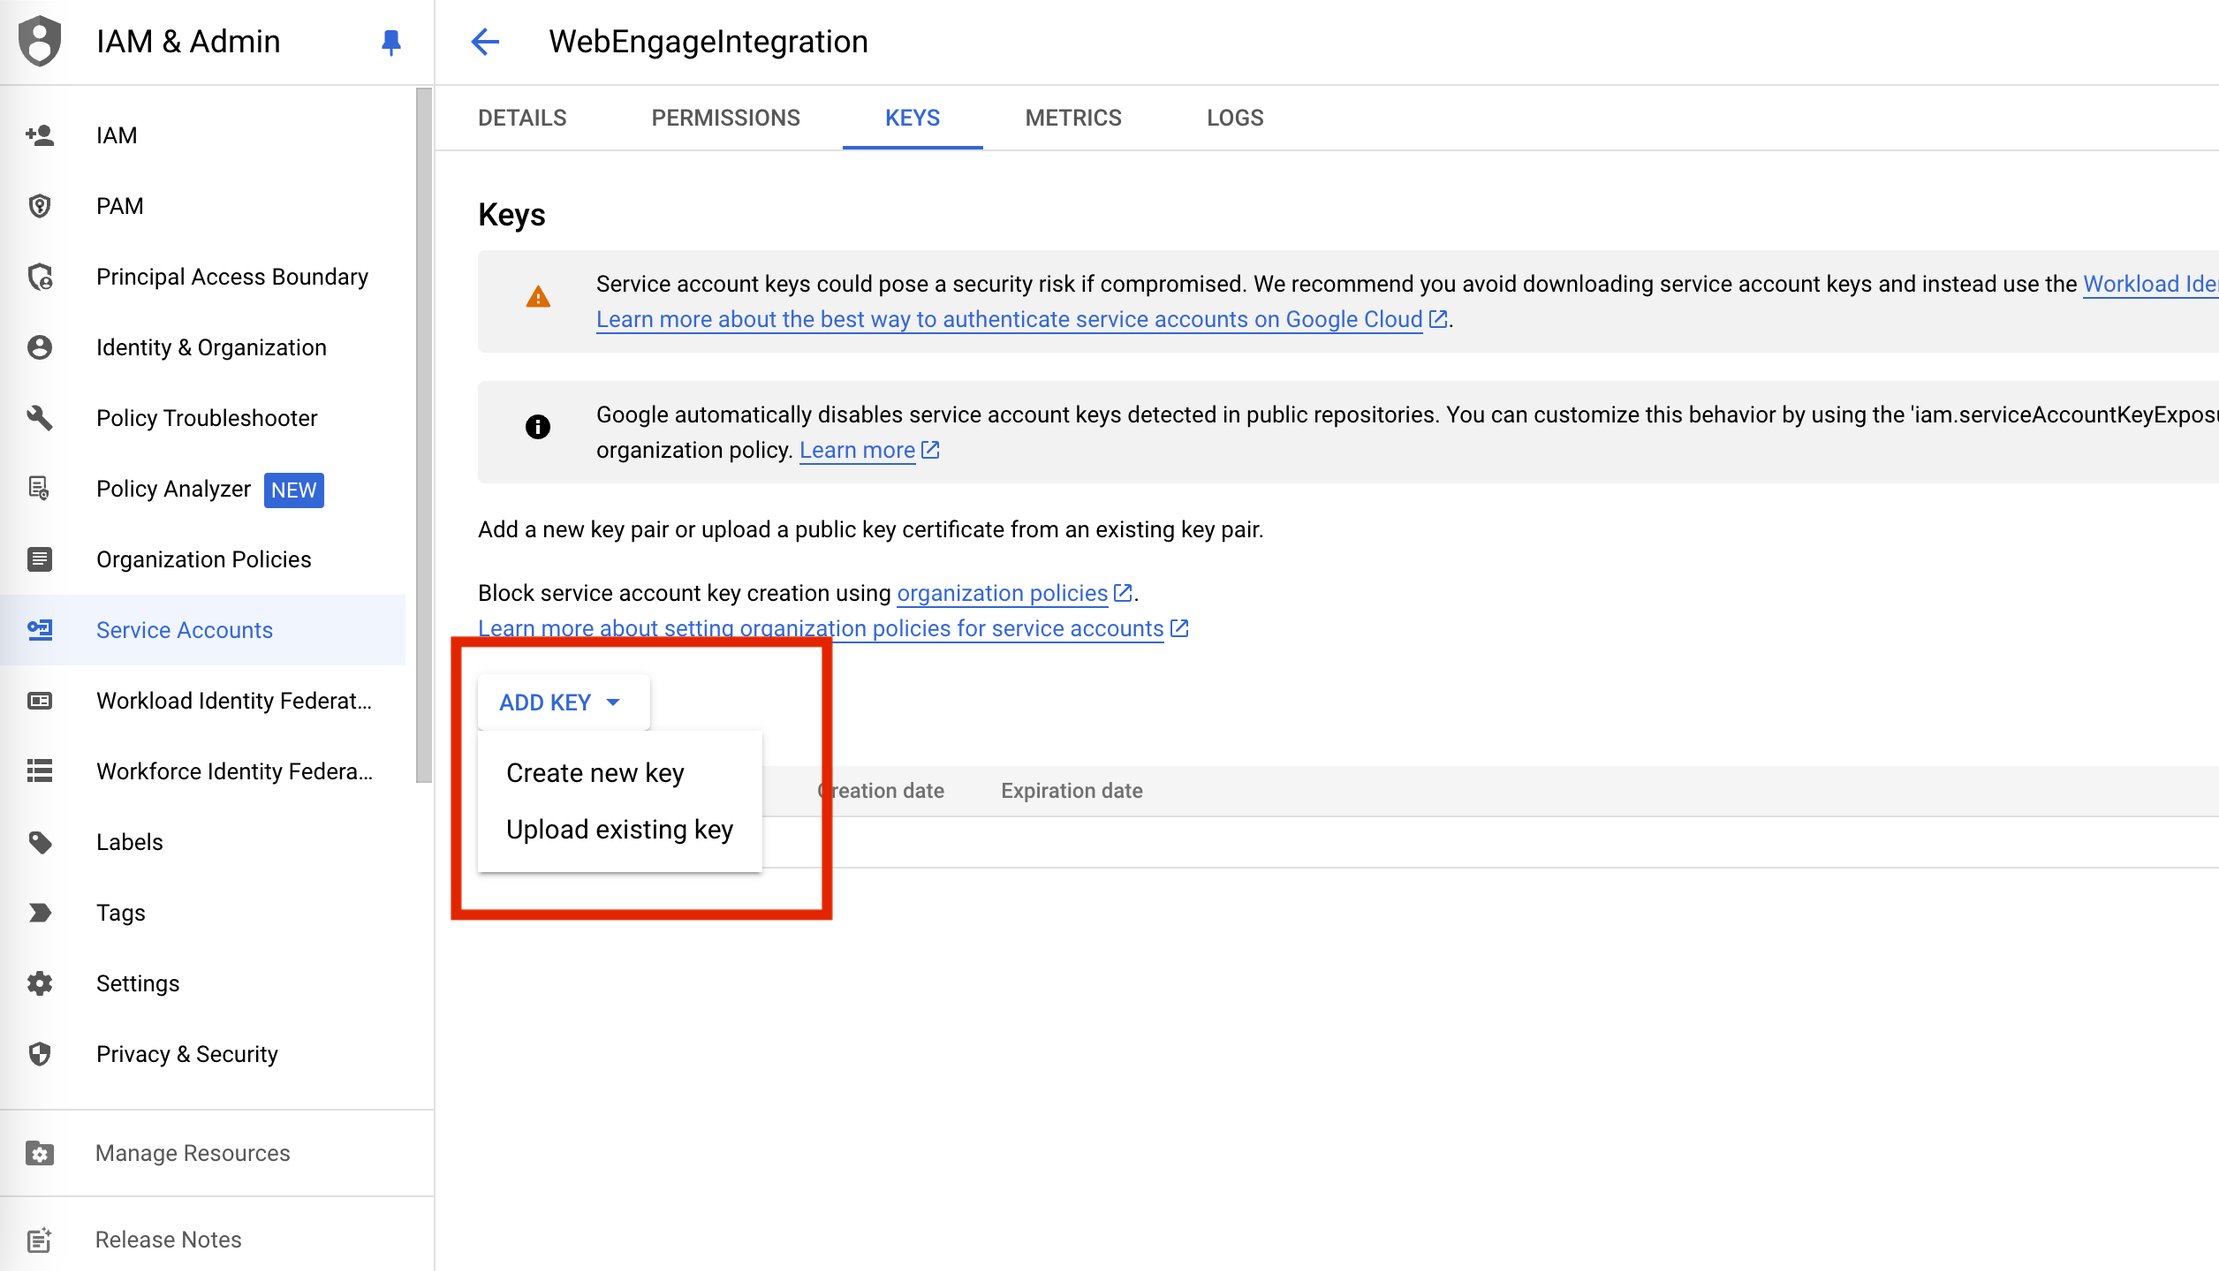
Step 8: Select JSON key and click on CREATE. A JSON file will be downloaded to your computer
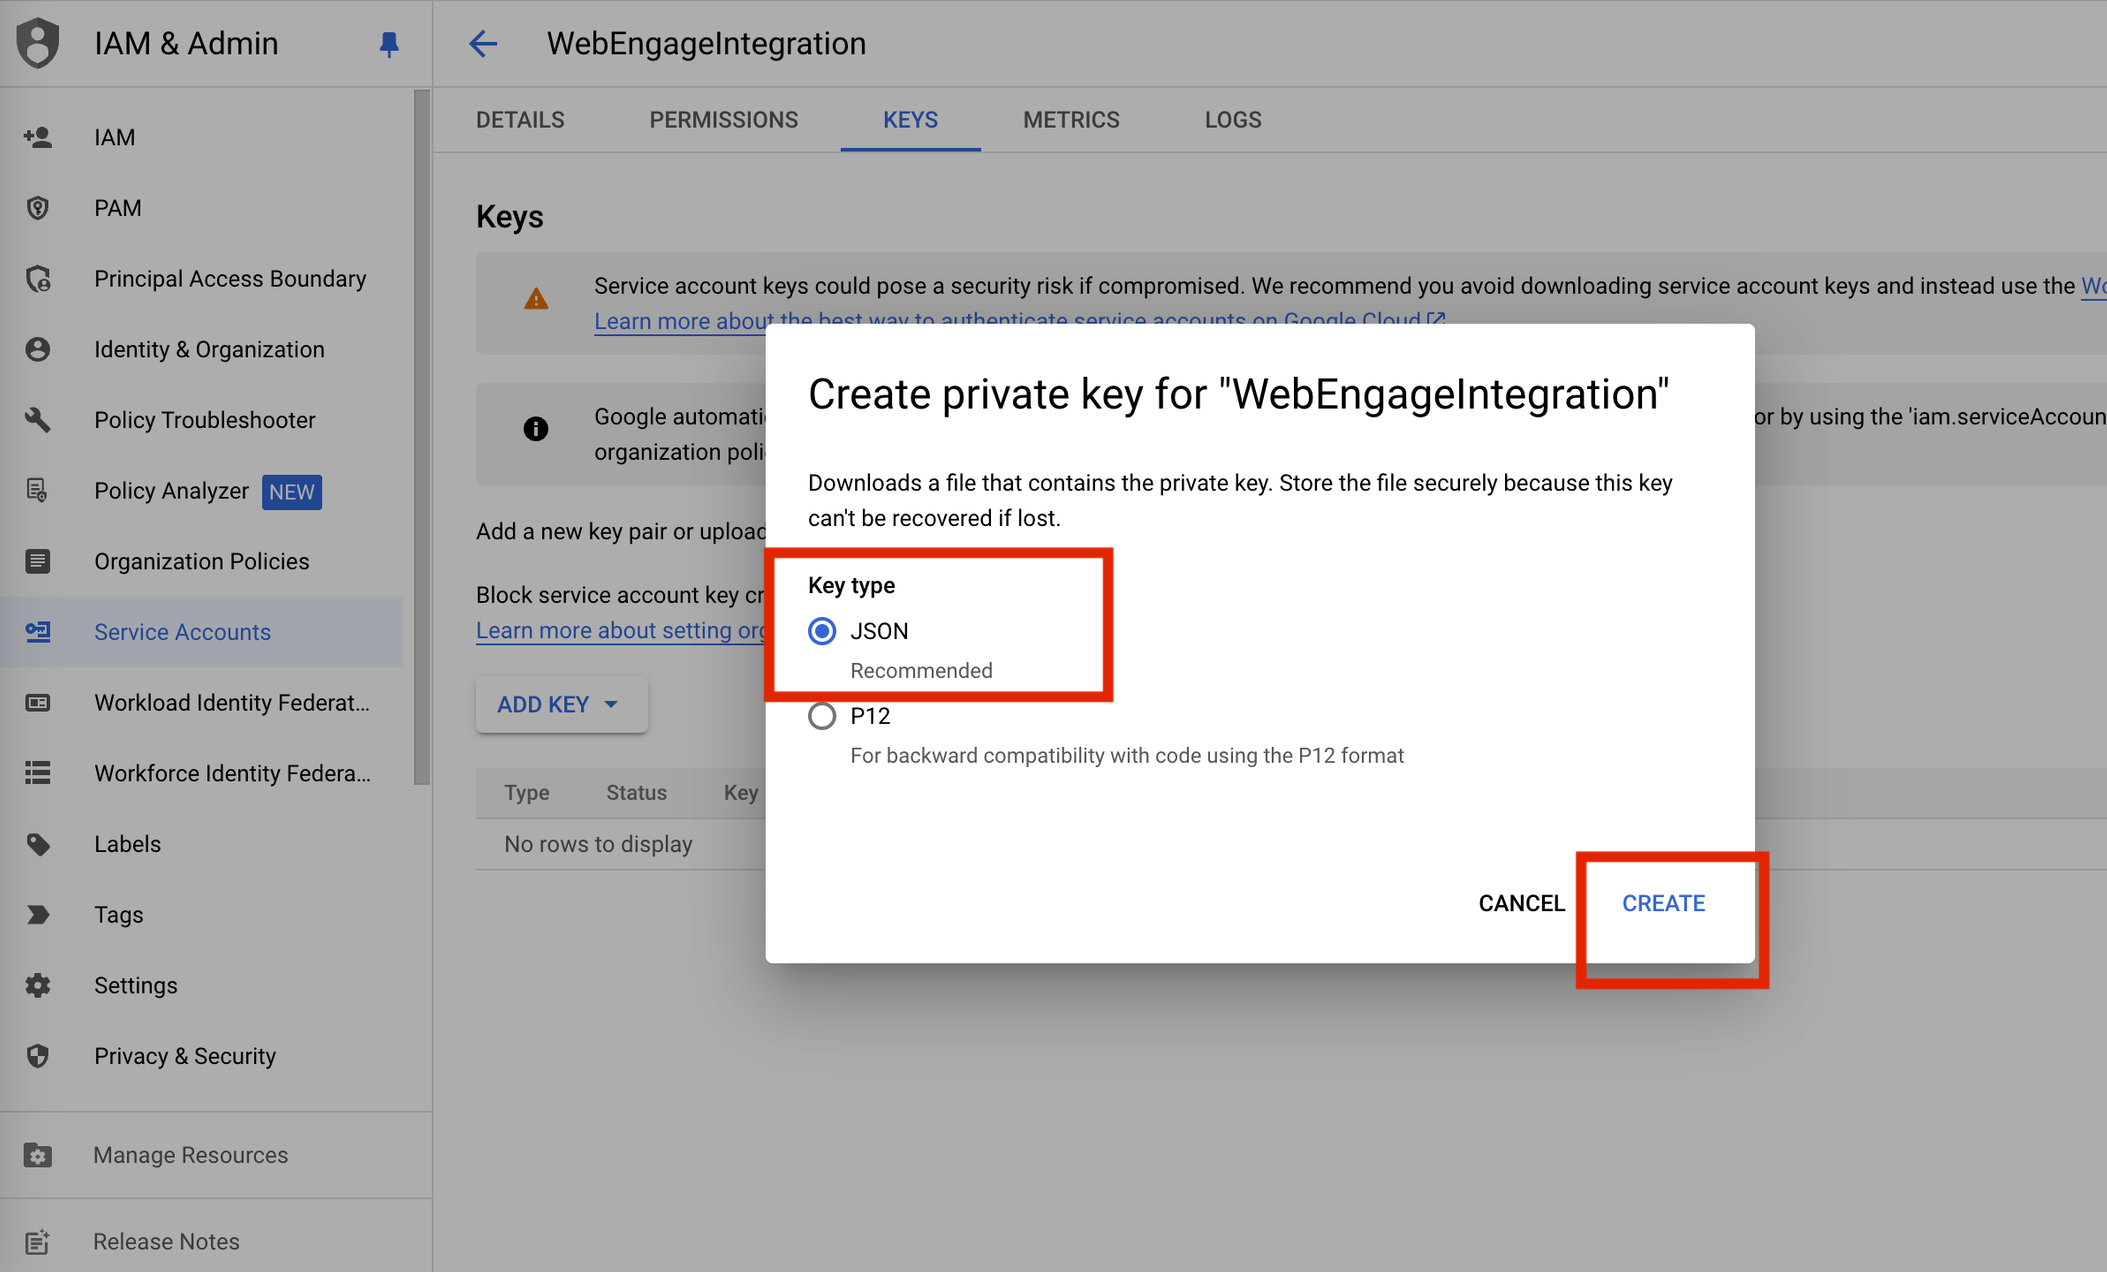
Step 9: Upload the JSON file to the WebEngage Integration Page.
API Rate Limit
FCM API has a default limit of 600K RPM only for the new projects created. Whereas, incase you are already a high volume client with a higher limit, this same limit will be carried forwarded to the new V1 API.
However, if you have a lower limit and want to increase then you need to contact FCM support, and get it increased.
How to check your current limit?
To check your current limit, navigate to the Google Cloud console and go to APIs & Services > Firebase Cloud Messaging API > Quotas & System Limits. Alternatively, you can go directly to this link and look for the value labeled "Send requests per minute."
Should you migrate all your requests to the new API all at once?
We recommend that you gradually ramp up your traffic to the new API. If you expect to send more than 600,000 messages/min on a regular basis, contact Firebase support for instructions on how to increase quota or get recommendations on how to spread out traffic.
Incase your rate limit is exceeded, what then?
In case the rate limit is exceeded WebEngage tries again with a delay. WebEngage automatically retries failed requests due to rate limit errors. After ten retries, if the request still fails, the notification will be marked as failed in the reports. To avoid this, we recommend spreading out campaigns over a longer period or using segment-based campaigns.
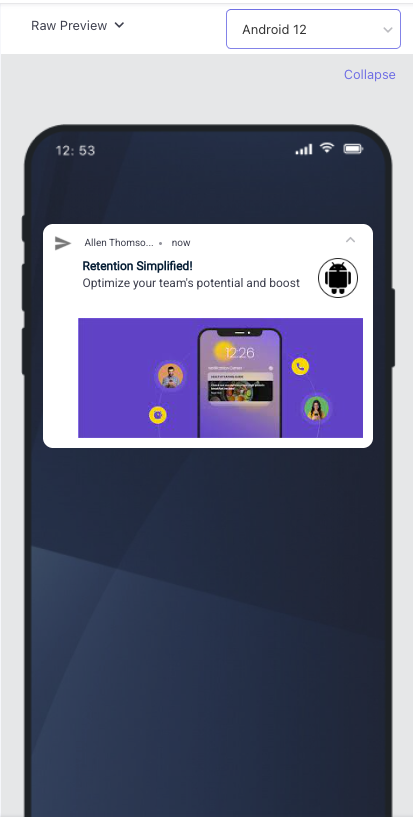
Notification Layout Behaviour Difference: Android 11 and Below vs Android 12 and Above
In Android 11 and below, push notification layouts allowed more flexibility with custom designs. However, this often led to anti-patterns that caused inconsistencies across devices, potentially confusing users. To address this, Android 12 and above introduced stricter restrictions on custom notification layouts, ensuring a more uniform and predictable user experience. These changes were implemented to prevent layout compatibility issues and maintain consistency across different devices.
The difference can be seen in the images below:
Android 12 and Above:
Android 11 and below:
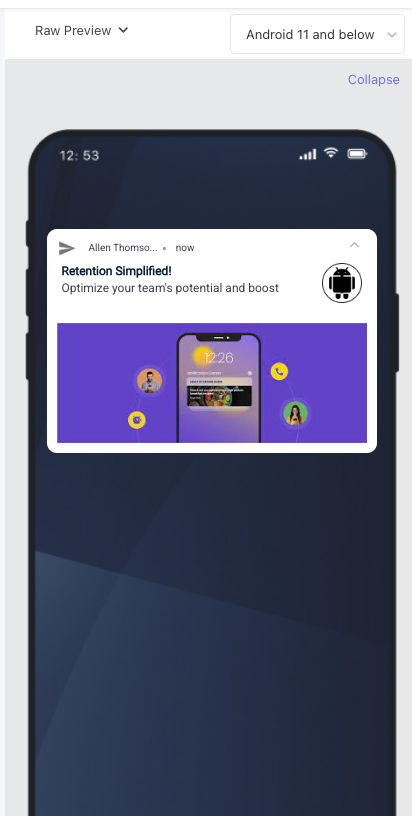
These layout differences are also reflected in the WebEngage dashboard preview for better visibility and testing.
👉 Reference: Android 12 Notification Layout Changes
Making your app compatible with Android 13 push changes
From Android 13 onwards, clients will have to explicitly ask permissions from end user to send push notifications. This means, client will NOT recieve push opted in as true once the app is installed by the end user, unless the user explicitly subscribes for same.
To make sure your app is compatible with Android 13 changes, kindly follow these steps:
Step 1. Kindly refer to official Google documentation to make your application compatible with the same.
Step 2. On the basis of the permission provided by the user, pass the status to WebEngage by following the code snippet below:
WebEngage.get().user().setDevicePushOptIn(true);WebEngage.get().user().setDevicePushOptIn(true)
Please Note
Pass the boolean value "true" or "false" depending on the permission the user has specified. If users refuse the permission, they will not receive push alerts.
- Push permission Prompt trigger to be managed by the App.
Hybrid SDKs (React, Cordova, Flutter, etc.)
Refer these React, Cordova and Flutter documents to make your app compatible with Android 13 push notification related changes.
Additional Step: Customizing Icon & Accent Colors
(Applicable only to Android SDK v1.14.0 & above)
By default, the WebEngage Android SDK uses your application's icon to set the small and large icons of your push messages. You can provide custom icons during SDK initialization, as shown below.
import com.webengage.sdk.android.WebEngageConfig;
import com.webengage.sdk.android.WebEngageActivityLifeCycleCallbacks;

...
...

WebEngageConfig webEngageConfig = new WebEngageConfig.Builder()
	.setPushSmallIcon(R.drawable.YOUR_SMALL_ICON)
	.setPushLargeIcon(R.drawable.YOUR_LARGE_ICON)
	.setPushAccentColor(Color.parseColor("#ff0000"))
	.build();
registerActivityLifecycleCallbacks(new WebEngageActivityLifeCycleCallbacks(this, webEngageConfig));
import com.webengage.sdk.android.WebEngageConfig;
import com.webengage.sdk.android.WebEngageActivityLifeCycleCallbacks;
...
...
val webEngageConfig = WebEngageConfig.Builder()
.setPushSmallIcon(R.drawable.YOUR_SMALL_ICON)
.setPushLargeIcon(R.drawable.YOUR_LARGE_ICON)
.setPushAccentColor(Color.parseColor("#ff0000"))
.build()
registerActivityLifecycleCallbacks(
WebEngageActivityLifeCycleCallbacks(
this,
webEngageConfig
)
)Notification Icon Fix for Android Lollipop & Above
Since the release of Lollipop (API 21), the material design style dictates that all non-alpha channels in notification icons be ignored. Therefore, the small icon will be rendered as solid white if it's not transparent. Hence, if you have provided a custom icon during SDK initialization, then you need to make sure that it is transparent.
FAQs
How to check your current limit?
What do we do incase the rate limit is exceeded?
In case the rate limit is exceeded WebEngage tries again with a delay.
- Can I migrate my requests to the new API all at once?
We recommend gradually increasing your traffic to the new API. If you anticipate sending more than 600K messages per minute regularly, please contact Firebase support for guidance on increasing your quota or for recommendations on distributing your traffic.
Please feel free to drop in a few lines at [email protected] in case you have any further queries. We're always just an email away!