Precise Communications
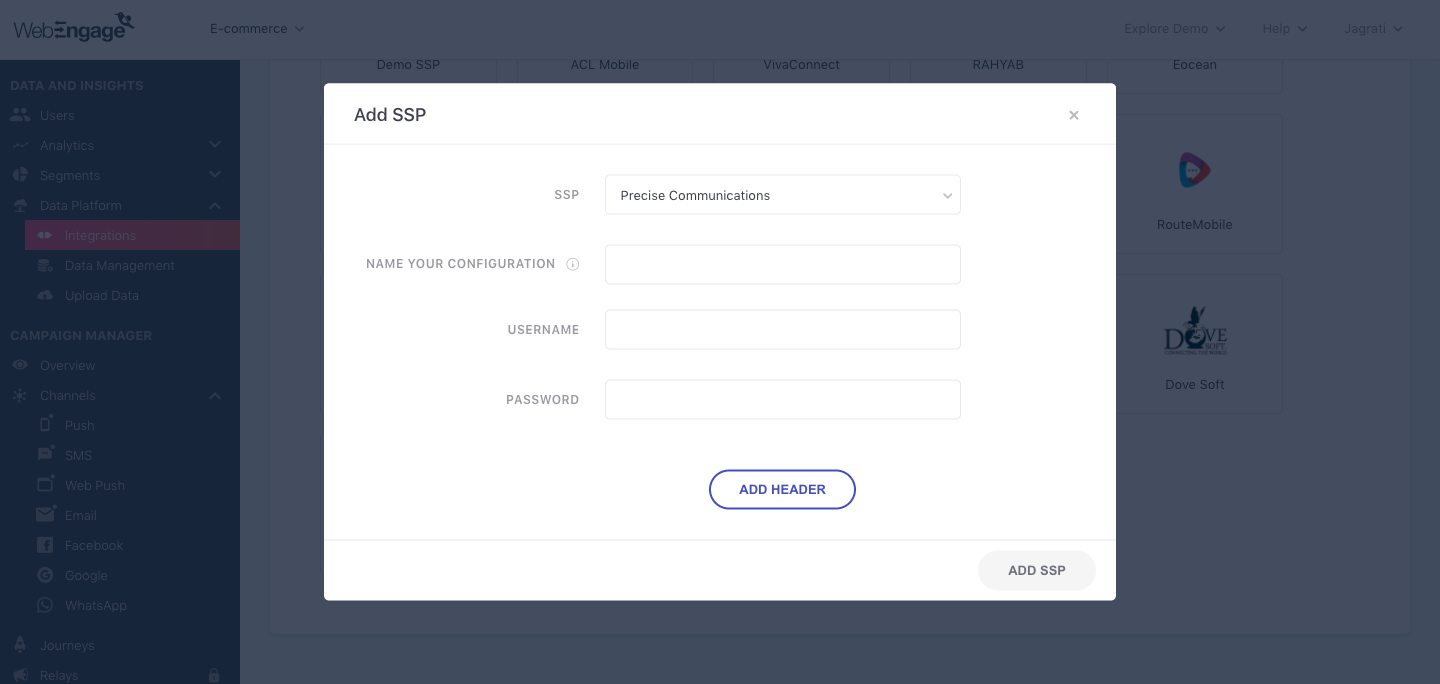
Follow the below steps to configure Precise Communications as your SMS Service Provider (SSP).

Click to enlarge
As shown above:
Step 1: Select SSP
Select Precise Communication from the List of Available SSPs. In doing so, you will be prompted by a configuration modal.
Step 2: Name your Configuration
Please add a user-friendly name that enables you to identify the right SSP for a campaign while creating it. This comes in handy, especially when you have multiple accounts with the same SSP for sending different campaigns.
For example, if you have chosen to use Precise Communications for sending Promotional campaigns, then we recommend that you indicate the same by naming the configuration something like:
- Precise Communication Promo
- PC Promo Pipeline
Step 3: Add Username & Password
Navigate to your Precise Communications dashboard to find your credentials. Paste them in the configuration modal to connect your account with WebEngage.
Step 4: Add Custom Headers
Please get in touch with your relationship manager at Precise Communications if these authentication headers aren't readily available in your dashboard.
Step 5: Add SSP
Click on Add SSP, and you're good to go!
Congratulations!You've now successfully integrated Precise Communications with your WebEngage dashboard.
You can test the integration by creating a test SMS campaign and sending it to a group of internal users (aka your teammates).
Please feel free to drop in a few lines at [email protected] in you have any further queries. We're always just an email away!
Updated 3 months ago