SMTP
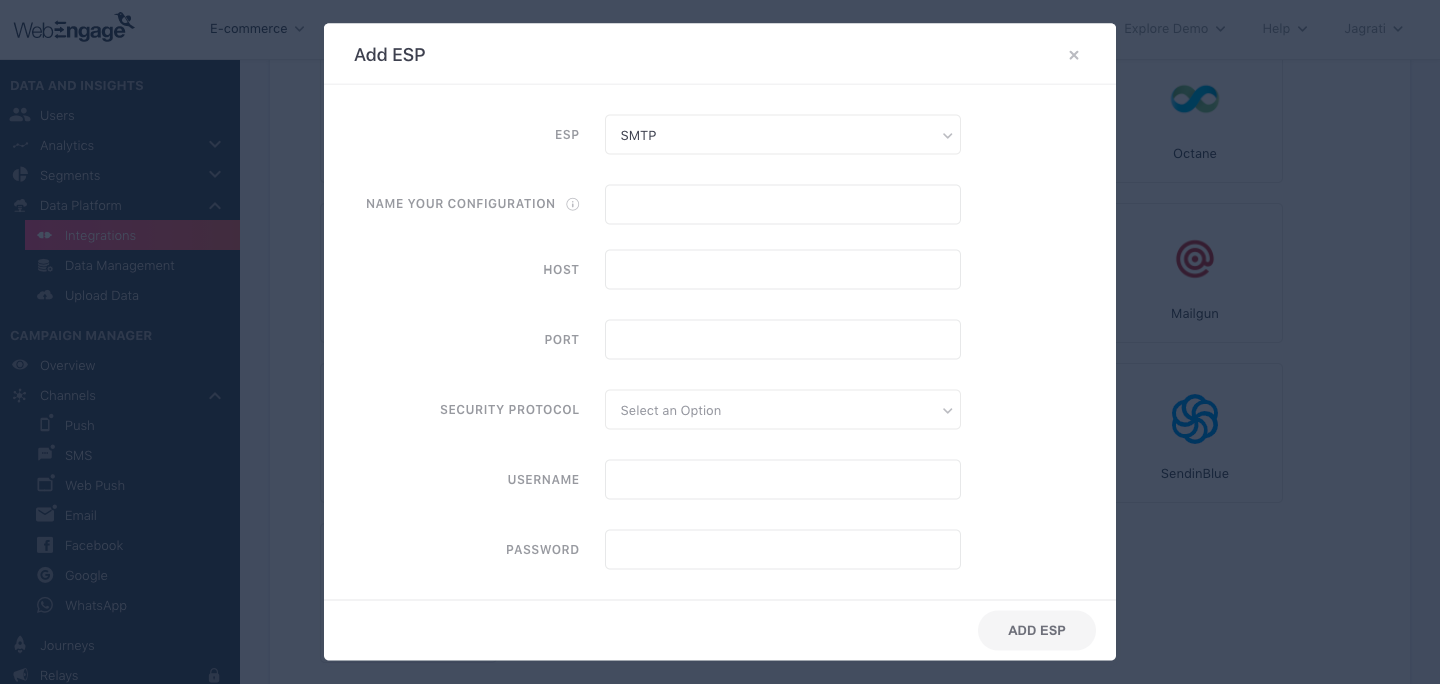
Click on the SMTP box under the Available Email Service Providers (ESP) section. In the configuration modal, enter the following information of your SMTP gateway: Host, Port, Security Protocol, Username, Password.
You will also have to name the configuration on WebEngage to identify the added ESP account. Please choose any user-friendly name for the Name Your Configuration field. The Configuration Name helps you identify the relevant ESP account you should use during the Email campaign creation process (especially helpful when you have multiple accounts with the same ESP that you have configured and added to WebEngage).

Click to enlarge
Step 1: Select ESP
Select SparkPost from the List of Available ESPs. In doing so, you will be prompted by a configuration modal.
Step 2: Name your Configuration
Please add a user-friendly name that enables you to identify the right ESP for a campaign while creating it. This comes in handy especially when you have multiple accounts with the same ESP for sending different types of campaigns (Transactional/ Promotional).
For example, if you have configured an SMTP account for sending transactional campaigns, then you can name the configuration:
- SMTP-T
- SMTP Transactional
Step 3: Enter Host and Port
Step 4: Select Security Protocol
Click on the drop-down menu and choose from the four security protocols: SSL, TLS, STARTTLS, and NONE.
Step 4: Enter Username and password
To progress further, enter your SMTP username and password.
Step 5: Add ESP
Click Add ESP, and you're good to go!
Congratulations!You've now successfully integrated SendinBlue with your WebEngage dashboard.
You can test the integration by creating a test Email campaign and sending it to a group of internal users (aka your teammates).
Updated 3 months ago