Web Push for AMP
Steps to Enable Web Push Notifications on Your AMP Pages
WebEngage supports tracking of users and events on web pages built using the AMP framework. In addition, WebEngage also allows users of your AMP pages to opt-in to receive web push notifications. Please note that this is available only for HTTPS websites.
Please NotePlease ensure that you've completed the SDK setup for your AMP pages as it's a pre-requisite to Web Push configuration.
Step 1: Add Code
Include the following code snippet on your AMP pages to load the amp-web-push component.
<script async custom-element="amp-web-push" src="https://cdn.ampproject.org/v0/amp-web-push-0.1.js"></script>Step 2: Place 'amp-web-push' tag on AMP Page
The amp-web-push tag needs to be placed all AMP pages where you would like to enable Web Push Notifications and user opt-ins. This tag requires 3 mandatory parameters:
helper-iframe-urlpermission-dialog-urlservice-worker-url.
<amp-web-push id="amp-web-push" layout="nodisplay"
    helper-iframe-url="https://<youdomain.com>/amp-web-push-helper-frame.html?licenseCode=<YOUR_PROJECT_LICENSE_CODE>"
    permission-dialog-url="https://<youdomain.com>/amp-web-push-permission-dialog.html"
    service-worker-url="https://<youdomain.com>/service-worker.js?licenseCode=<YOUR_PROJECT_LICENSE_CODE>">
</amp-web-push>
helper-iframe-url
helper-iframe-url- This is an HTML page that is used as a helper to sync data between
amp-permission-dialog-boxand the page. - It needs to be hosted on your website's root domain. You can download the code from here.
permission-dialog-url
permission-dialog-url- This is an HTML page that will be used to ask the user for permission to opt-in to receive the Web Push Notification.
- It needs to be hosted on your website's root domain. You can download the code from here.
service-worker-url
service-worker-url-
This will load the WebEngage AMP service-worker and needs to be hosted on your website's root domain.
-
Depending on the WebEngage data center you're using, the code for configuring the AMP service worker differs. (Please add the code listed below to the main service-worker.js file in your root directory.)
Identifying Your WebEngage Data CenterIn your contract with WebEngage, if you have not specifically requested for your data to be stored in our Saudi Arabia data center or India data center, then your data will be stored in our Global data center.
If your WebEngage dashboard URL starts with
dashboard.webengage.com, then it means you're using our Global data center.If your WebEngage dashboard URL starts with
dashboard.in.webengage.com, then it means you're using our India data center.If your WebEngage dashboard URL starts with
dashboard.ksa.webengage.com, then it means you're using our Saudi Arabia data center.
- Global Data Center: By default, your data is stored in our global data centers. Therefore, if you're not explicitly using our Saudi Arabia or India data center to store/access your data, then please use the following code for your
service-worker.jsfile.
//service-worker.js code snippet for Global Data Center
const vapidPublicKey = '<YOUR_PROJECT_VAPID_PUBLIC_KEY>',
      licenseCode    = '<YOUR_PROJECT_LICENSE_CODE>';
importScripts('https://ssl.widgets.webengage.com/js/merged-worker.js')- India Data Center: If you're using our India data center to store/access your data, then please use the following code for your
service-worker.jsfile.
//service-worker.js code snippet for India Data Center
const vapidPublicKey = '<YOUR_PROJECT_VAPID_PUBLIC_KEY>',
      licenseCode    = '<YOUR_PROJECT_LICENSE_CODE>';
importScripts('https://widgets.in.webengage.com/js/merged-worker.js')- Saudi Arabia Data Center: If you're using our Saudi Arabia data center to store/access your data, then please use the following code for your
service-worker.jsfile.
//service-worker.js code snippet for Saudi Arabia Data Center
const vapidPublicKey = '<YOUR_PROJECT_VAPID_PUBLIC_KEY>',
      licenseCode    = '<YOUR_PROJECT_LICENSE_CODE>';
importScripts('https://widgets.ksa.webengage.com/js/merged-worker.js')
Getting your Vapid KeyYou can retrieve your Vapid Key by contacting us at [email protected]. Please replace
<YOUR_PROJECT_VAPID_PUBLIC_KEY>in the above code snippets with the Key shared by our team.We are currently working on making a public API available to you for retrieving this KEY and will update you soon!
- Please ensure that you replace
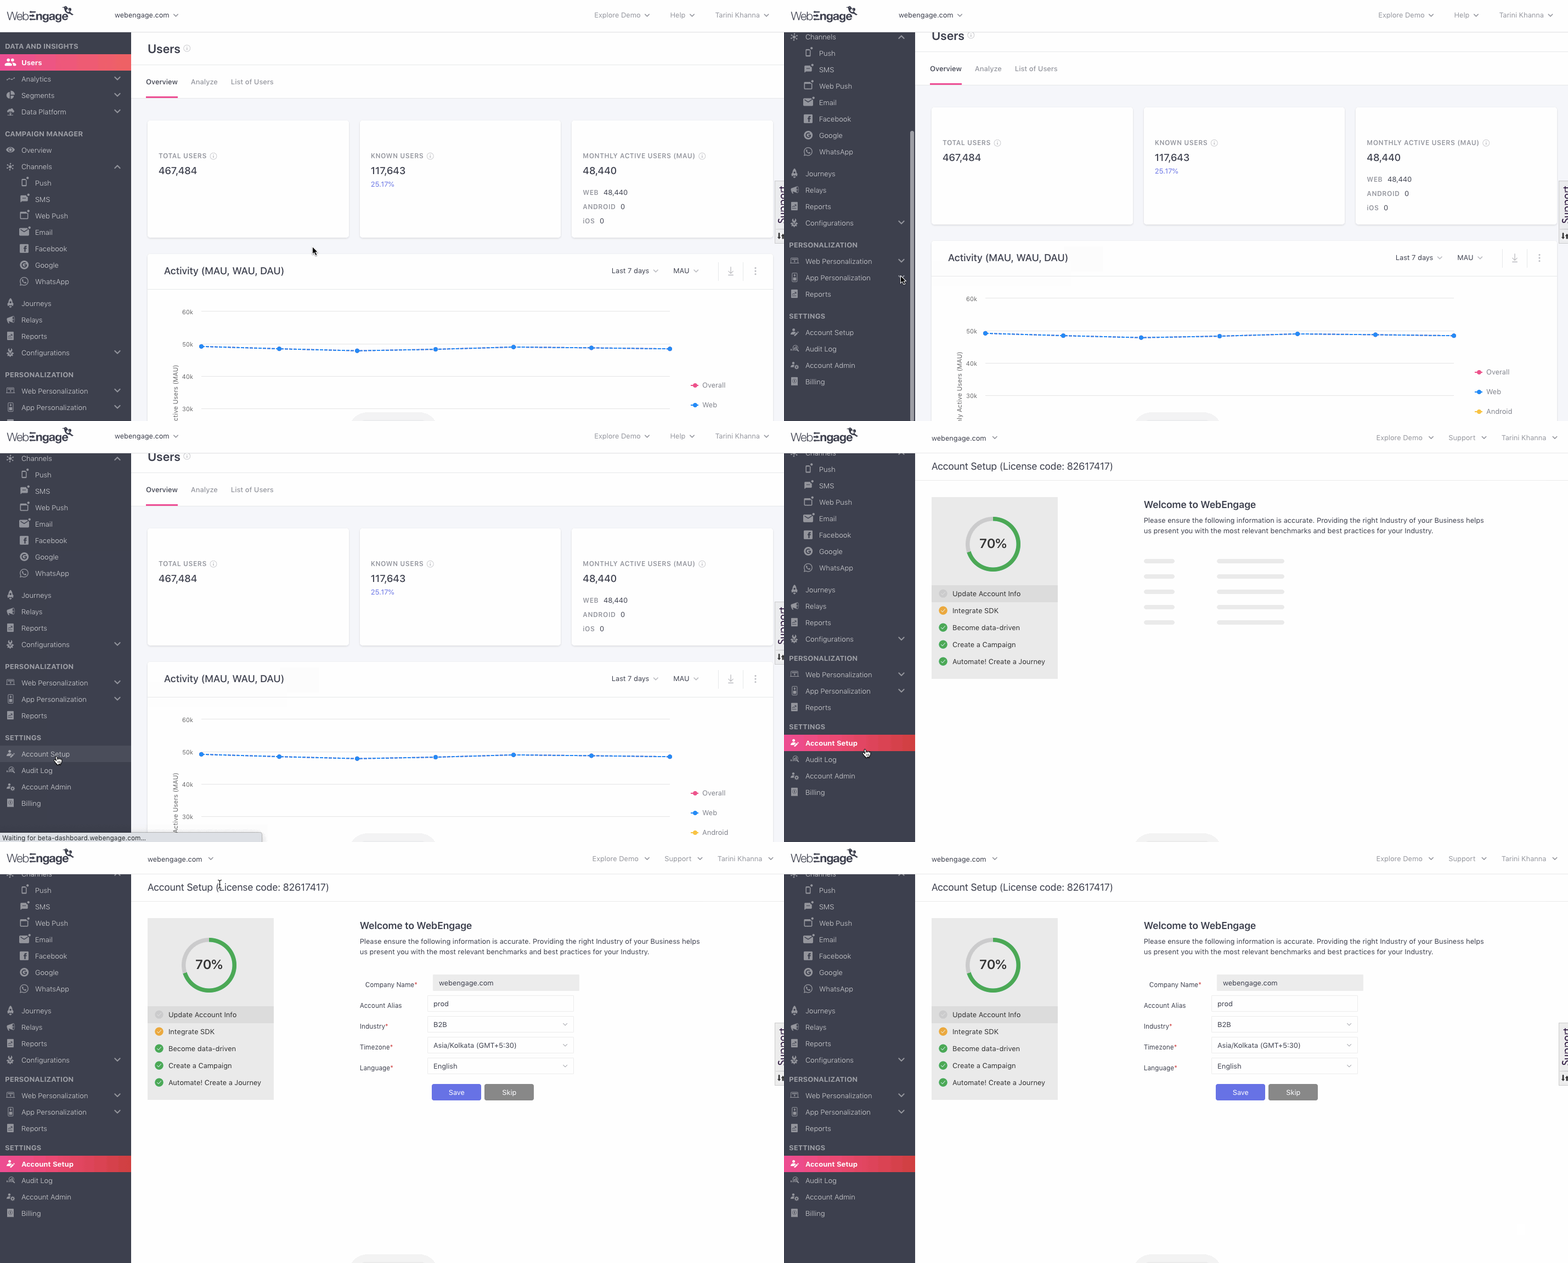
<YOUR_PROJECT_LICENSE_CODE>with your WebEngage license code in the snippets listed above. As shown below, navigate to Settings > Account Setup in the main navigation panel to find your license code. In case your license code starts with a tilde~, please include it while copy-pasting.

Locating WebEngage license code in your account
Step 3: Set up Permission Control Widget
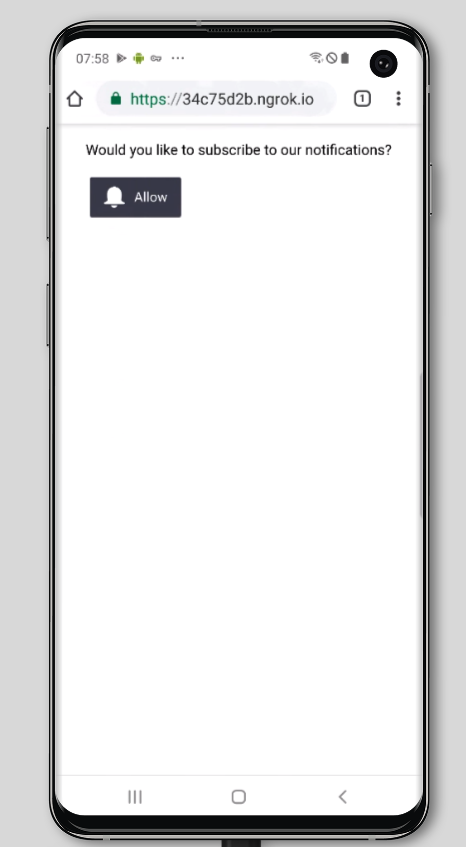
A permission control widget also needs to be set up on your AMP pages. This will help display a widget to your users asking them to opt in to receive web push notifications.

Permission control widget
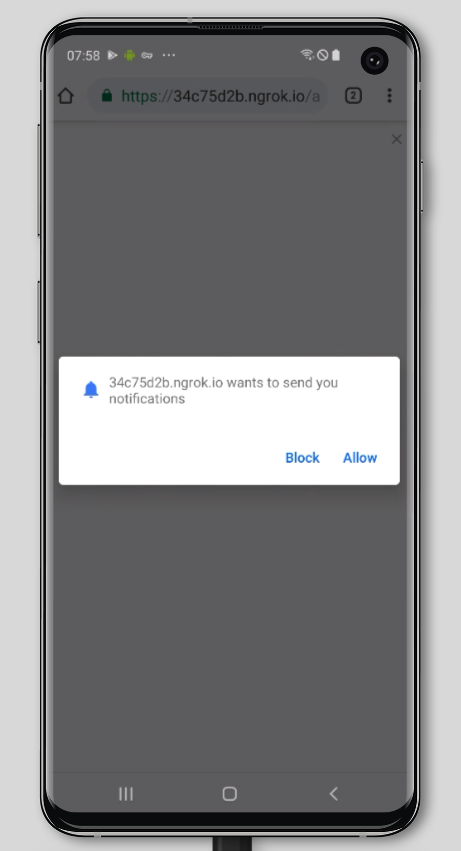
Once they click on this widget a new browser window opens that shows a native browser prompt asking the user to opt in to web push notifications. If the user clicks Allow, they would now be reachable on Web Push.

Window that opens asking user to opt in to web push
You can use the code snippet below for the permission control widget. Please feel free to modify it to suit your requirements.
<!-- A subscription widget -->
<amp-web-push-widget visibility="unsubscribed" layout="fixed" width="245" height="45">
    <button class="subscribe" on="tap:amp-web-push.subscribe">
      <amp-img
               class="subscribe-icon"
               width="24"
               height="24"
               layout="fixed"
               src="data:image/svg+xml;base64,PHN2ZyBjbGFzcz0ic3Vic2NyaWJlLWljb24iIHdpZHRoPSIyNCIgaGVpZ2h0PSIyNCIgdmlld0JveD0iMCAwIDI0IDI0IiB4bWxucz0iaHR0cDovL3d3dy53My5vcmcvMjAwMC9zdmciPjxwYXRoIGQ9Ik0xMS44NCAxOS44ODdIMS4yMnMtLjk0Ny0uMDk0LS45NDctLjk5NWMwLS45LjgwNi0uOTQ4LjgwNi0uOTQ4czMuMTctMS41MTcgMy4xNy0yLjYwOGMwLTEuMDktLjUyLTEuODUtLjUyLTYuMzA1czIuODUtNy44NyA2LjI2LTcuODdjMCAwIC40NzMtMS4xMzQgMS44NS0xLjEzNCAxLjMyNSAwIDEuOCAxLjEzNyAxLjggMS4xMzcgMy40MTMgMCA2LjI2IDMuNDE4IDYuMjYgNy44NyAwIDQuNDYtLjQ3NyA1LjIyLS40NzcgNi4zMSAwIDEuMDkgMy4xNzYgMi42MDcgMy4xNzYgMi42MDdzLjgxLjA0Ni44MS45NDdjMCAuODUzLS45OTYuOTk1LS45OTYuOTk1SDExLjg0ek04IDIwLjk3N2g3LjExcy0uNDkgMi45ODctMy41MyAyLjk4N1M4IDIwLjk3OCA4IDIwLjk3OHoiIGZpbGw9IiNGRkYiLz48L3N2Zz4=">
      </amp-img>
      Would you like to subscribe to our notifications?
    </button>
</amp-web-push-widget>
Use the following code to style the widget above.
<style amp-custom>
        amp-web-push-widget button.subscribe {
          display: inline-flex;
          align-items: center;
          border-radius: 2px;
          border: 0;
          box-sizing: border-box;
          margin: 0;
          padding: 10px 15px;
          cursor: pointer;
          outline: none;
          font-size: 15px;
          font-weight: 400;
          background: #3d404e;
          color: white;
          box-shadow: 0 1px 1px 0 rgba(0, 0, 0, 0.5);
          -webkit-tap-highlight-color: rgba(0, 0, 0, 0);
        }

        amp-web-push-widget button.subscribe .subscribe-icon {
          margin-right: 10px;
        }

        amp-web-push-widget button.subscribe:active {
          transform: scale(0.99);
        }
</style>
We hope this has enabled you to set up Web Push for your AMP pages. Please feel free to drop in a few lines at [email protected] in case you have any further queries. We're always just an email away!
Updated 3 months ago