Mandrill (by Mailchimp)
Prerequisites
Please ensure that the following settings are in place before you integrate your Madrill account with WebEngage:
1. From Email/Domain Verification
Please verify all the Sender IDs you'll be using for Email marketing in your Madrill dashboard before proceeding.
2. Credential Permissions
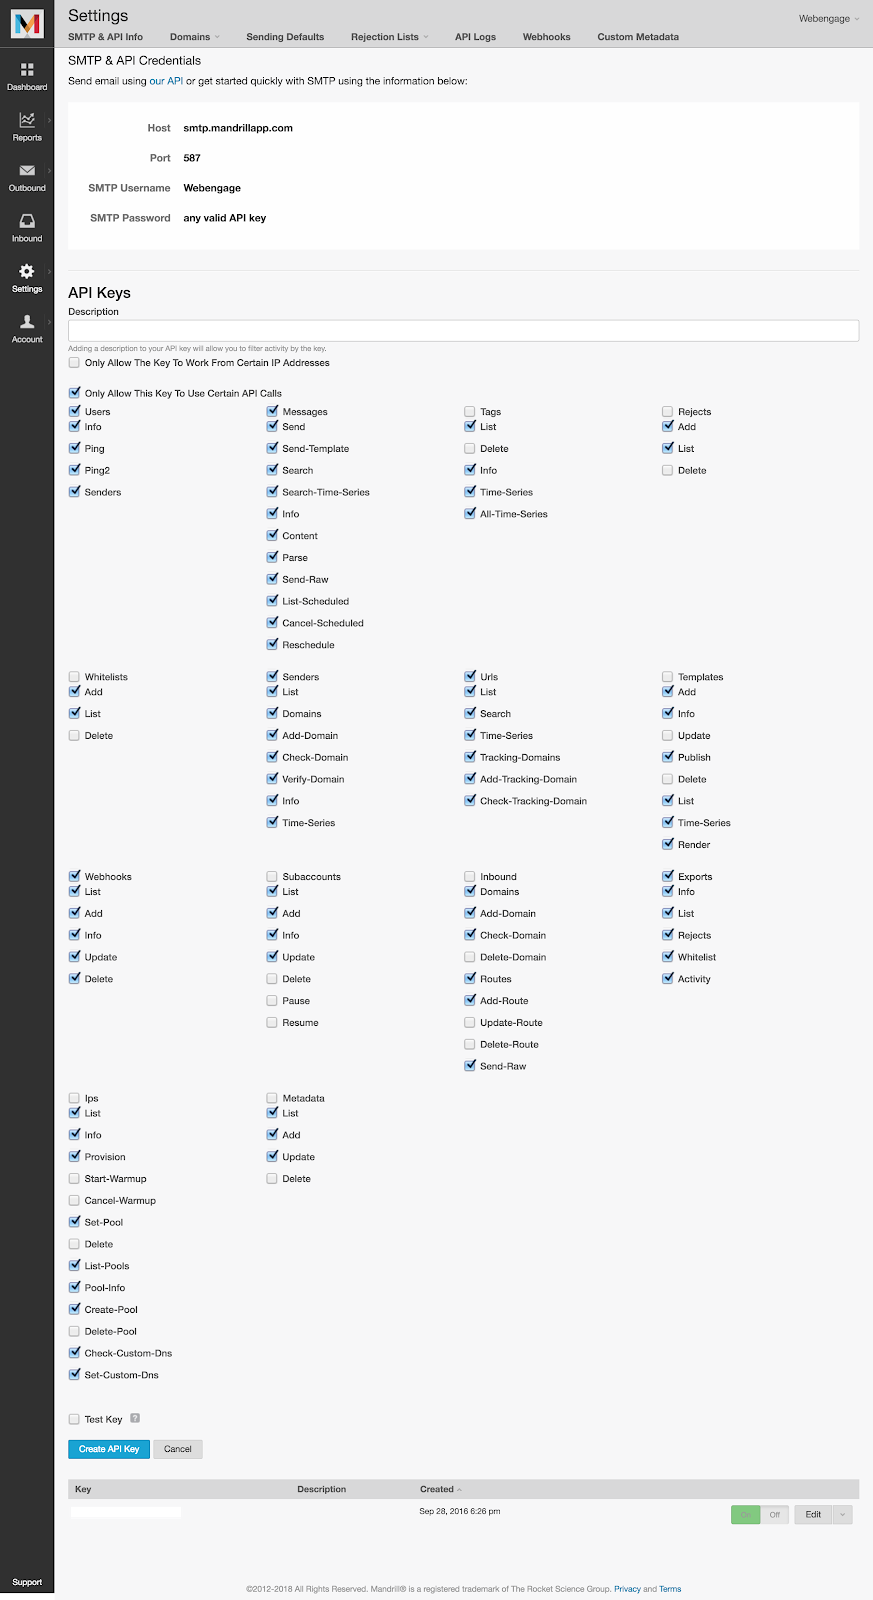
Please ensure that the Mandrill API Key being used to integrate WebEngage has Full Access. If that's not feasible, then at a minimum, the permissions shown below are required to integrate the ESP.

Now, let's show you how you can configure Mandrill as an ESP in your WebEngage dashboard.
Configuration

Click to enlarge
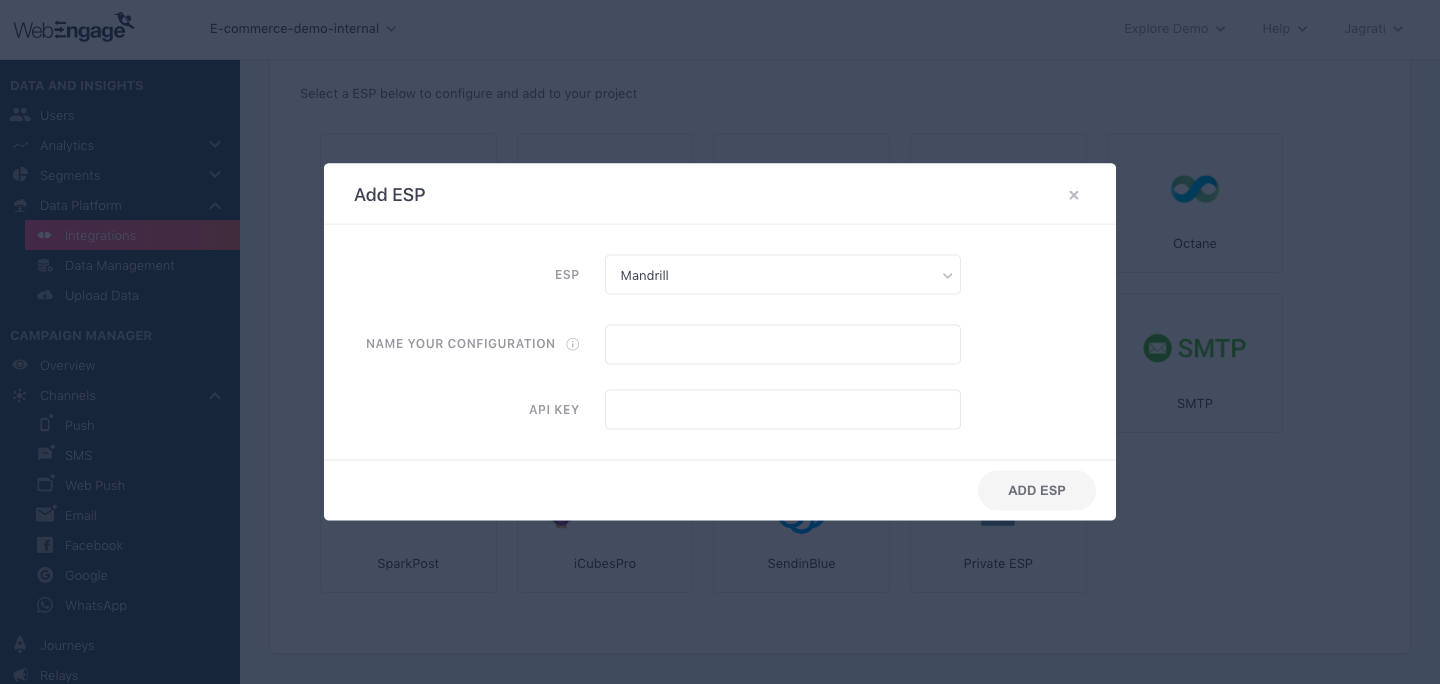
As shown above:
Step 1: Select ESP
Select Mandrill from the List of Available ESPs. In doing so, you will be prompted by a configuration modal.
Step 2: Name your Configuration
Please add a user-friendly name that enables you to identify the right ESP for a campaign while creating it. This comes in handy especially when you have multiple accounts with the same ESP for sending different types of campaigns (Transactional/ Promotional).
For example, if you have configured a Mandrill account for sending transactional campaigns, then you can name the configuration:
- Mandrill T
- Mandrill Transactional
Step 3: Add API Key
Navigate to your Mandrill dashboard to find and copy your API Key, paste it in the configuration modal.
Step 4: Add ESP
Click on Add ESP and you're good to go!
Congratulations!You've now successfully integrated Mandrill with your WebEngage dashboard.
You can test the integration by creating a test Email campaign and sending it to a group of internal users (aka your teammates).
Please feel free to drop in a few lines at [email protected] in case you have any further queries or feedback. We're always just an email away!
Updated 3 months ago