Unity.iOS
This Unity Package is only for iOS and will not work on any other platform
1. Installation
For a fresh Installation
Step 1: Download the WebEngageUnityiOS.unitypackage
Step 2: Import the downloaded unitypackage into your Unity project through Assets > Import Package > Custom Package....
Step 3: Replace the framework file at Assets/Plugins/iOS/WebEngage.framework with the latest WebEngage framework. Unzip the downloaded zip file to get the framework.
Updating the native WebEngage SDK within the Unity wrapper
Replace the framework file at Assets/Plugins/iOS/WebEngage.framework with the latest WebEngage framework. Unzip the downloaded zip file to get the framework.
2. Initialization
Step 1: Add the following values in /Assets/Editor/WebEngagePostProcessBuild.cs file.
...

public class WebEngagePostProcessBuild
{
   [PostProcessBuild]
   public static void EditXcodePlist(BuildTarget buildTarget, string pathToBuiltProject)
   {
       if (buildTarget == BuildTarget.iOS)
       {
       	// Add your WebEngage license code
       	string WEBENGAGE_LICENSE_CODE = "YOUR-WEBENGAGE-LICENSE-CODE";

       	// Set debug log level
           string logLevel = "VERBOSE";
       	...
       }
   }
}
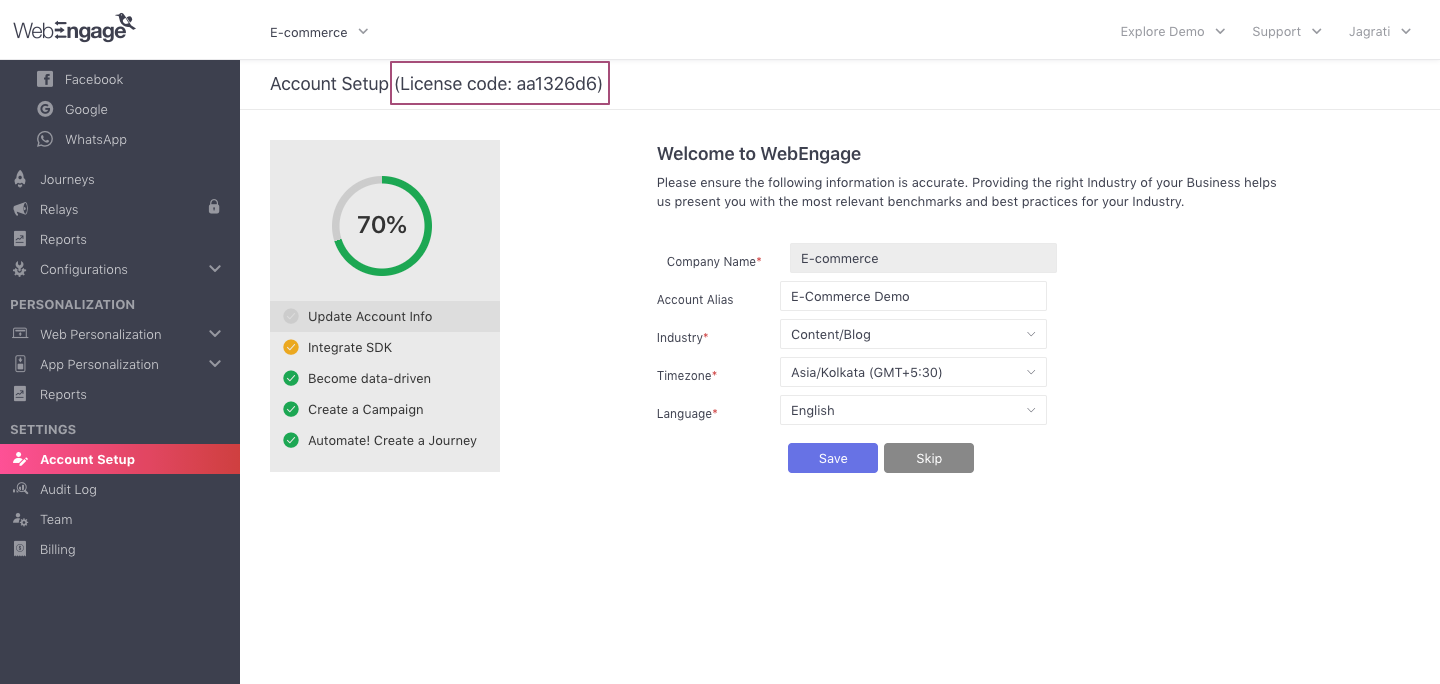
Make sure you replaceYOUR_WEBENGAGE_LICENSE_CODE with your WebEngage license code. As shown below, naviagte to the Account Setup section to find your license code.

Locating license code in your WebEngage account
Step 2: Initialize the WebEngage SDK in your AppDelegate.m class.
#import <WebEngage/WebEngage.h>
...

-(BOOL)application:(UIApplication*) application didFinishLaunchingWithOptions:(NSDictionary*) options
{
    [[WebEngage sharedInstance] application:application didFinishLaunchingWithOptions:options];

    ...
}
If you are not already implementing AppDelegate.m in your Unity app, then create a new file at /Assets/Plugins/iOS/OverrideAppDelegate.m and copy the content below in that file.
#import "UnityAppController.h"
#import <WebEngage/WebEngage.h>


@interface OverrideAppDelegate : UnityAppController
@end


IMPL_APP_CONTROLLER_SUBCLASS(OverrideAppDelegate)

@implementation OverrideAppDelegate

-(BOOL)application:(UIApplication*) application didFinishLaunchingWithOptions:(NSDictionary*) options
{
    [[WebEngage sharedInstance] application:application didFinishLaunchingWithOptions:options];

    return [super application:application didFinishLaunchingWithOptions:options];
}

@end
3. Additional steps
Add script to remove Unwanted Architectures
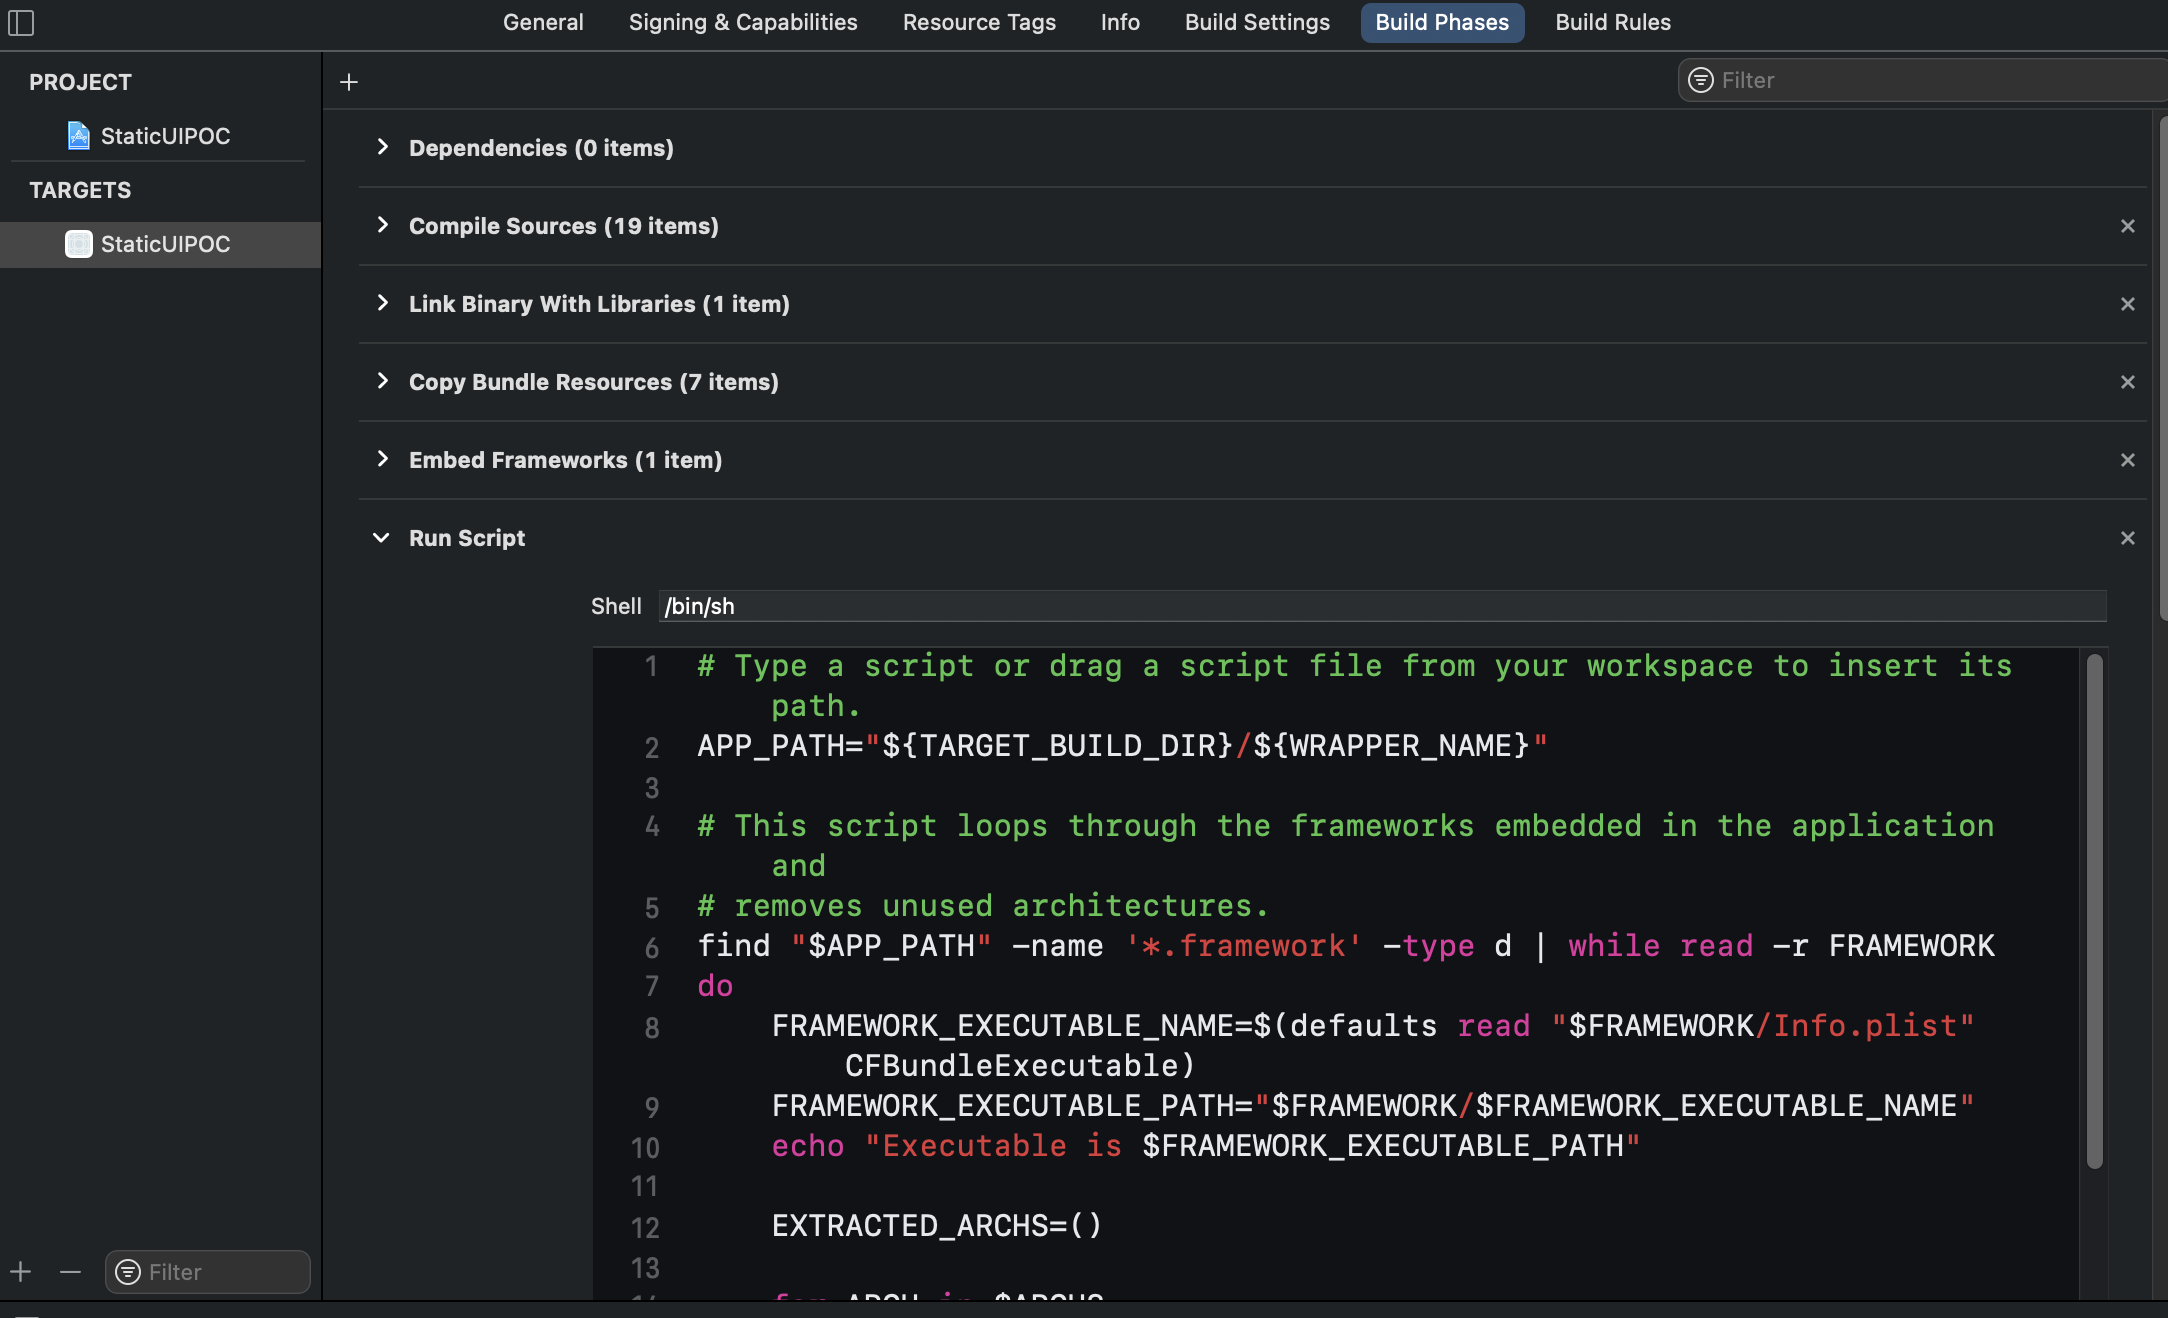
Do this if not already done: Select App Target and go to Build Phase and add a Run Script step to your build steps, set it to use /bin/sh and enter the following script:
#!/bin/bash
APP_PATH="${TARGET_BUILD_DIR}/${WRAPPER_NAME}"

# This script loops through the frameworks embedded in the application and
# removes unused architectures.
find "$APP_PATH" -name '*.framework' -type d | while read -r FRAMEWORK
do
    FRAMEWORK_EXECUTABLE_NAME=$(defaults read "$FRAMEWORK/Info.plist" CFBundleExecutable)
    FRAMEWORK_EXECUTABLE_PATH="$FRAMEWORK/$FRAMEWORK_EXECUTABLE_NAME"
    echo "Executable is $FRAMEWORK_EXECUTABLE_PATH"

    EXTRACTED_ARCHS=()

    for ARCH in $ARCHS
    do
        echo "Extracting $ARCH from $FRAMEWORK_EXECUTABLE_NAME"
        lipo -extract "$ARCH" "$FRAMEWORK_EXECUTABLE_PATH" -o "$FRAMEWORK_EXECUTABLE_PATH-$ARCH"
        EXTRACTED_ARCHS+=("$FRAMEWORK_EXECUTABLE_PATH-$ARCH")
    done

    echo "Merging extracted architectures: ${ARCHS}"
    lipo -o "$FRAMEWORK_EXECUTABLE_PATH-merged" -create "${EXTRACTED_ARCHS[@]}"
    rm "${EXTRACTED_ARCHS[@]}"

    echo "Replacing original executable with thinned version"
    rm "$FRAMEWORK_EXECUTABLE_PATH"
    mv "$FRAMEWORK_EXECUTABLE_PATH-merged" "$FRAMEWORK_EXECUTABLE_PATH"

done
This script is for removing unsupported architectures while exporting the build OR submitting the app to the app store.

Congratulations!You have successfully integrated WebEngage with your app and are sending user session data to WebEngage. Please note that it may take up to a few minutes for data to reflect in your dashboard.
Please feel free to drop in a few lines at [email protected] in case you have any further queries. We're always just an email away!
Updated 3 months ago
We recommend that you implement the following integrations with your app before releasing it with WebEngage for the first time: