TrustSignal
Please NoteThis document only covers how you can integrate TrustSignal as a WSP in WebEngage. Please refer to TrustSignal's WhatsApp documentation for further details on their services.
Configuring WSP (TrustSignal)
Following are the steps that will enable you to add the WhatsApp Service Provider to the list of WSPs offered by WebEngage.
Step 1: Add WhatsApp Service Provider (WSP)
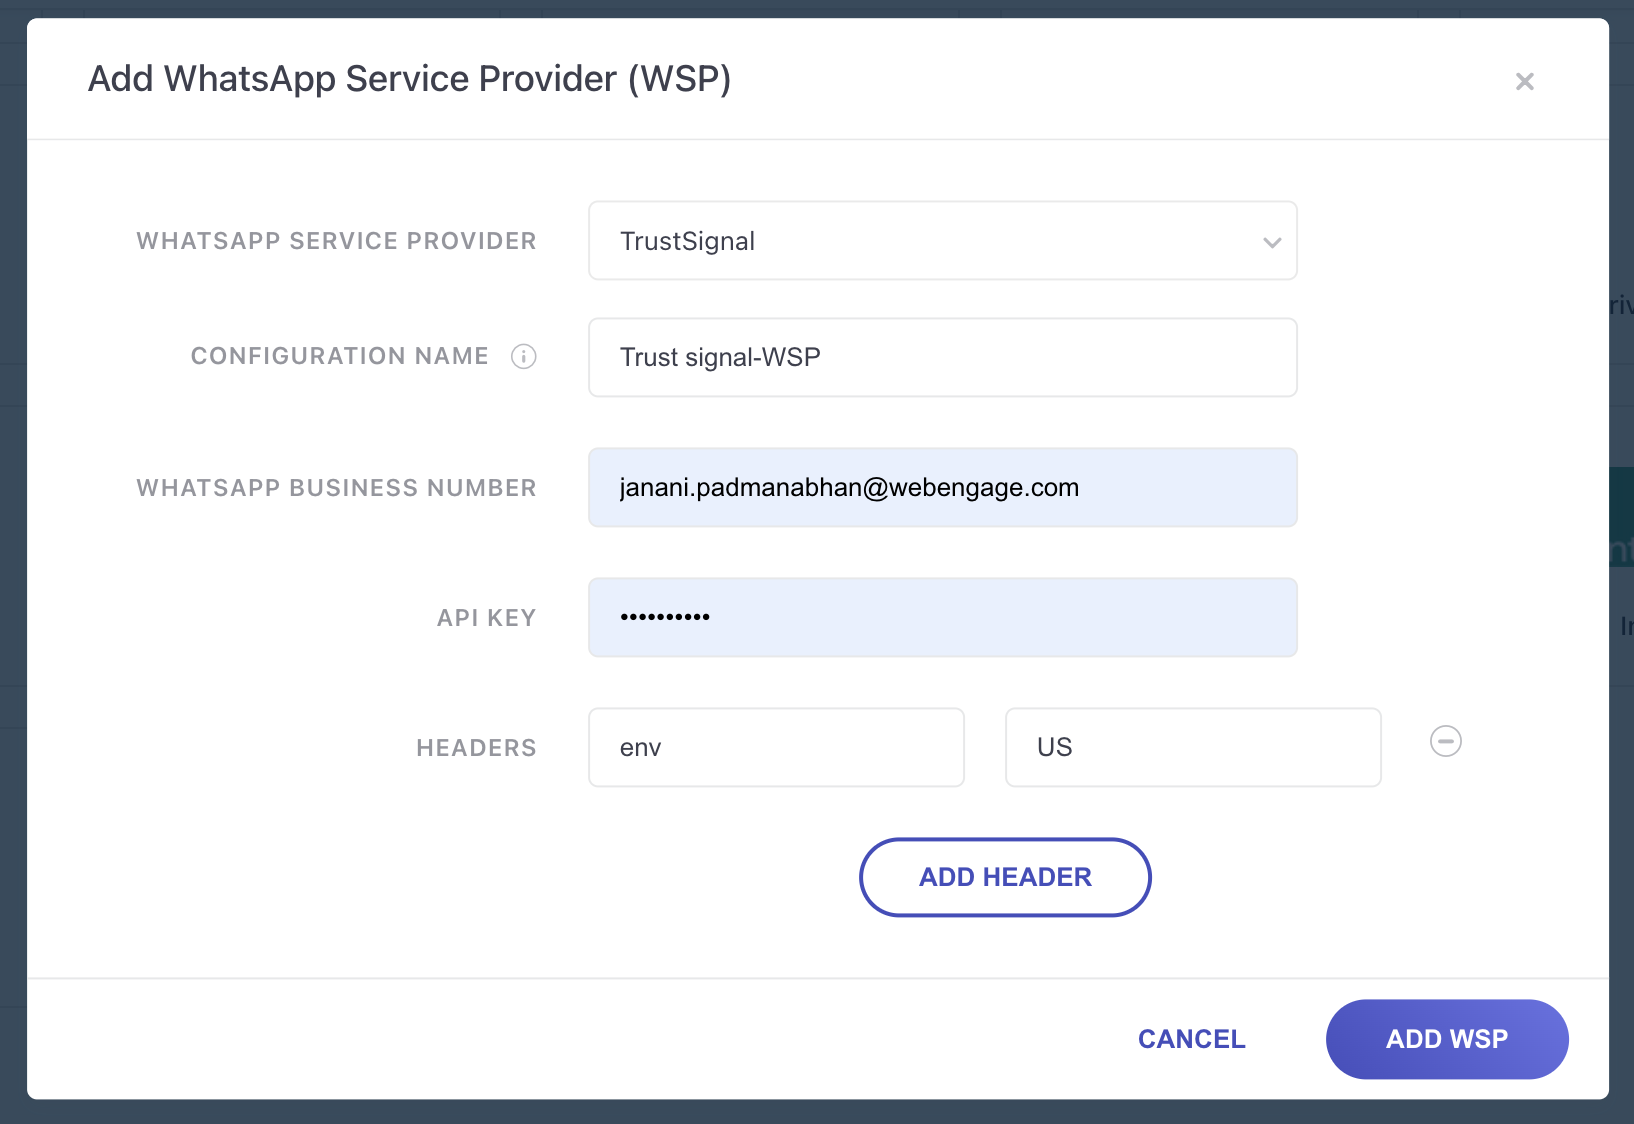
Click the Add WhatsApp Service Provider or Plus icon on the top or click on the banner of the WSP at the bottom. In doing so, you will be prompted by a configuration modal. Select TrustSignal from the first dropdown, WhatsApp Service Provider.

Click to enlarge
Step 2: Configuration Name
Adding a name enables you to identify the appropriate WSP for a campaign while creating it. This comes in handy, especially when you have multiple accounts with the same WSP.
Step 3: Add WhatsApp Business Number
Kindly specify the verified phone number that you'll be using to send all your WhatsApp campaigns in this field.
Step 4: Add API Key
Navigate to your TrustSignal dashboard to find your credentials and paste them in the configuration modal.
Step 5: Add Headers
Kindly connect with your TrustSignal Account Manager if these authentication headers aren't readily available in your dashboard. Next, click Add WSP to save details.
Step 6: Add WebEngage Webhook URL in TrustSignal Dashboard (Highly Recommended)
Adding the WebEngage Webhook in TrustSignal will enable us to receive delivery status notifications for each user. This includes campaign performance indicators like the message delivered, failed, and queued.

Click to enlarge
As shown above, on clicking Add WSP, you will be prompted by a modal confirming that your WSP is ready to use. Copy the Webhook URL, add it to the relevant field in your TrustSignal dashboard, and click Save. Please connect with your TrustSignal Account Manager for further assistance.
WhatsApp Templates
WhatsApp templates can be easily created by following the below steps:
Step 1: Getting Started
Click on the Plus icon next to WhatsApp Templates to get started.
Step 2: Select the WSP
Select TrustSignal from the drop-down menu to send the campaign.
Step 3: Add Template Details
- Template Type: You can choose one template type from the given options: Text, Image, Video, Document, and Location.
- Template Name: Give the template a name for your reference.
- Template Text: Add the message to the template. To know how to add variables in template text click here.
- Template Language: From the dropdown menu, choose the preferred language for the template.
- Button (Optional): Toggle to add the CTA button to your message.
- Footer (Optional): Enter the footer note for the template.
Step 4: Click Add Template
Your template is now saved and ready to send your campaign.

Click to enlarge
Once you've added the templates, your Data Platform> Integrations > WhatsApp section will look like as shown below. You can choose to edit/ delete a template anytime by clicking on the Actions menu.

Click to enlarge
Step 5: Add Custom headers (IMP NOTE : Add only for US AND KSA environments)
For accounts on the Indian dashboards, there's no need to click Add Header- this step is only applicable for accounts in the US and KSA environments.
Example: If the account is on the US environment, click Add Header and specify: env: US
Congratulations!You've now successfully integrated TrustSignal with your WebEngage dashboard.
You can test the integration by creating a test WhatsApp campaign and sending it to a group of internal users (aka your teammates).
Please feel free to drop in a few lines at [email protected] in you have any further queries. We're always just an email away!
Updated 8 months ago