Magento
Please NoteThis integration works only for Magento Enterprise & Community Editions v2.2 & above.
WebEngage has an out-of-the-box integration for Magento that can be configured in just a few minutes. Once in place, you can leverage your dashboard to segment your customers, analyze their behavior and engage them through various channels like Email, SMS, On-site, Web Push, WhatsApp & Facebook-Instagram.
Before proceeding, please ensure that you have created a WebEngage account. You can signup here if you haven't already.
Here's how you can integrate your Magento site with WebEngage:
Step 1: Install WebEngage Plugin in Your Magento Project
Step 1.1: Download the WebEngage plugin for Magento v2.3
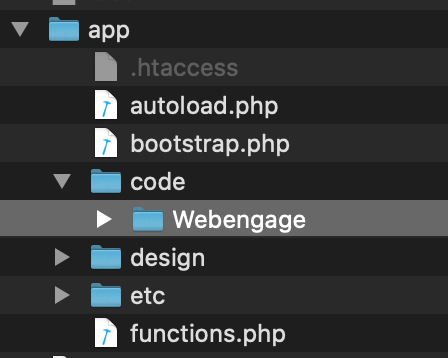
Step 1.2: Extract the zip file and copy the folder called Webengage in your root directory under app/code (as shown below).

Click to enlarge
Step 2: Initialization
Run the following commands in your Magento site's root folder:
-
php bin/magento setup:upgrade -
php bin/magento setup:static-content:deploy -f -
php bin/magento indexer:reindex
Step 3: Configure WebEngage in Magento Dashboard
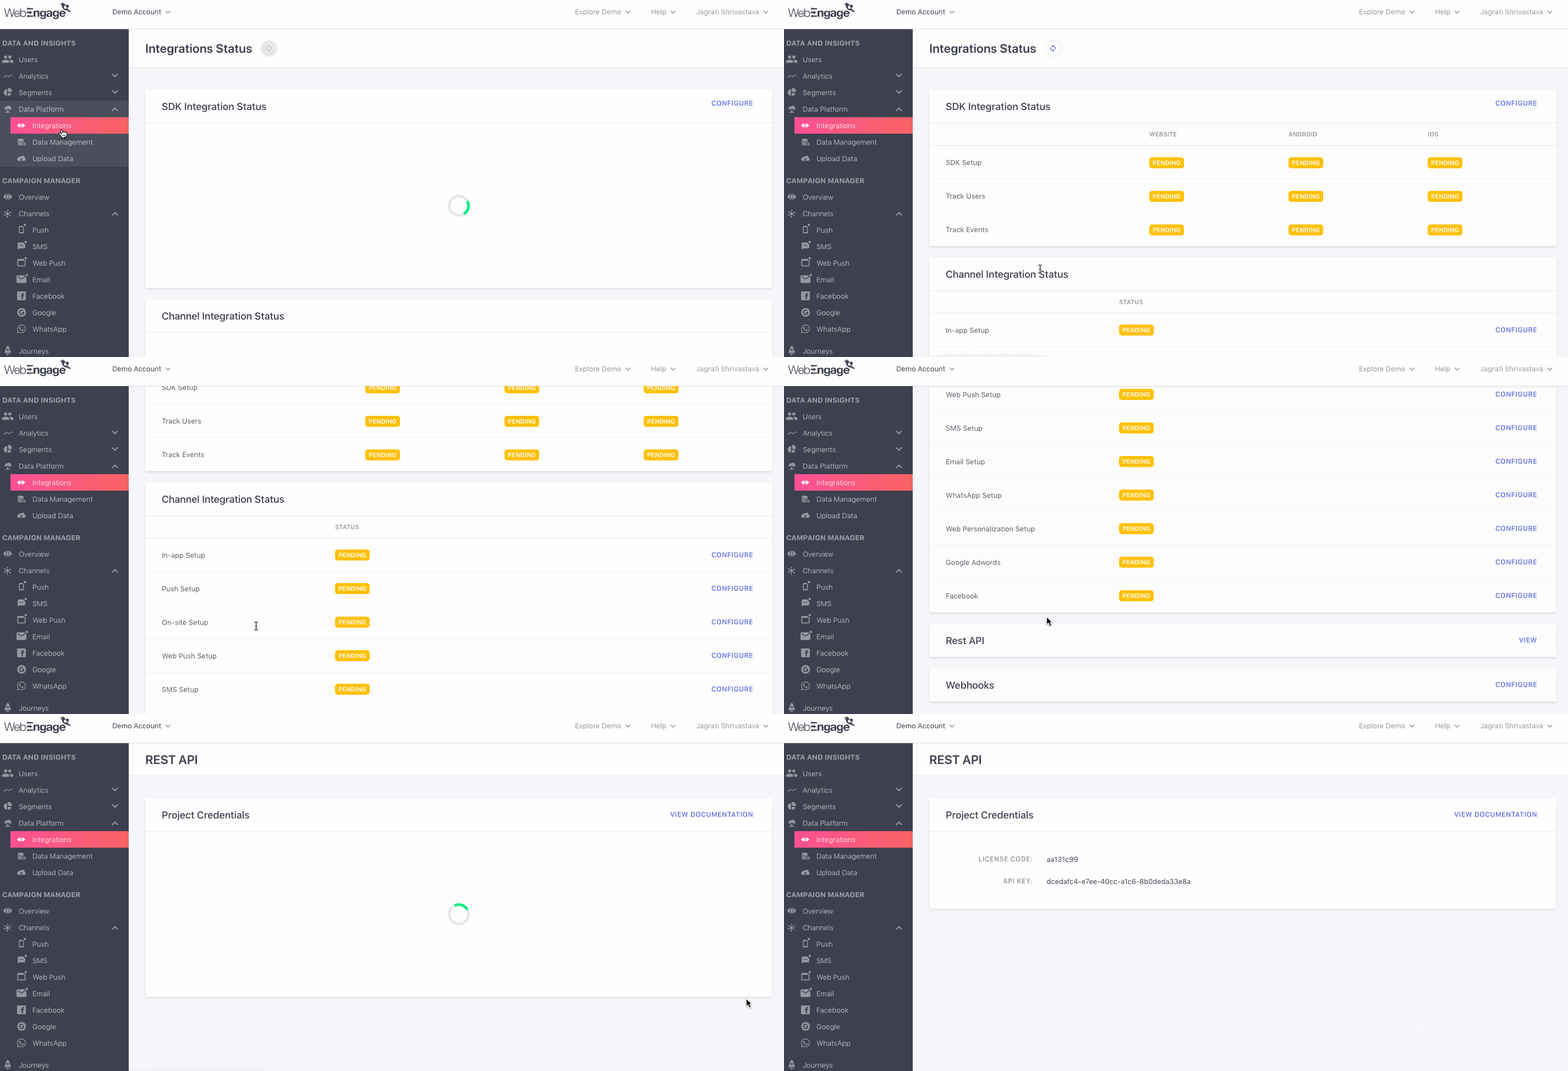
Step 3.1: Go to Data Platform > Integrations > REST API in your WebEngage dashboard to copy the License Code and API Key.

Click to enlarge
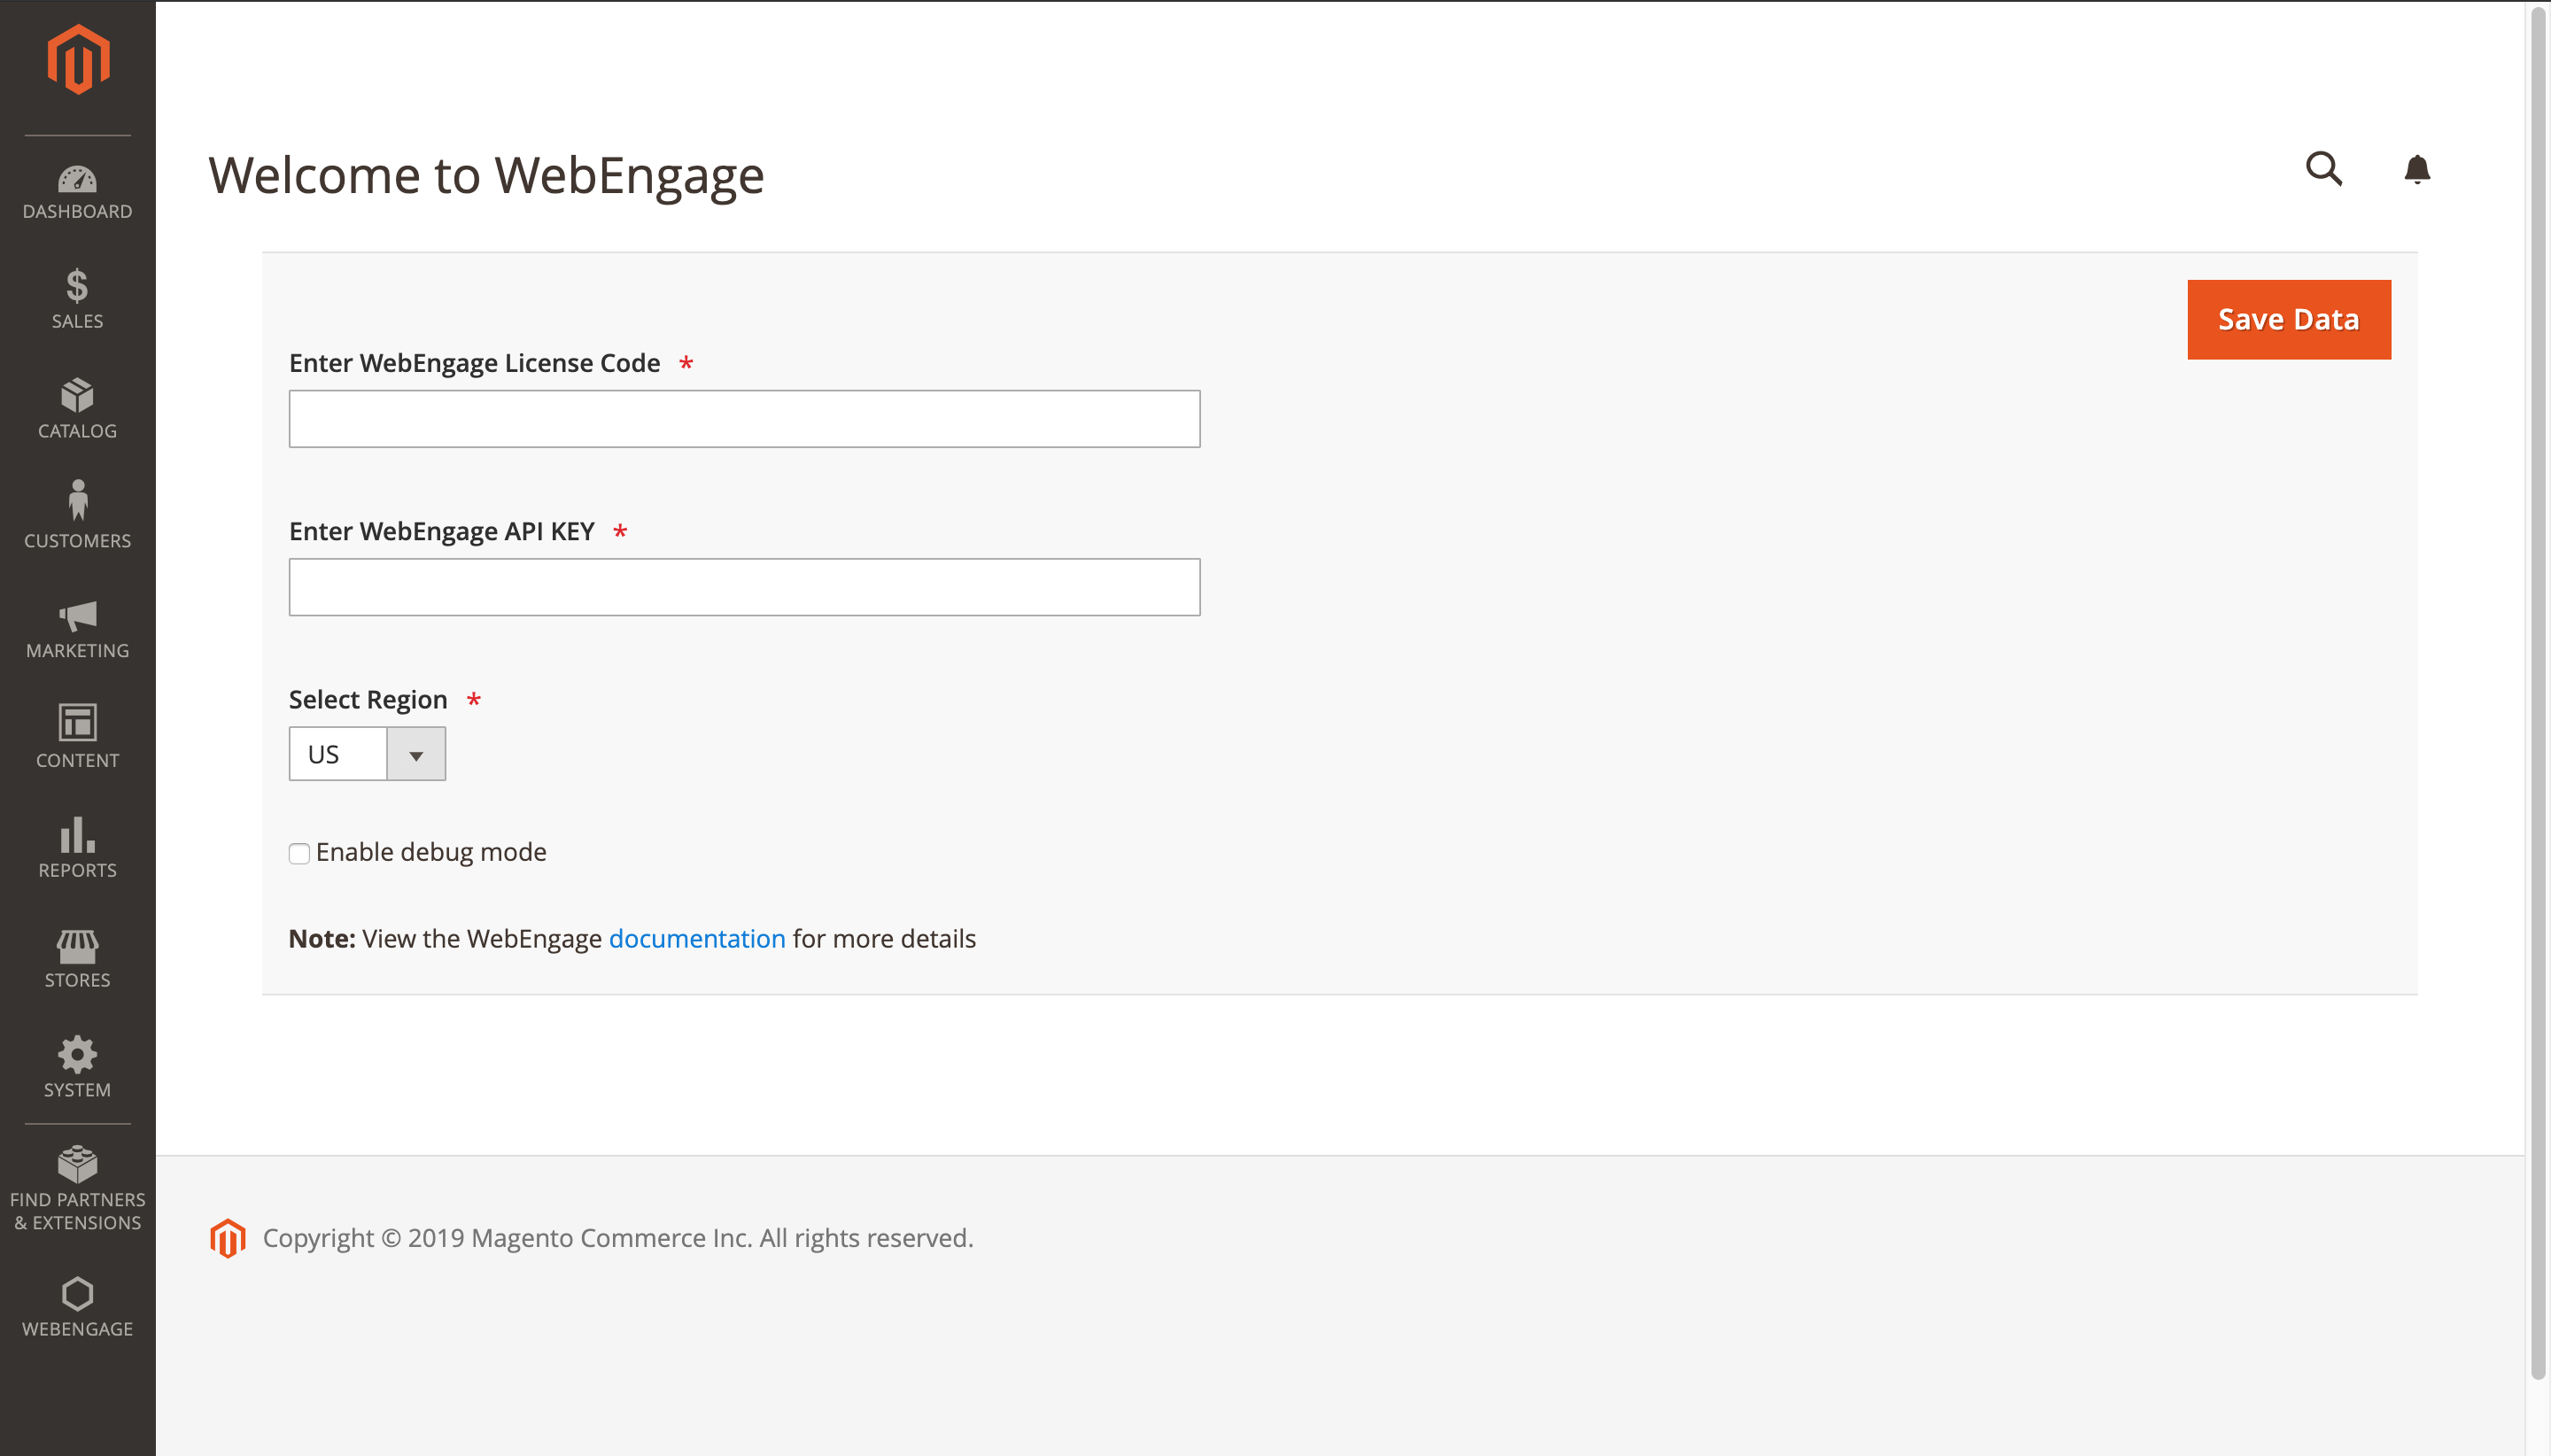
Step 3.2: Add WebEngage details in your Magento dashboard.

Click to enlarge
As shown above:
1: Paste your WebEngage License Code and API Key under the respective fields.
2: Select Region - US/ India (depending on your data center)
How to Identify Your WebEngage Data CenterIn your contract with WebEngage, if you have not specifically requested for your data to be stored in our India Data Center, then your data will be stored in our Global Data Center.
If your WebEngage dashboard URL starts with
dashboard.webengage.com, then it means you're using our Global Data Center.If your WebEngage dashboard URL starts with
dashboard.in.webengage.com, then it means you're using our India Data Center.
3 (optional): Enable debug mode if you would like to log the events and user information being sent to WebEngage in your Magento debug log.
4: Click Save Data.
Step 4: Add Domain to WebEngage Dashboard
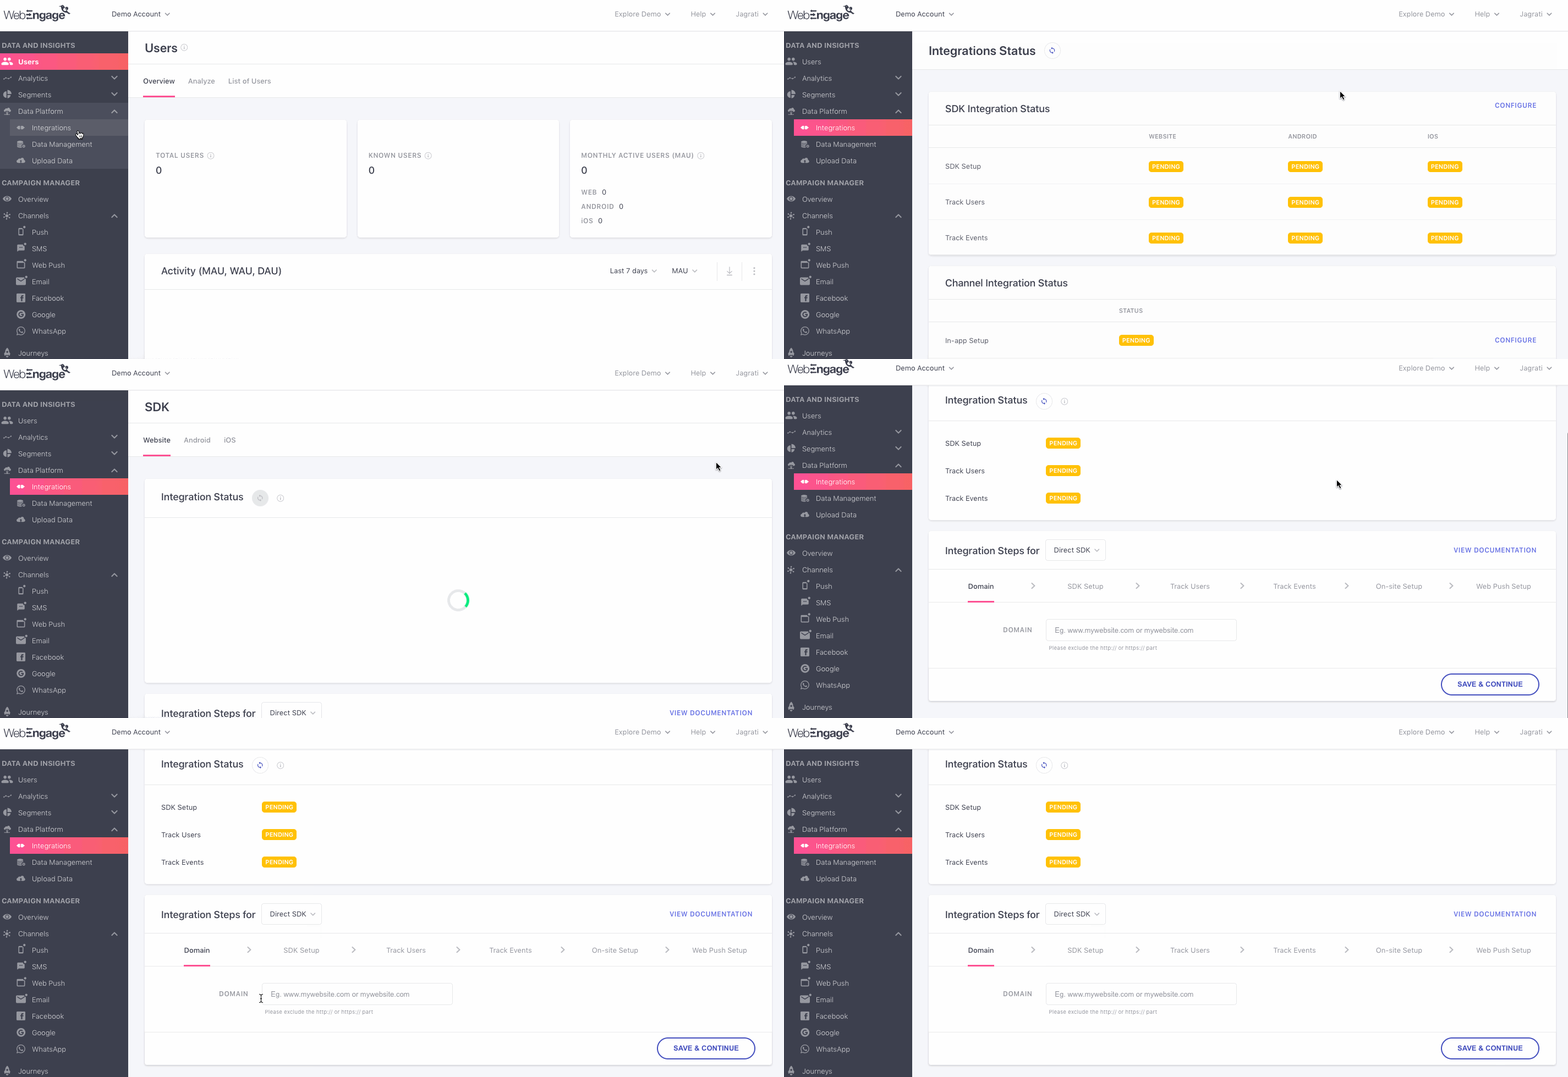
Once you've configured WebEngage in Magento, login to your WebEngage dashboard.

Click to enlarge
As highlighted above:
-
Navigate to Data Platform > Integrations > SDK (Configure) > Website.
-
Add your web address against the field Domain under Integration Steps.
-
Click Save & Continue.
And you're good to go!
Congratulations, Integration is now complete! Users and Events data will now start flowing into your WebEngage dashboard. However, it may take up to a few minutes for data to start reflecting.
Data Received From Magento SiteDue to certain limitations of Magento, we'll be able to track only the following Custom Events for your website.
Add to Cart
Product View
Checkout Started
Cart Viewed
Removed from Cart
Category Viewed
Add to Wishlist
Add to Compare
Customer Login
Customer Logout
Search Result
Checkout Completed
Next Steps
Navigate back to your WebEngage dashboard and:
-
Start segmenting your users as per their location, preferences, behavior, and much more!
- You can leverage these segments to retarget users on Facebook & Instagram by connecting your Facebook Ad Account with WebEngage.
-
Leverage analytical tools like Live stats, Funnels and Cohorts to gain deep insights into your users.
-
Leverage On-site Notification, Survey & Feedback to effectively engage users.
-
Configure SMS, Web Push, Email & WhatsApp to start engaging users through these channels.
Please feel free to drop in a few lines at [email protected] in case you have any queries or feedback. We're always just an email away :)
Updated 3 months ago